Introduction
Perhaps twenty or even just ten years ago, people thought of a computer case as simply pieces of metal holding the components in their proper places; nothing more. Today, however, things are pretty different. As computers become more and more commonplace, average people are starting to be more concerned with concepts such as airflow patterns, better heat-dissipating materials, or sound-dampening drive mounts - all things increasingly needed to keep today's high-wattage powerhouses cool and quiet.
Also, popularity of computers in general is quite possibly the cause for the biggest shift in case design, which is improved asthetics. As computers occupy more places in our everyday lives, people are less interested in large, beige, boxy eyesores, and much more interested in finding a machine that fits in with its surroundings and incorporates the type of features that a true enthusiast values.
In order to serve our readers better, we have decided that it makes more sense to have a review of a comparative analysis of multiple cases than an extremely close look at an individual case that we receive. Today, we're focusing on a range of cases that we feel best represents a popular price point - between $60 and $150 - and have selected cases that most of our readers either are seriously considering or we feel should be considered. This all being said, several of the cases that we are looking at in this article are unique enough to certainly write several pages about them, but we are going to try to condense the information and present it in as concise a manner as possible.
We'll look at the cases in order of cost, least expensive to most expensive.
Aspire X-Cruiser
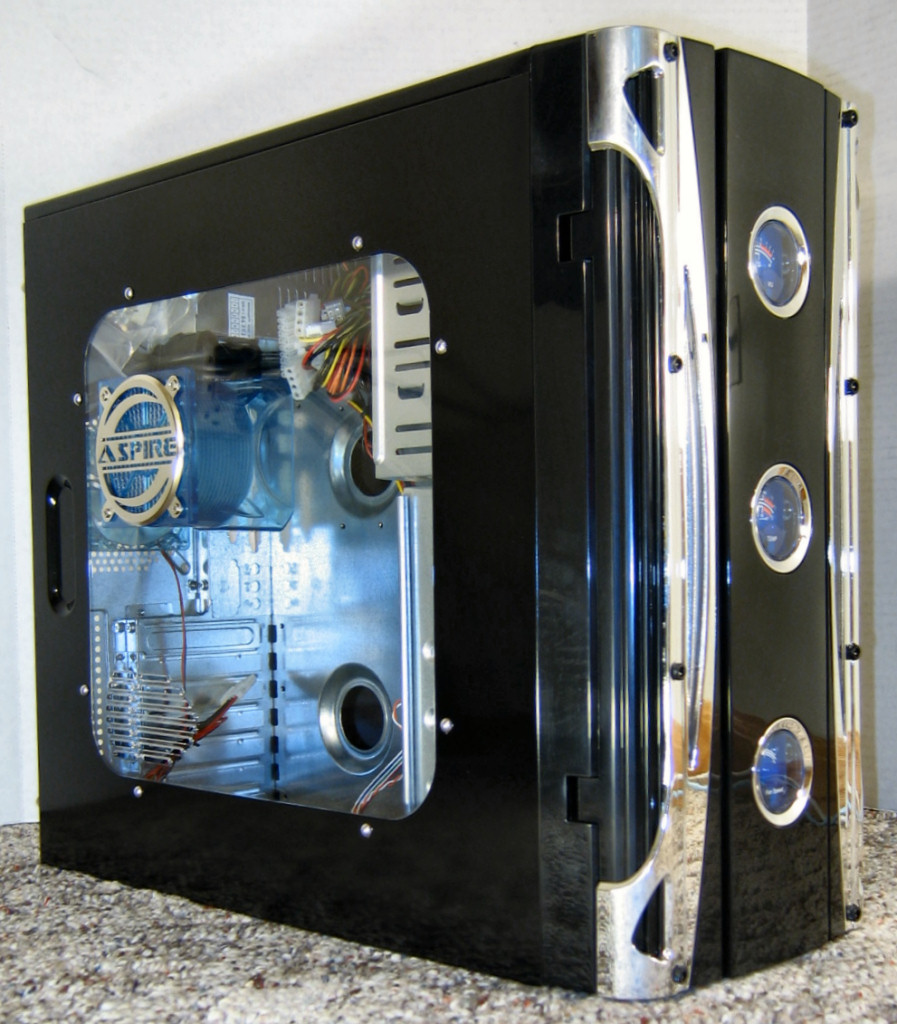
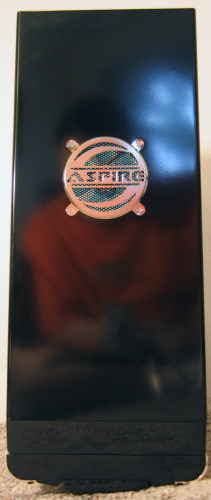
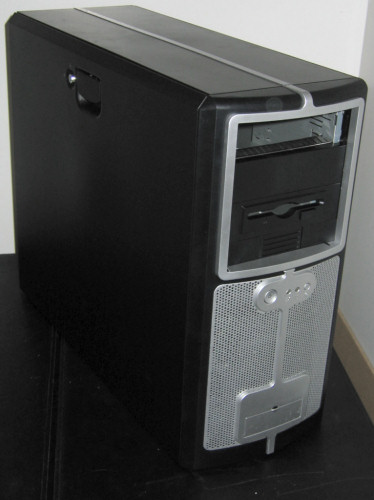
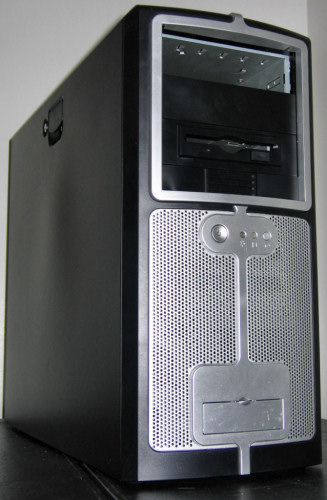
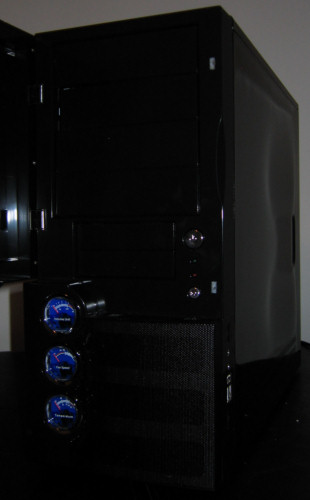
First up is a relatively mid-range priced semi-gaming themed case from Aspire. While a lot of Aspire's cases are almost too gaudy for us to consider in an article like this, the front door of the X-Cruiser is a little cleaner looking.
Click to enlarge.
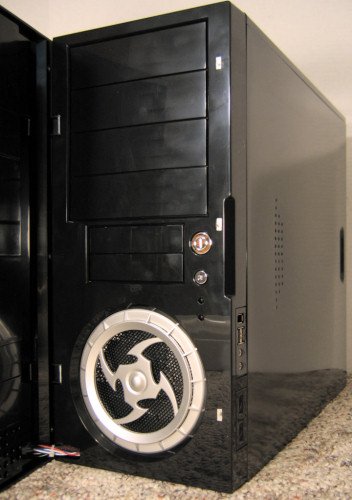
Especially in the black color that we received, the glossy plastic and metal really stand out against the chrome-colored plastic on the door - something that will either make or break this system for the majority of people looking at cases in this price range. By examining the front to start, we'll begin to get an idea what this chassis has to offer.

Click to enlarge.
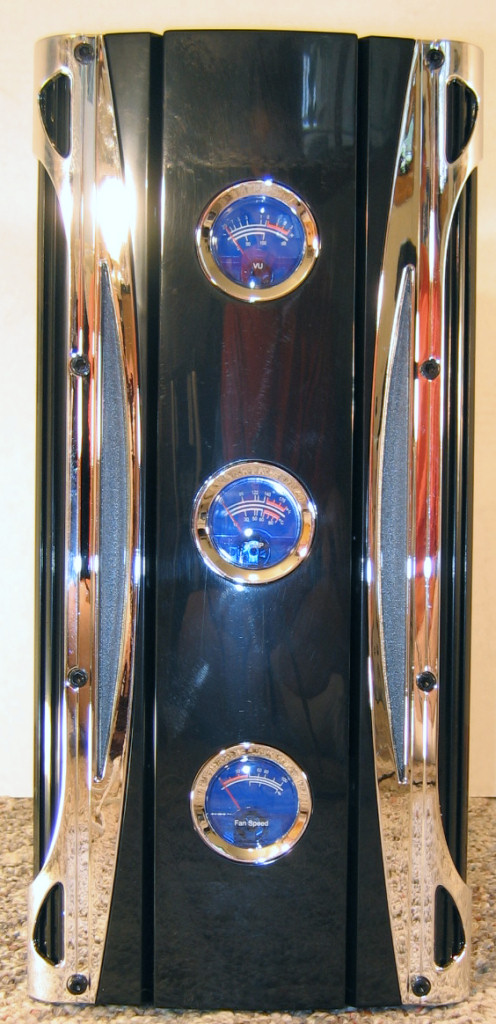
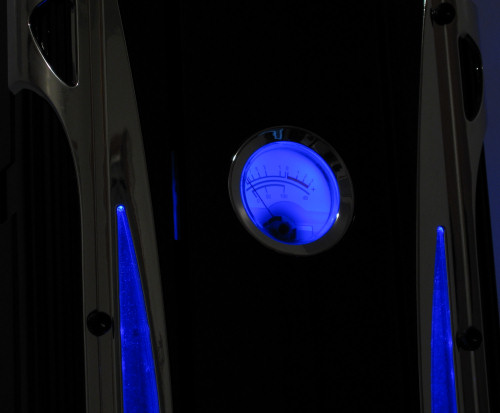
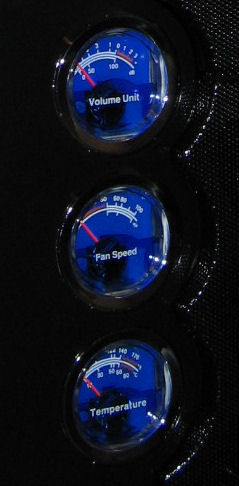
The front is dominated by the three included analog meters, which (from top to bottom) are sound, temperature, and fan speed gauges. The entire front is a left side-hinged plastic door that conceals the four 5¼" and two 3½" drive bays, as well as the intake for the optional front-mounted dual 80mm fans.
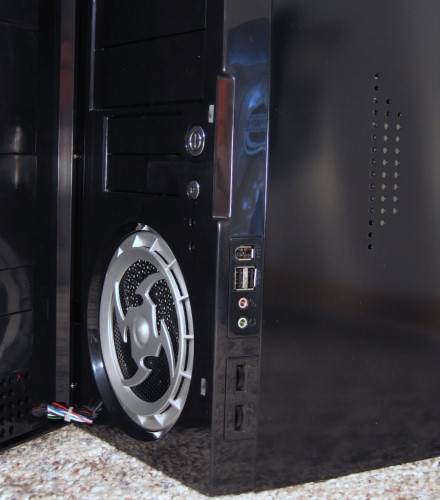
Click to enlarge.
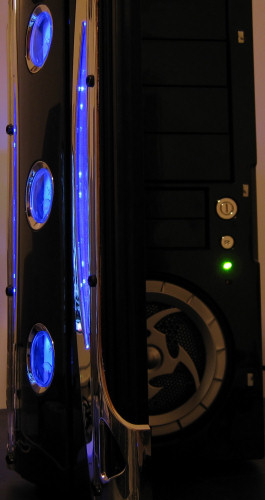
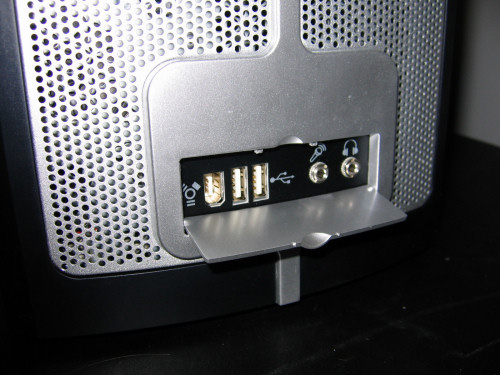
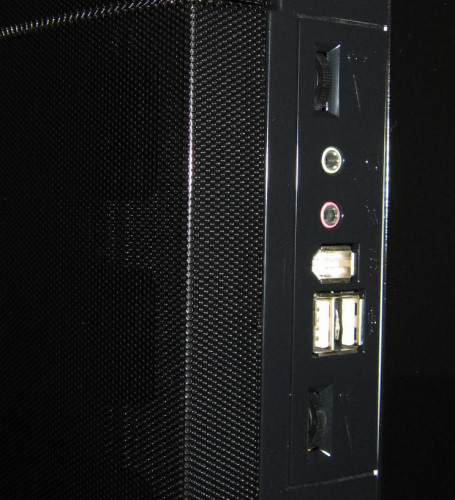
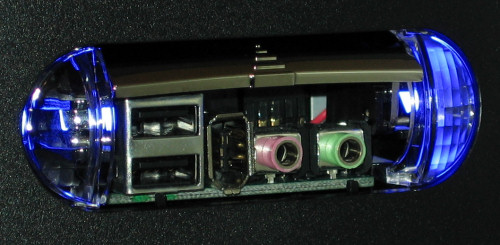
The front port cluster is located on the right side towards the bottom, and not only sports the usual dual USB, Firewire, and audio jacks, but also has a volume control for both the headphone jack, and a fan controller for one case fan. A small magnet holds the door shut, and underneath that is the chrome plastic power and reset buttons along with the power and HDD activity LEDs.
Click to enlarge.
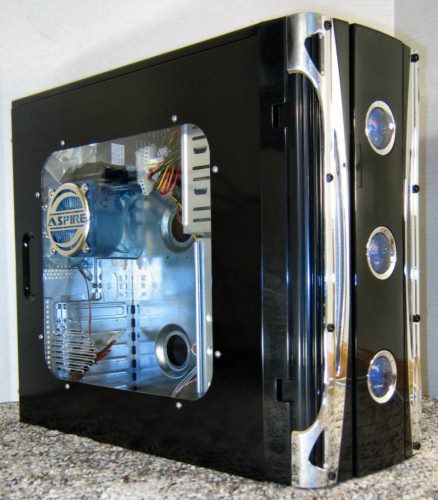
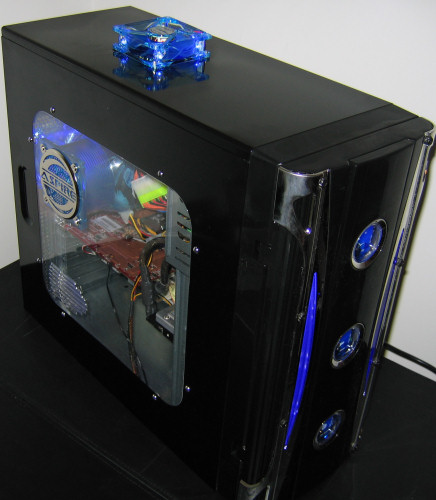
Turning the case and looking at the left side, we see the prominent rounded window with a blue fan shroud covered by a filter and logo-stamped metal. No fan actually comes mounted here, but the dual exhaust fans will pull air in through this shroud to help cool the CPU. There are also extra cooling vents in the plastic right above the expansion cards.
Click to enlarge.
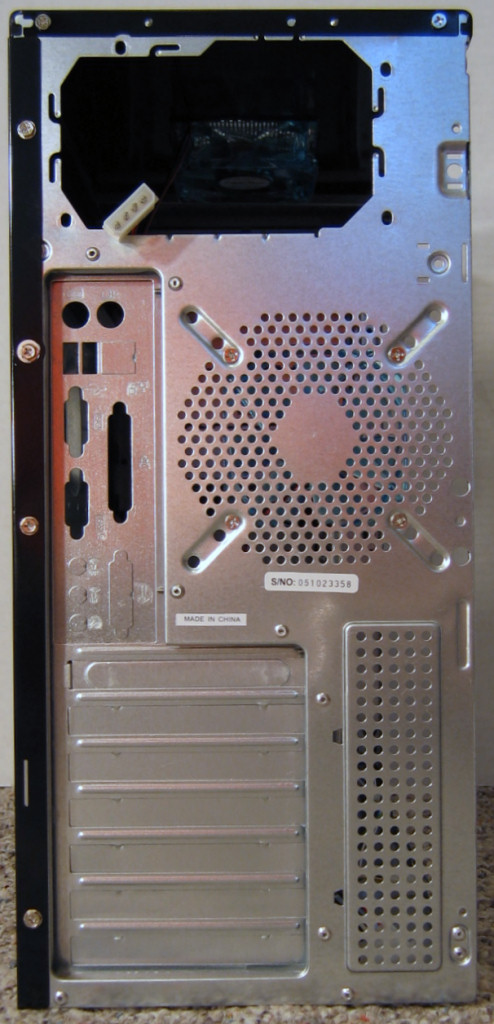
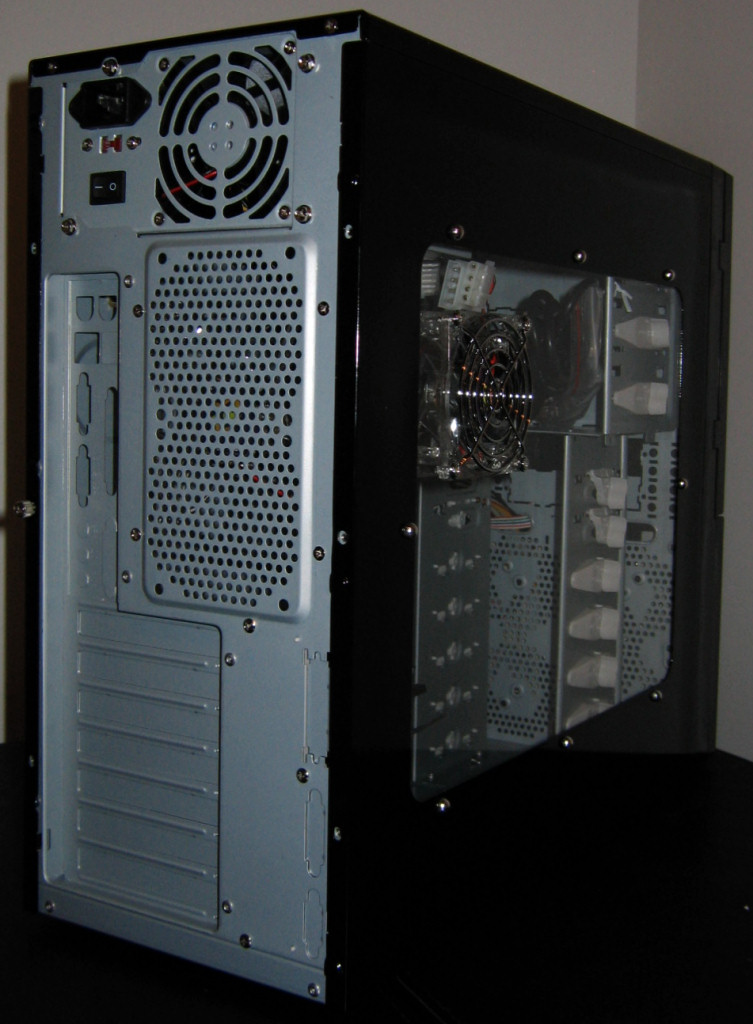
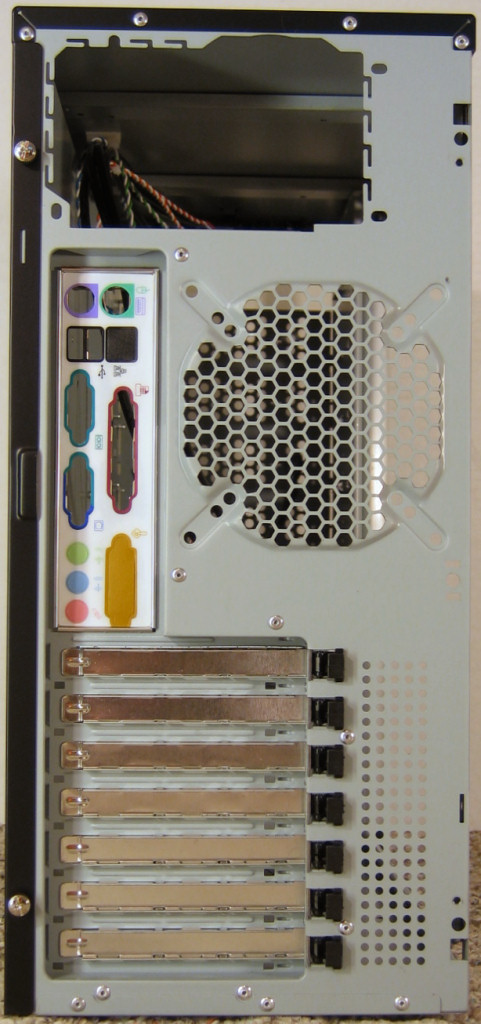
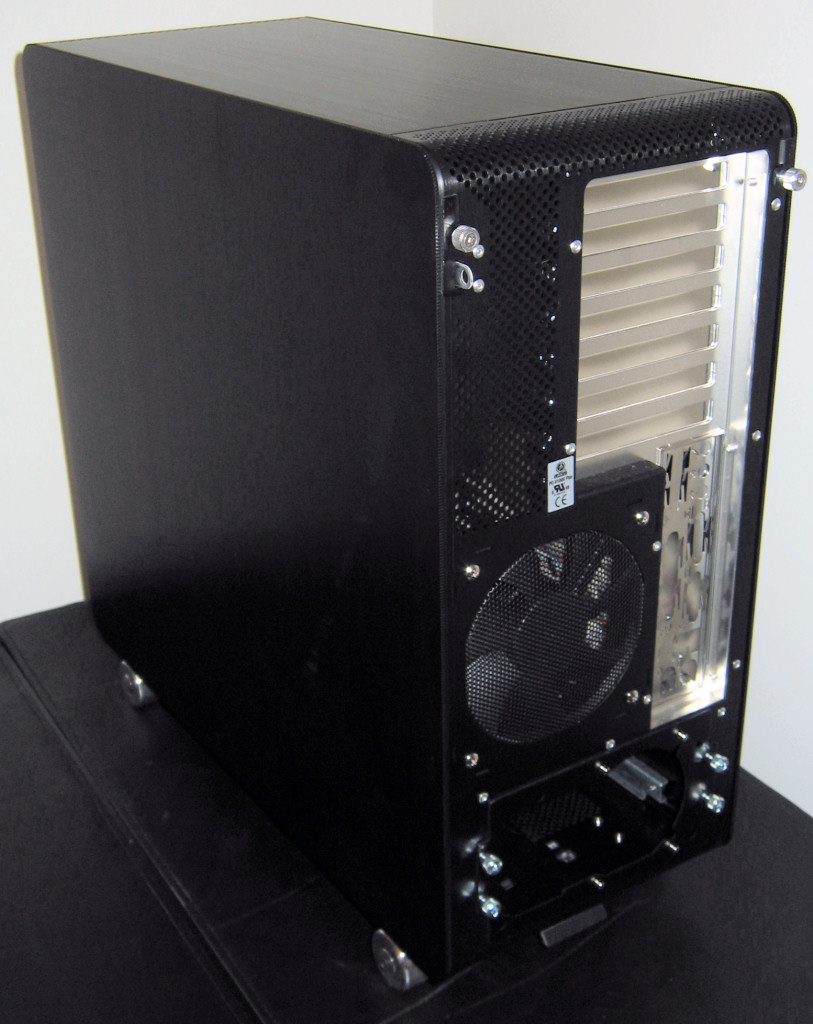
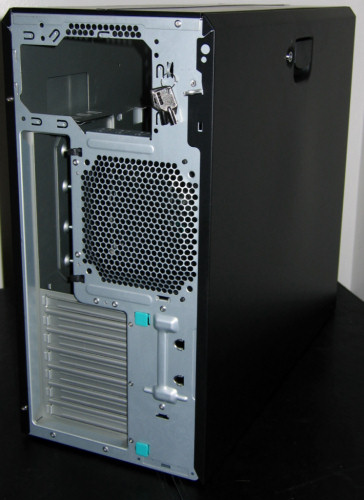
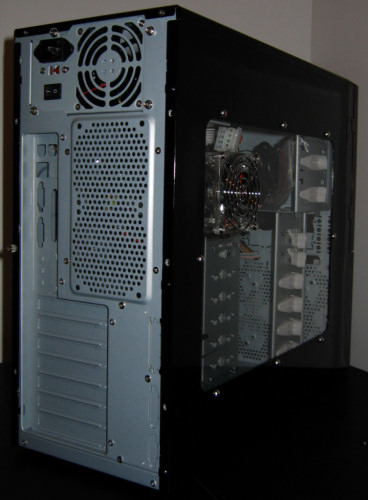
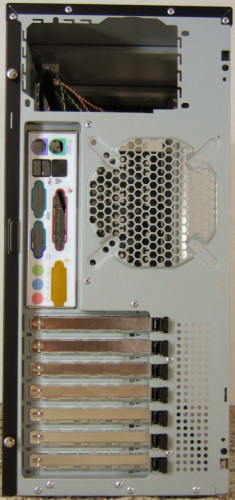
Before we take a look inside the X-Cruiser, a quick glance at the back shows us that at least the case offers space and mounts for a 120mm in the rear, even though only an 80mm fan is included.

Click to enlarge.
Aspire X-Cruiser (cont'd)
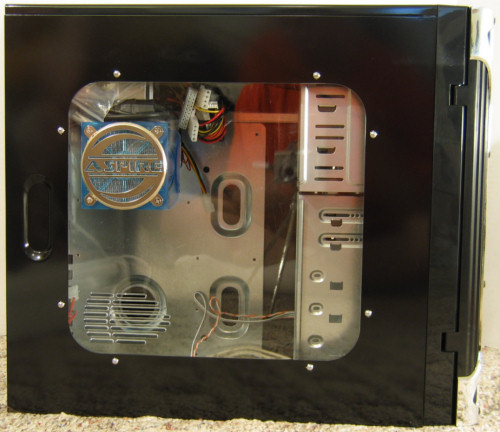
First, a quick glance at the inside of the side panel to see the CPU shroud in better detail. The shroud's height can be adjusted, thanks to its two-part design.
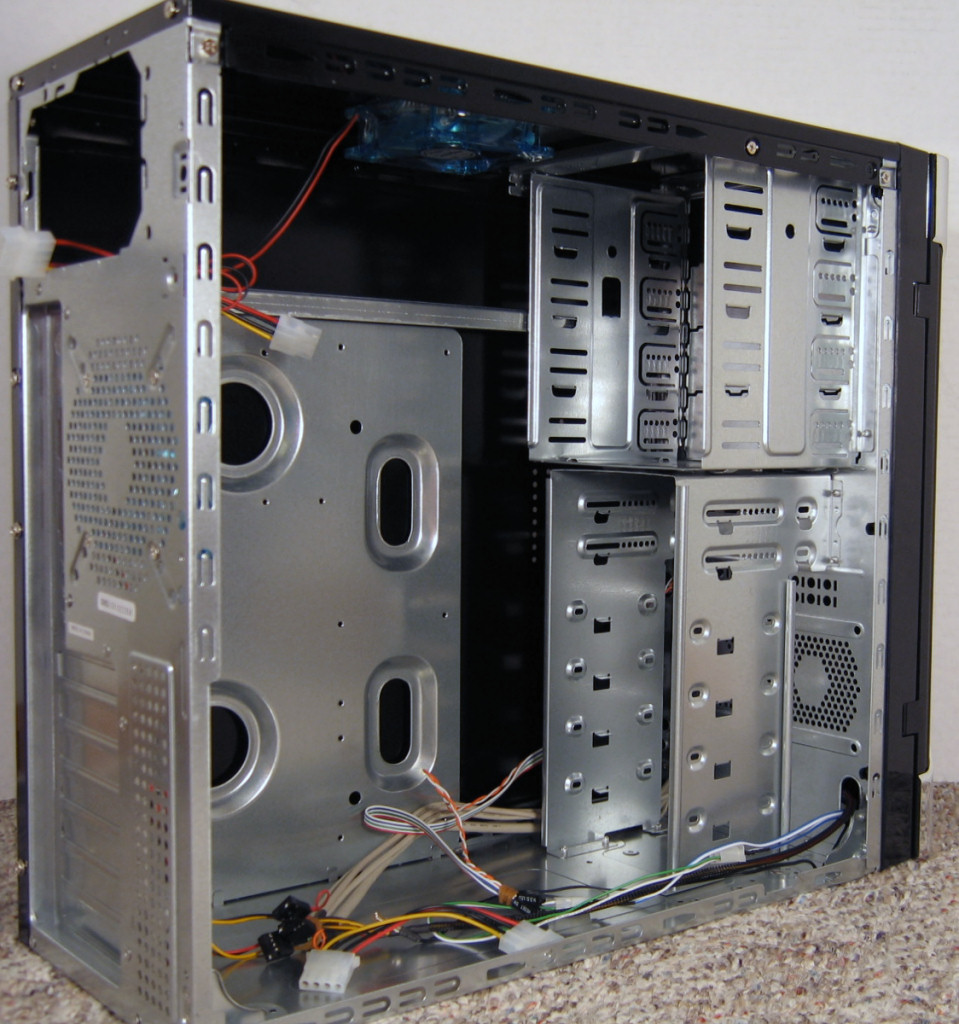
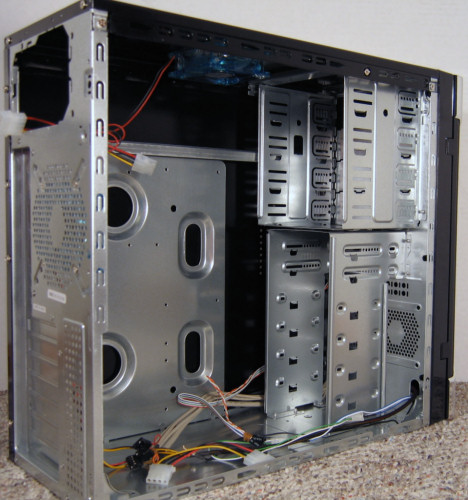
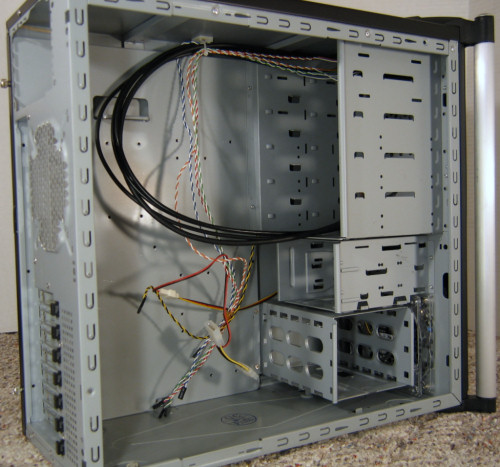
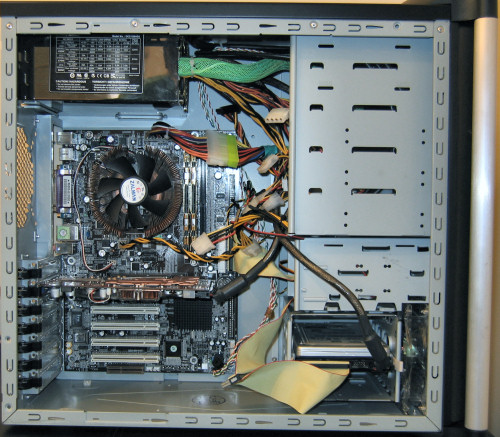
After taking off the side panel, the simplicity of the interior of the X-Cruiser is rather apparent. The motherboard tray isn't removable, nor do any of the drives have any dampening or tool-less features. This doesn't necessarily make for a bad case; it just separates it from more expensive cases and might actually make it more appealing to people who want a simpler unit.
Click to enlarge.
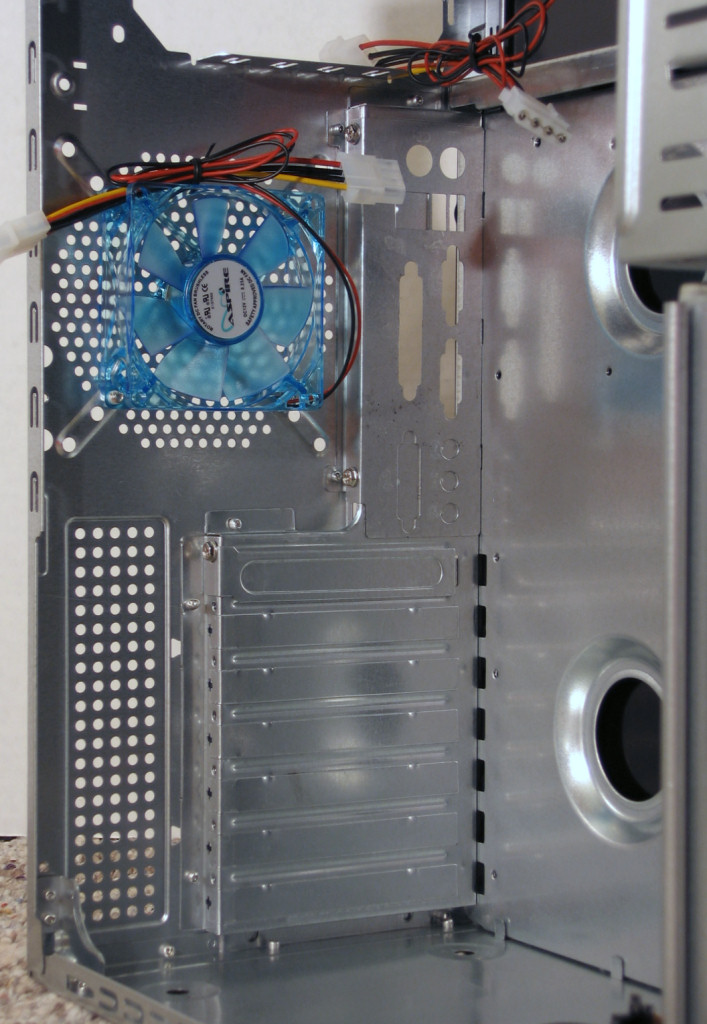
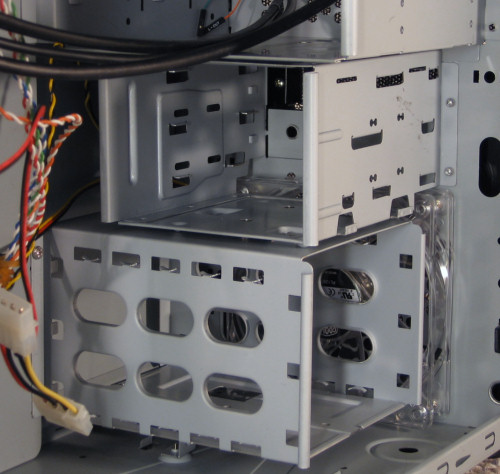
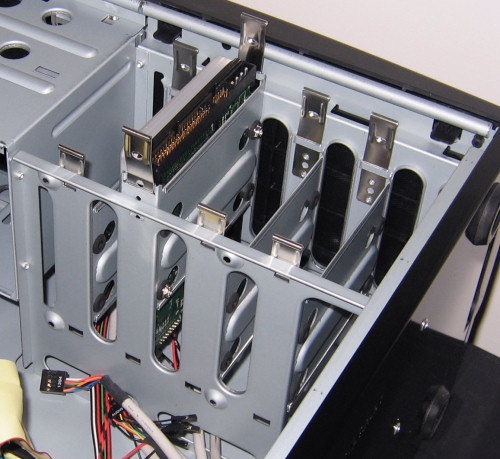
There are a total of six 3½” bays, two of which are external, and four 5¼” bays. In this close-up, you can see the two optional 80mm fan mounts in the front.
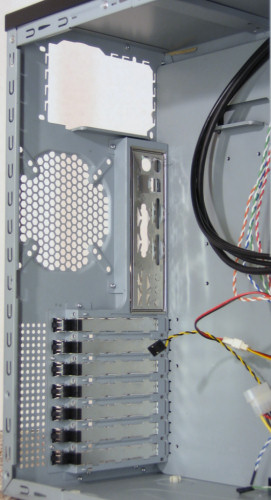
The rear-mounted 80mm fan is blue just like the top fan, which (as will see in a bit) has a big problem with placement. One nicer thing about the X-Cruiser is that the motherboard backing plate is removable via a bolt, something anyone who builds PCs regularly will appreciate quite a bit more than the pop-in plates, which are often a pain to work with.

Click to enlarge.
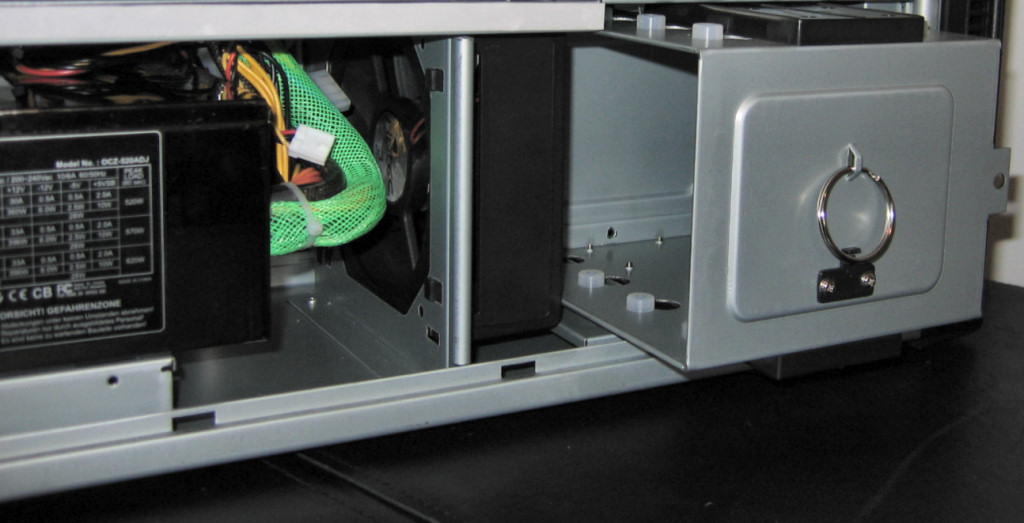
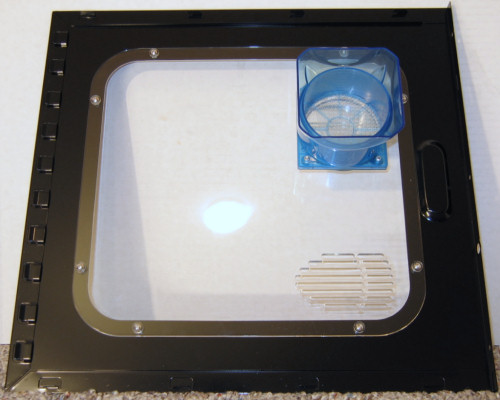
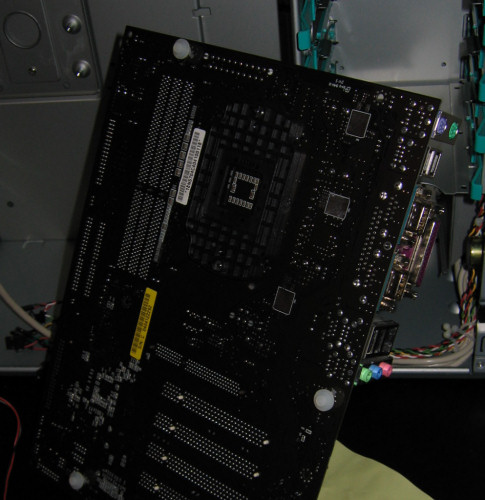
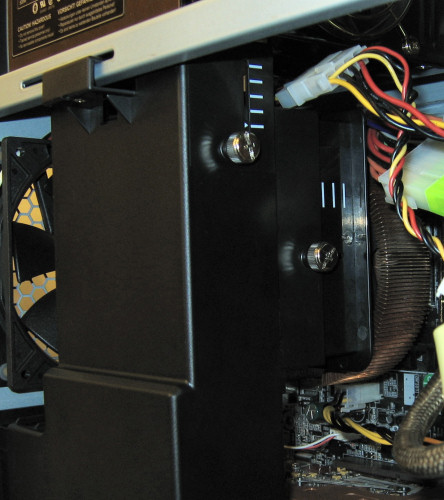
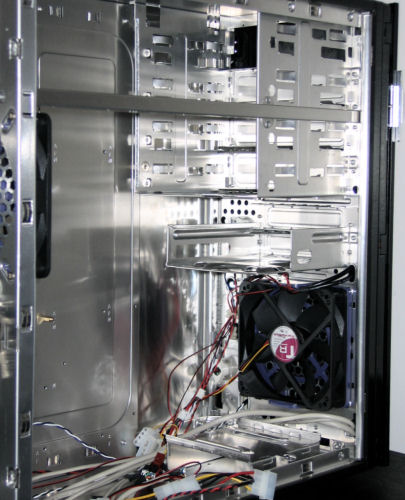
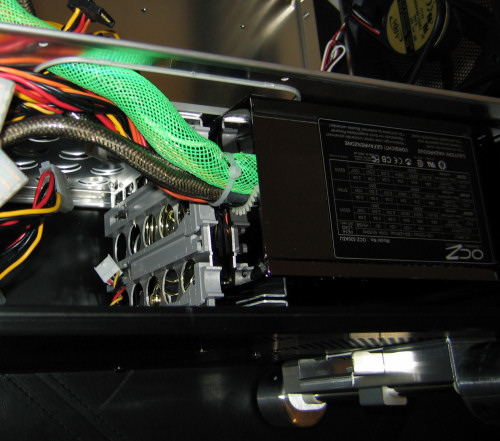
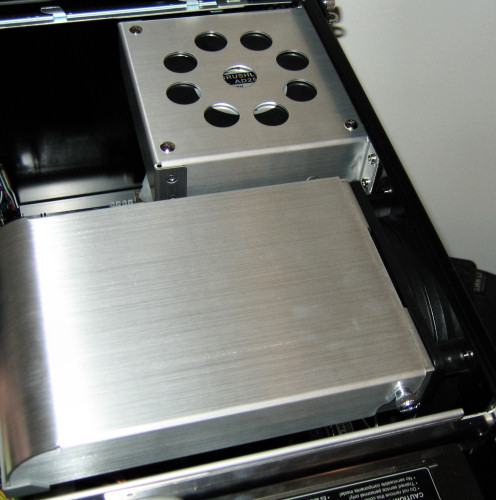
Installing our test bed went fairly smoothly, except for a problem with the top mounted fan. At first, we thought perhaps our longer-than-average PSU was to blame, so we double-checked by installing a shorter unit.
Even with a relatively standard sized PSU, the top fan mount is unusable unless the fan is mounted externally, rendering the included grill useless. With a longer PSU, such as our OCZ PowerStream, the fan is still able to get air, but the reduced opening might impact cooling performance. When a short enough PSU is used, the fan could still be used as it came in the package, leaving the top looking like this:
Notice that the reflection is clearly visible in the glossy finish of the case.
Aspire X-Cruiser (cont'd)
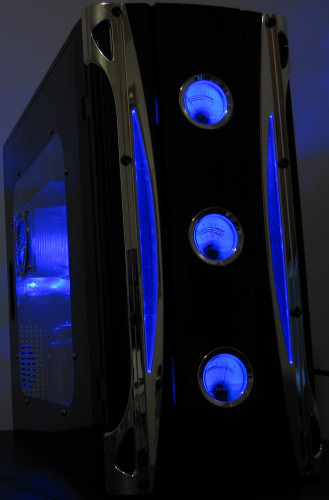
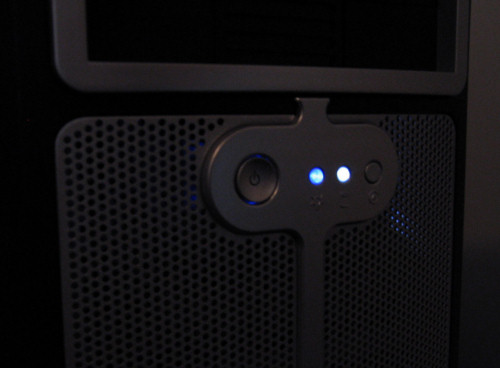
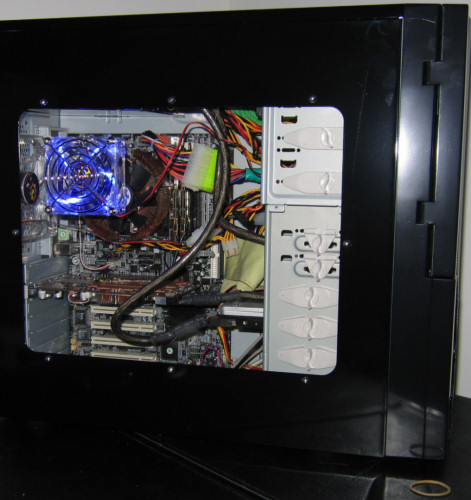
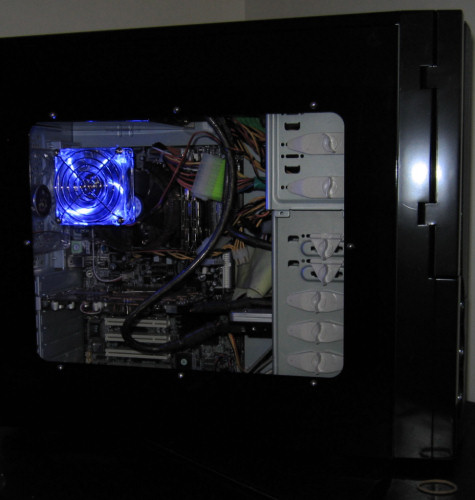
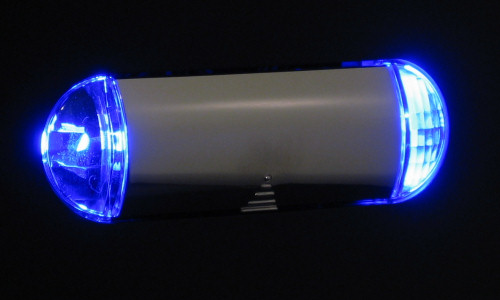
After installing our standard test bed, we mounted the top fan externally to simulate results as close as possible to an "out of box" cooling setup. Both fans glow blue along with the gauges and lighted areas on the front door. Here are several pictures of the case all lit up.
Unfortunately, the top gauge, the dBa meter, wasn't responding for us. This is possibly just a problem with our unit, but be warned if this would be a major issue for you.
DynaPower F3323
A relatively new player in the case manufacturing field, DynaPower asked us to take a look at a new server chassis of theirs, and we were pleasantly surprised, to say the least. Probably the first and foremost reason for our excitement is that the F3323 is available for right around $70 (at the time that this article was written).
Click to enlarge.
One of the very first things that we noticed about the case is its weight - this isn't aluminum, and you sure can tell. But with the added weight of steel comes superior strength and sturdiness - valuable traits for a computer that probably won't be moved around too much. Out of all the cases in the roundup, this is the most solid by a pretty decent margin.
Click to enlarge.
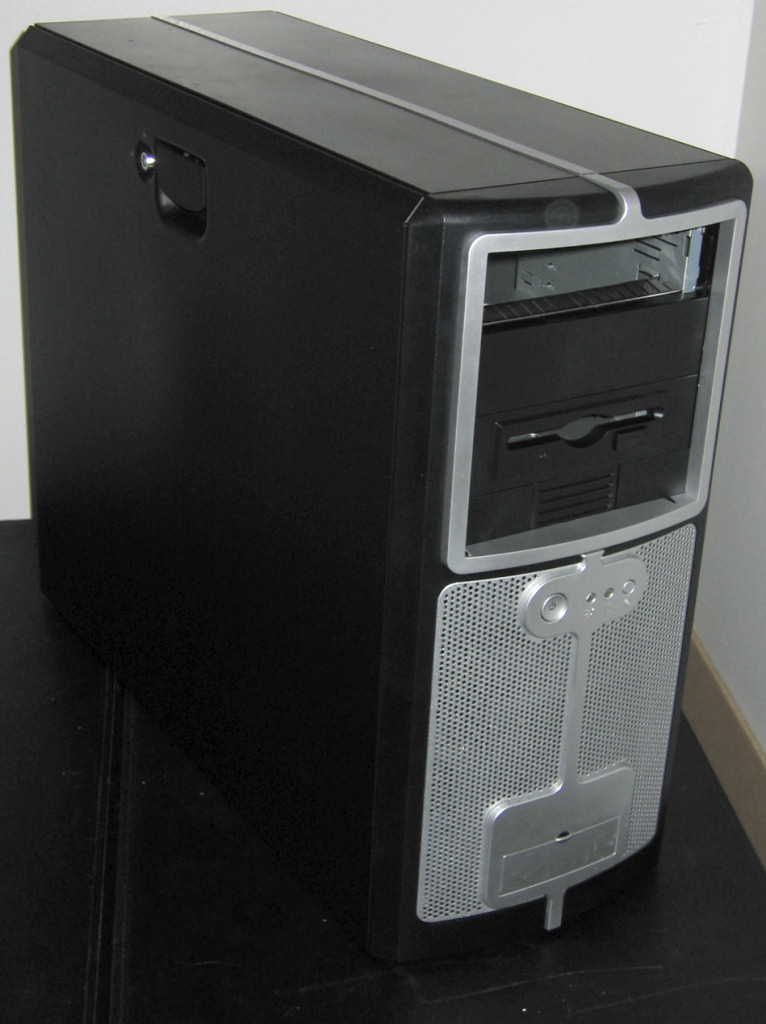
The front of the F3323 is straightforward, yet professional looking, and the solid stripe running the length of the top of the unit only adds to this appearance. Further evidence that this is first and foremost a server-oriented case is the fact that there are only two 5¼" drives, and one external 3½". Towards the bottom of the front is the coverable port cluster with nice bright icons that label each port.
Peaking around the back of the case, we see a plentifully perforated area for the main exhaust fan and that's about it. Later, we'll discuss a slight problem that we found with the PSU mounting area.
Click to enlarge.
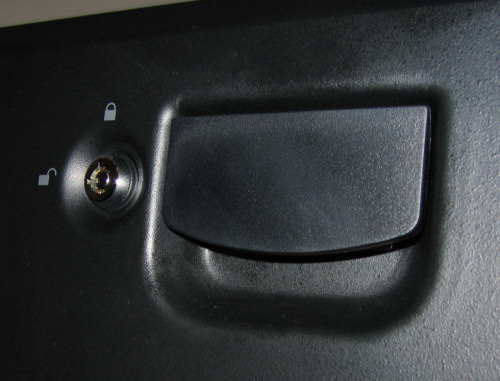
To get at the internals, we must remove the left side panel. When lifting on this latch, we realized that this was one of the easiest side panels that we've ever removed. The cover is very sturdy and the lockable latching system holds it securely in place without the need for any thumbscrews.
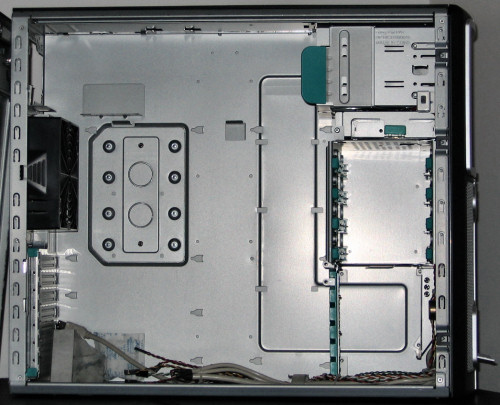
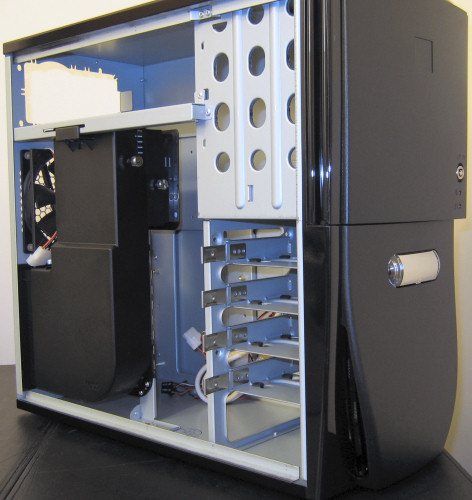
DynaPower F3323 (cont'd)
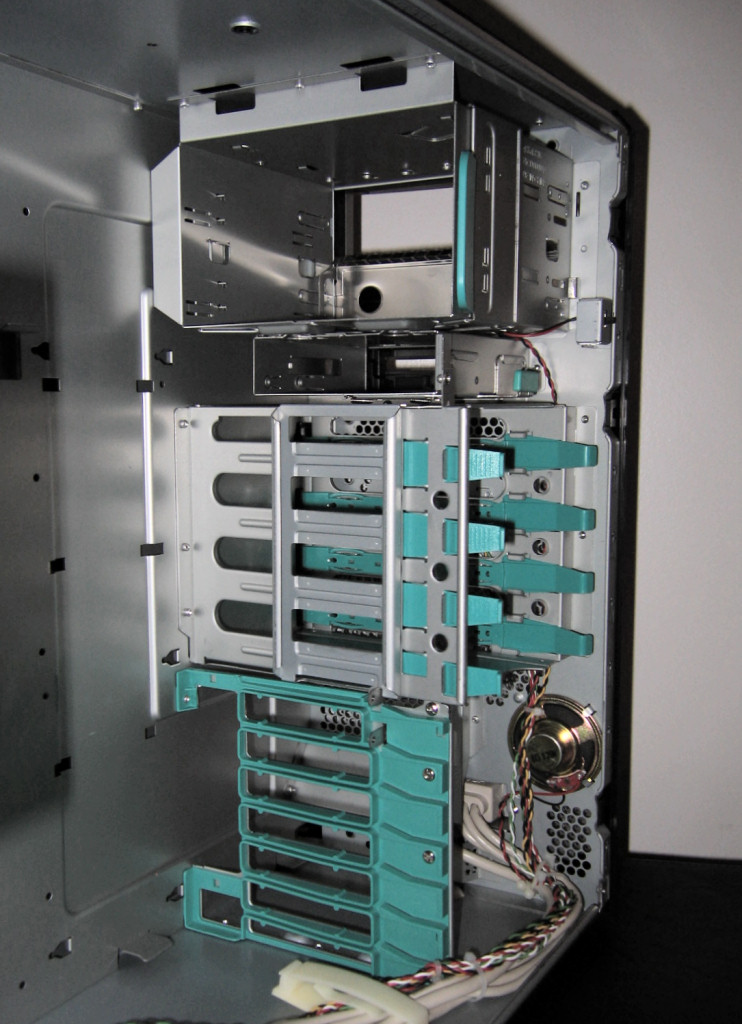
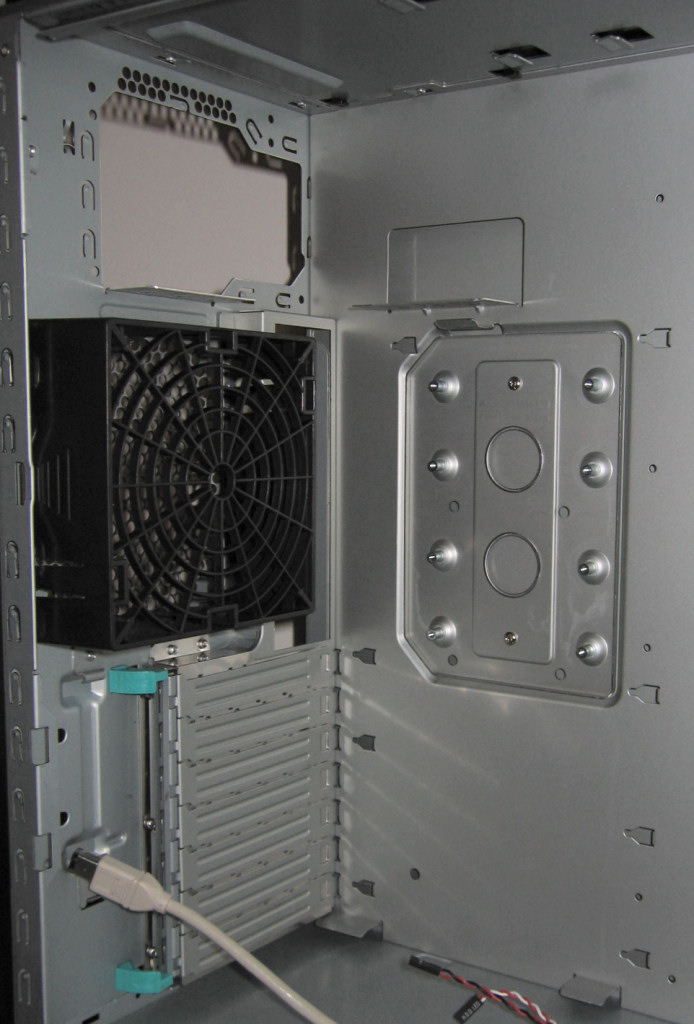
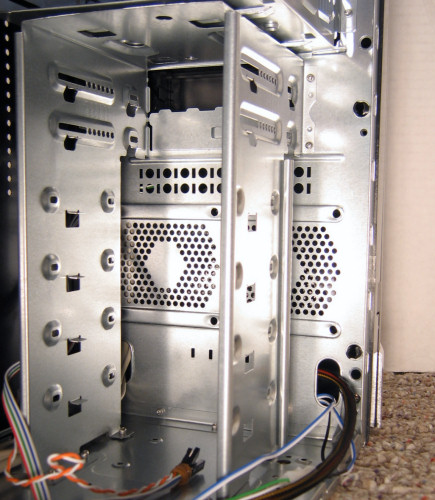
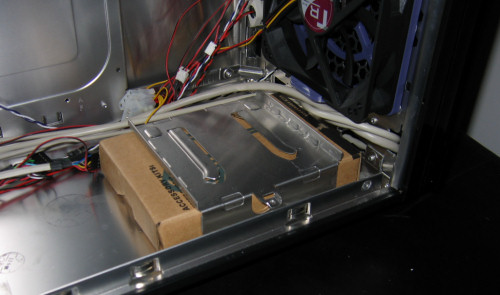
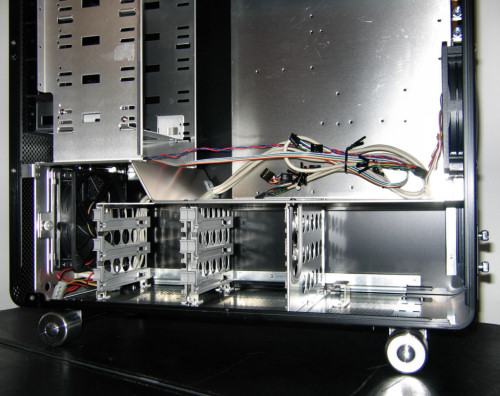
With the ability to hold extended motherboards and full-size expansion cards, the interior of the F3323 is very spacious - especially for typical desktop components.
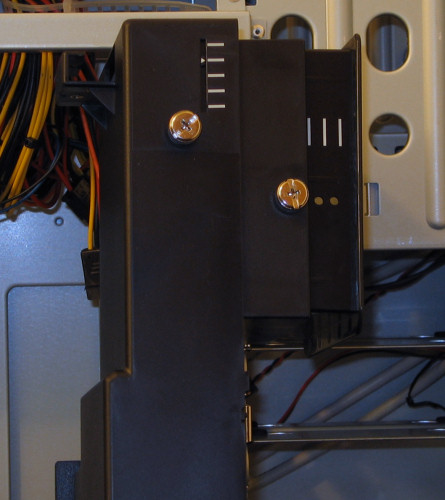
DynaPower has made a great effort to keep the system entirely tool-less, and most of the implementations of this goal actually turned out really well. The retention clip for the 5¼” drives, for instance, simply applies pressure to hold the drives until the user depresses the large, color-coded tab to release them. The single external 3½” bay has a similar system, but uses a coiled spring to apply pressure to the mounting pins.

Click to enlarge.
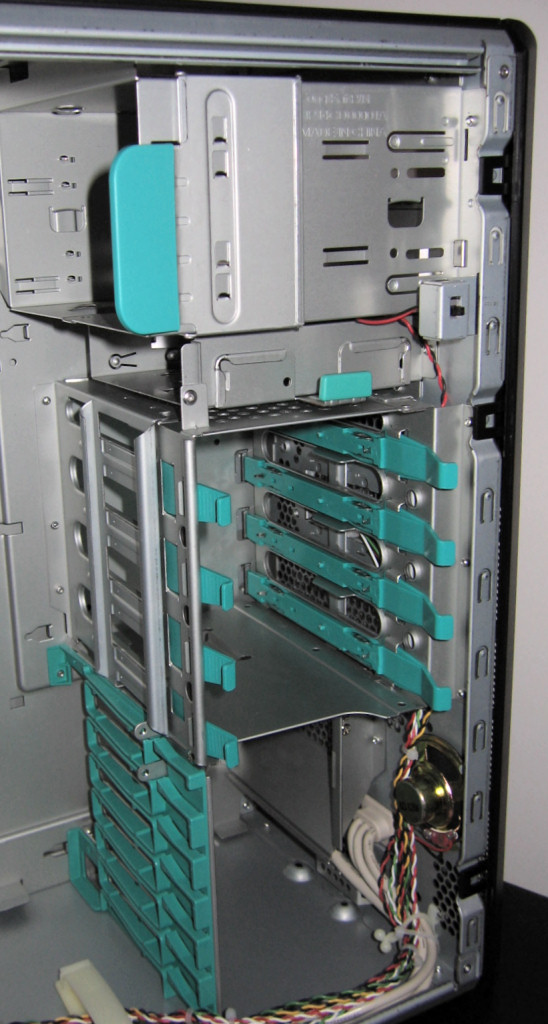
We were a bit shocked to find that the F3323 only has dedicated space for four hard disk drives. Being a server case this large, we feel that it really would've made more sense to make it slightly larger if that's what it took to allow the case to hold twice as many. As it is currently designed, there is actually quite a large portion of unused space in the front bottom of the chassis.

Click to enlarge.
Perhaps more annoying than the lack of more hard drive bays, however, are the rails themselves. Once in place, they hold the drive steadfast with no issues. Actually, getting the rails to stay in place on the drive while one loads them into the bay, however, is not all that easy. If they were simple push pins, this would not be much of an issue, but they're actually pieces of metal that run the length of the rail and are then bent at the tips into points meant for insertion into the drive's mounting threads.
Click to enlarge.
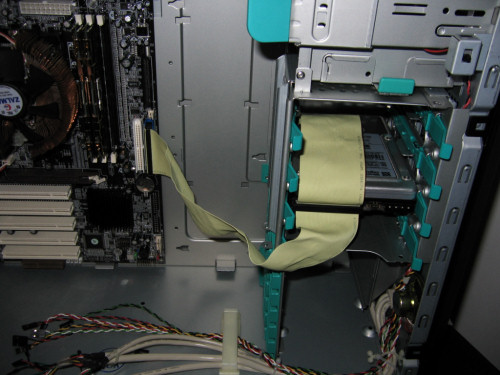
One also has to be careful that their IDE cables will be long enough - the case's extra depth made it just barely possible to use our standard ribbon cables.
Another possibly big gripe for a lot of users will be the omission of any case fans in this enclosure. While having a case ready to use out of the box is certainly important to many people, DynaPower must feel as if it makes more sense to let the user determine what kind of fan to use, if any is used at all.
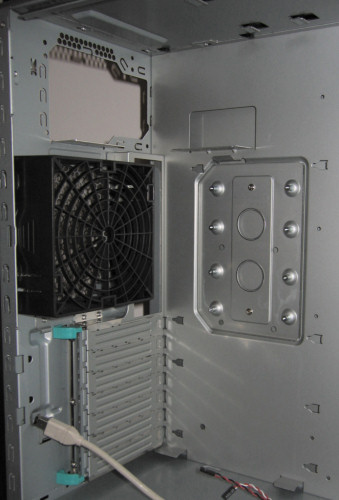
Click to enlarge.
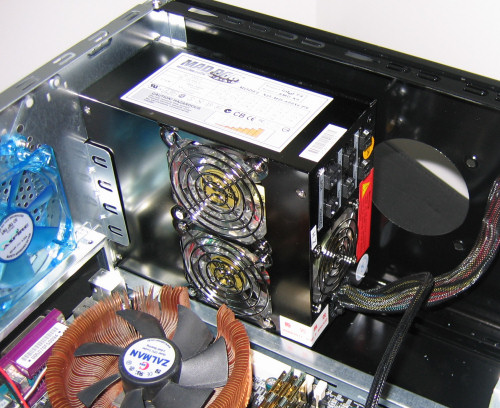
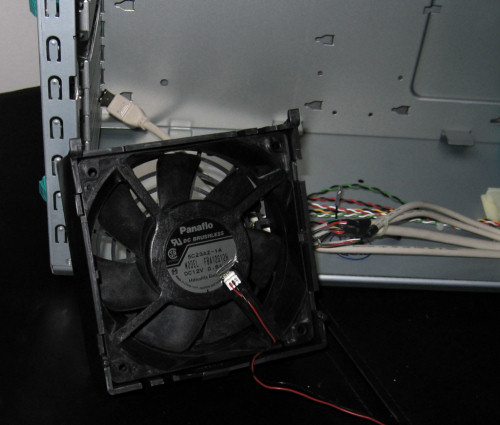
Since we wanted to make the case comparisons as close to "out of the box as we could, we were reluctant to add any fan at all - but this would be rather rare in our opinion, so we included a spare Panasonic Panaflo 120mm fan for testing. Known for its air-pushing prowess, we chose to include an in-line fan speed controller to keep the fan from creating overwhelming noise.
Click to enlarge.
DynaPower F3323 (cont'd)
Installing a fan into the cage is rather easy, but squeezing the assembled unit's sides to fit back into place on the back is a lot trickier. Unfortunately, this is another example where the tool-less ideology of the case is actually a detriment to the overall usability.
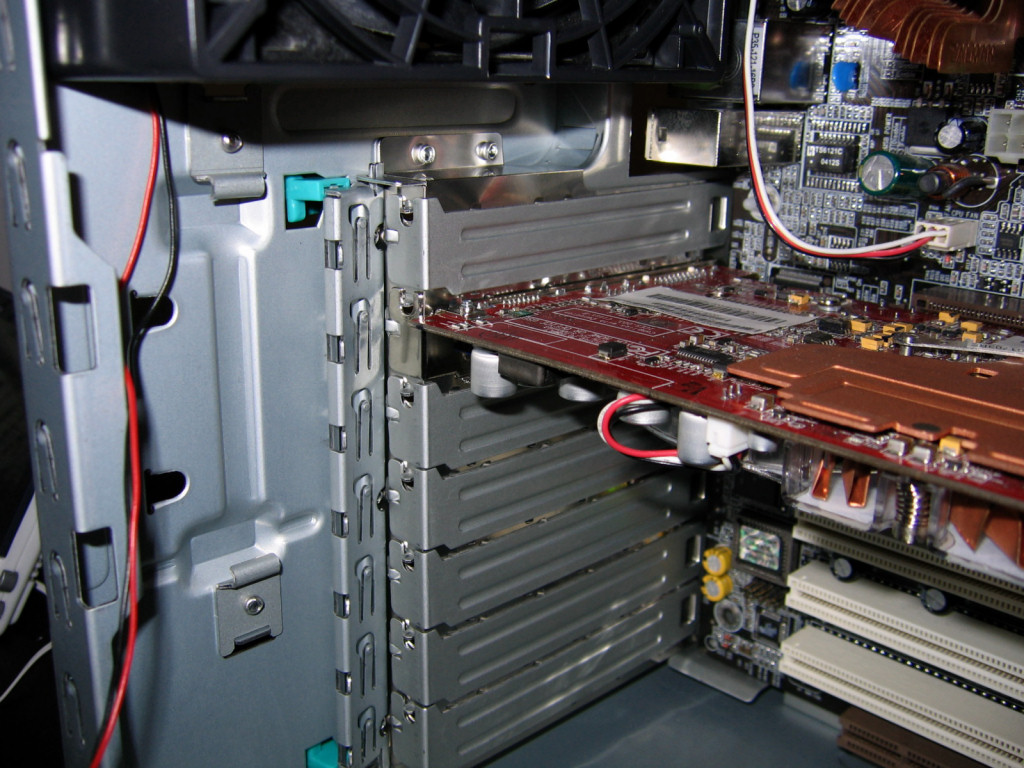
The expansion cards are all held down by a tool-less clip, which is also set off by bright plastic.

Click to enlarge.
This system works very well, thankfully, and held our Radeon video card securely. In this first picture, the clip is flipped back so the card can be inserted easily.

Click to enlarge.
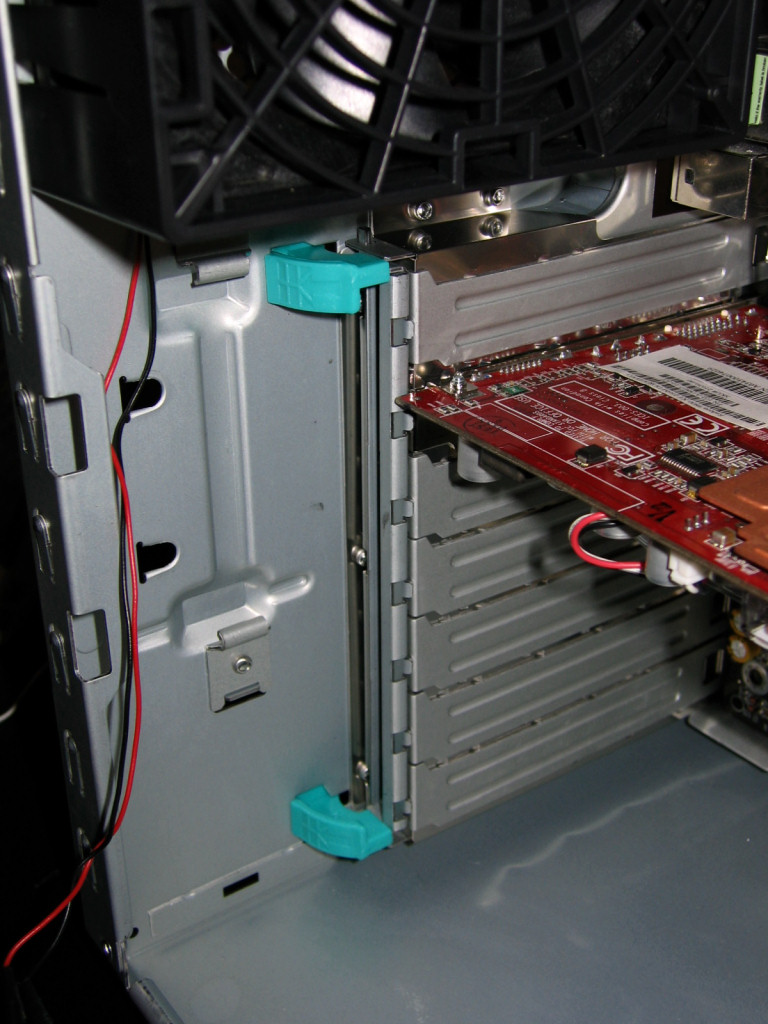
When pushed from the back side of the case, the teal plastic tabs click into place to hold the metal bracket against all the cards equally.
Continuing the theme, even the installation of the motherboard can be done without a screwdriver, as plastic pegs are included to hold the motherboard down. They work well enough, but we'd prefer just using a screwdriver for this purpose, especially if used in any other case, the pegs have to be removed from the main board.
Click to enlarge.
Getting back to something that we mentioned earlier, the power supply back plate has a slight mistake in its design.

Click to enlarge.
With our OCZ PowerStream, the accepting socket for the main power cable didn't quite fit through the backing plate, causing the unit to not fit perfectly. It's a minor issue, but still a rather silly one to overlook.
Perhaps the only item of "flair" on the F3323 was discovered after we put our test bed in it. Instead of the typical green and red, the front LEDs are blue and white, which actually look pretty nice in our opinion.
Sunbeam Trio
Still, at the relatively cheap end of the spectrum is Sunbeam's Trio case. As the time of writing, it was available for as little as $70 online. For the most part, the Trio looks more like a gamer's case, but this doesn't mean that it couldn't appeal to a slightly more mature crowd either.

Click to enlarge.
Finished in a glossy piano-black shine not unlike the X-Cruiser, the Trio is another case where keeping a cotton cloth on hand to keep it clean will make a big difference. The front bezel is entirely made of plastic, except for the metal ventilation grill on the right.
The typical auxiliary ports are on the right side of the case, but there are also volume controls for the headphone out and microphone input, which is definitely a nice touch.
Opening the large plastic front door gives us a look at the four optical bays, two floppy bays, power and reset buttons and LEDs.
Click to enlarge.
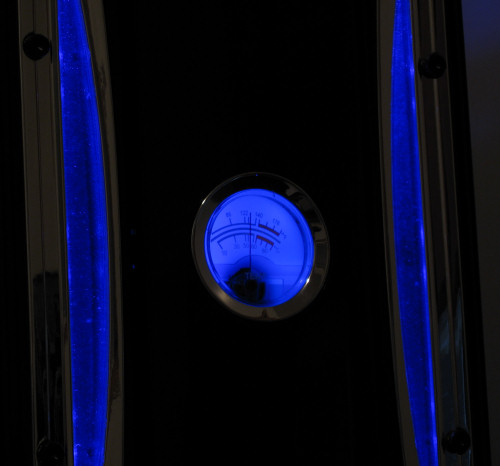
Also notice how, like the X-Cruiser, the Trio has three blue gauges monitoring volume, fan speed, and temperature. In the following close-up, note how this case's gauges are better labeled than the ones on the Aspire.
Moving on, let's take a look at the rear of this case.
There are a couple of things to point out about the back exhaust, the first of which is the perforation. While the holes certainly look big enough, there's actually just about as much metal here as space for air to pass through, which is a less efficient design than the spacious hexagon cutouts that other cases have in this roundup.
Click to enlarge.
Luckily, it does have something going for it that most of these cases do not, and that is the option of running either dual 80mm or a single 120mm fan. The trio does include a 120mm one though, so unless there's a much better use for it elsewhere, it probably makes the most sense just to leave it there.
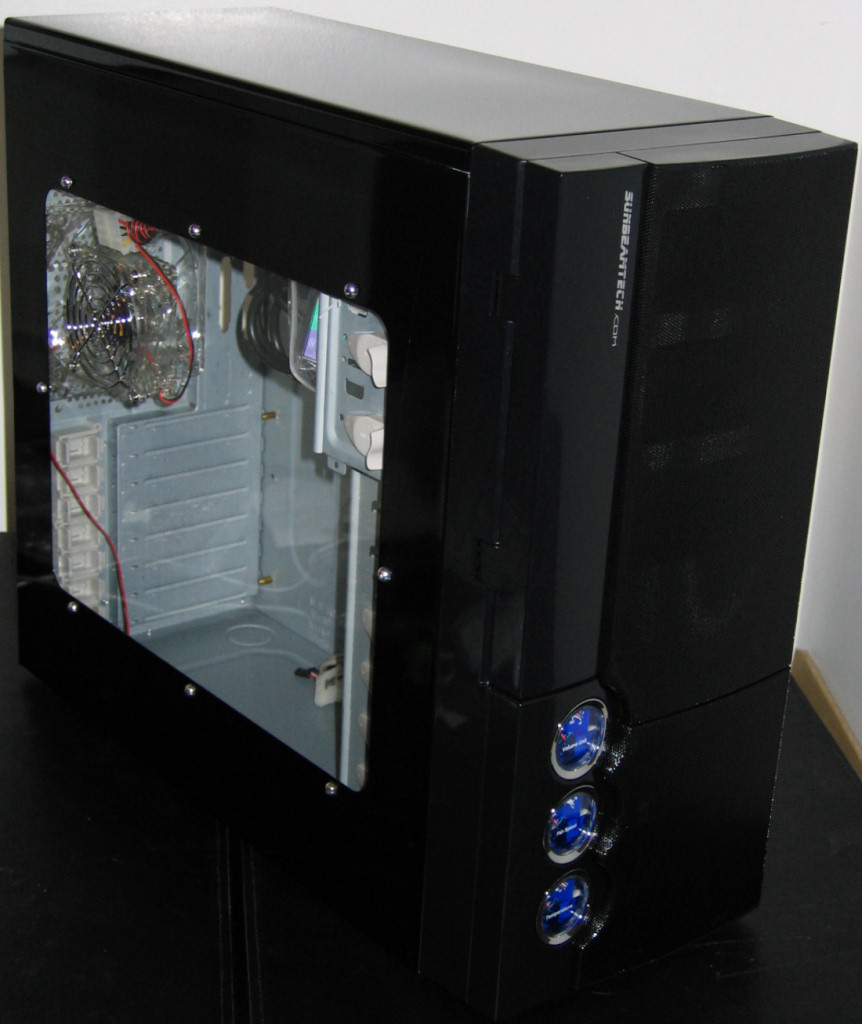
To get a better idea of what the Trio looks like from the side, we're going to jump immediately to some pictures of the case with the test bed fully installed.
Sunbeam Trio (cont'd)
In the lower right-hand corner of this image, one can see that the reflection of the rubber band shows up quite clearly in the shiny black finish of the front bezel, but the finish on the metal side is just as reflective as well.
Click to enlarge.
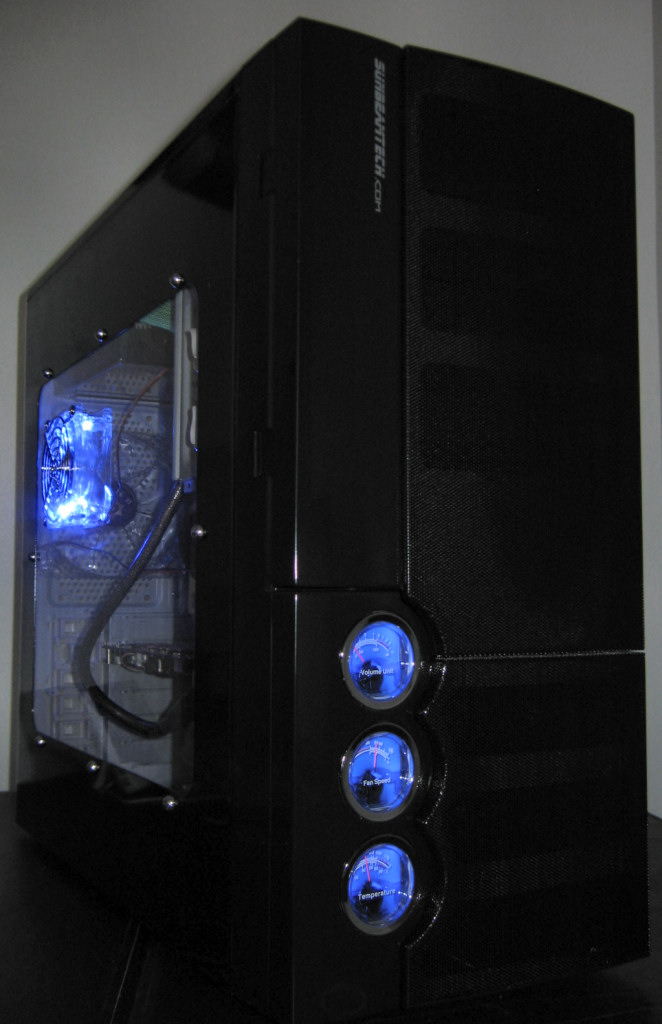
The window provides plenty of viewable space and still leaves enough room to hide a light or two for extra ambient glow from inside.
Turning our flash down and taking pretty much the same picture gives a good idea of how much glow the blue LED fan provides for lighting up the Trio.
Click to enlarge.
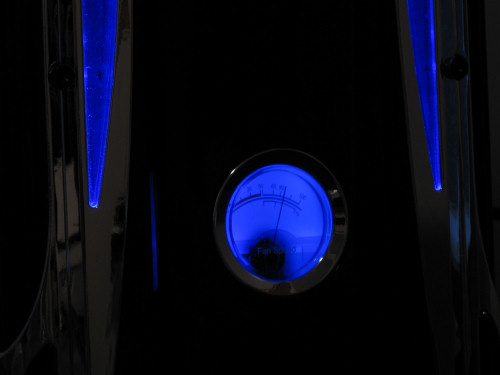
Spinning the case once more to the front, we find the gauges do indeed light up in blue just like the X-Cruiser's as well.

Click to enlarge.
In order to get the temperature reading on the bottom dial, a typical flat sensor is used, which is pictured in the next shot.

The side panels of the Trio remove in a rather normal manner, and once out of the way, the first object of interest is the tool-less drive locks that Sunbeam uses.
Click to enlarge.
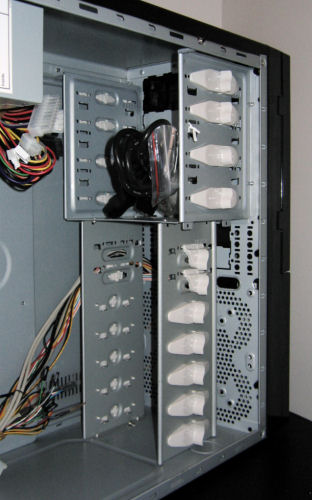
Sunbeam Trio (cont'd)
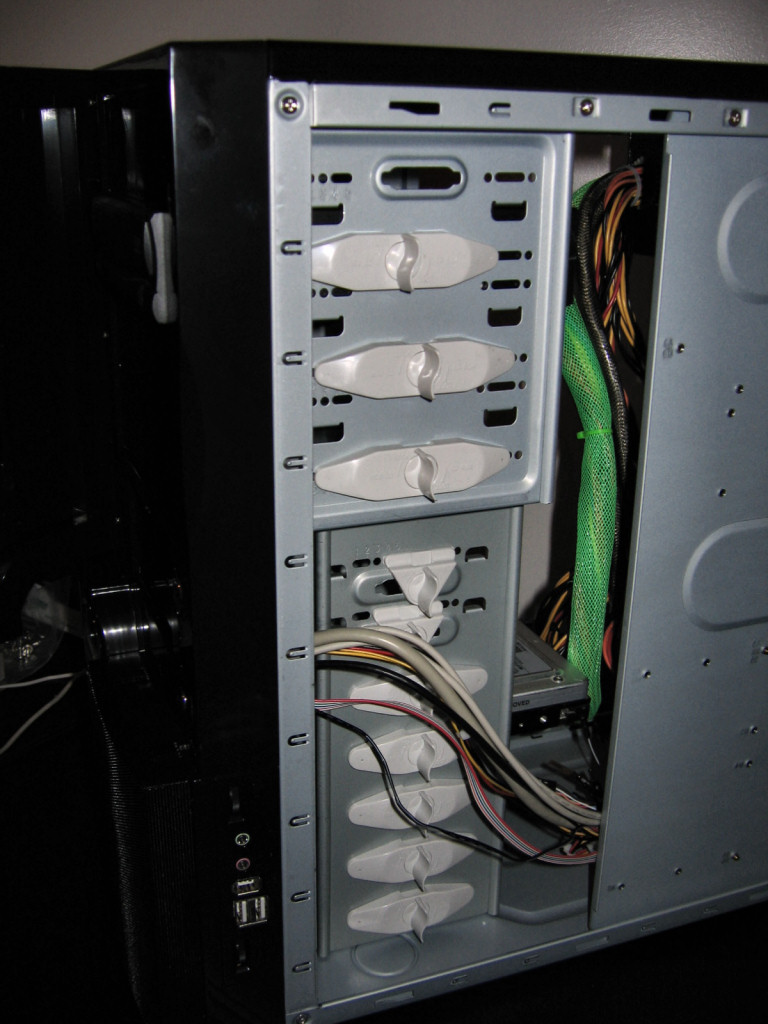
We can also appreciate this case's ability to hold up to six hard drives in addition to an external 3½”, all of which would be held in place with the removable plastic locks. The very top smaller bay can hold the same sized drive, but must use standard screws to do so.

Click to enlarge.
Looking from the right side of the case, we find the same locks, meaning that while this system is surely easy to use, it does the require the case to be accessible from both sides.
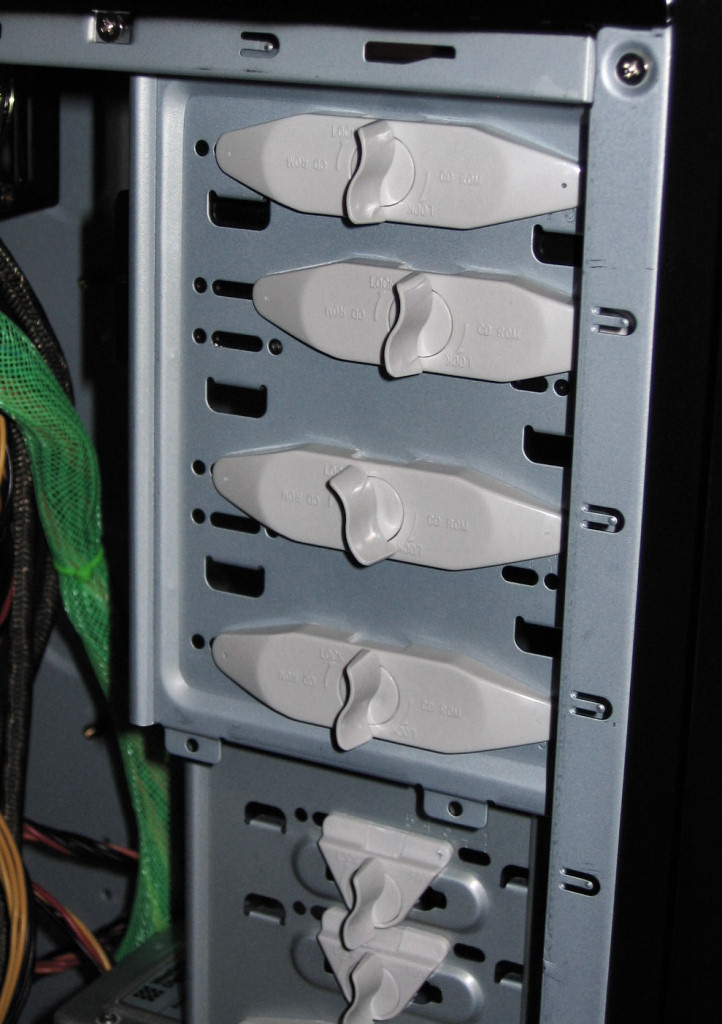
They're a simple enough design, and while other tool-less innovations that we've seen before don't allow for the possibility of missing pieces, this system does have the ability to shift the locks slightly to place drives in several slightly different positions.
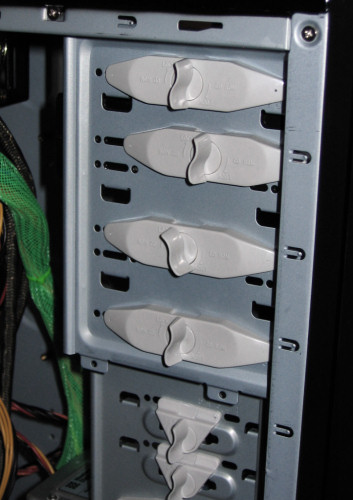
Click to enlarge.
Note how the second-from-top lock is locked in place closer to the front than the rest of them, and the lock below that is only partially locked.
To handle the expansion cards without the use of screws, the Trio uses sliding plastic clips. With the help of the protruding pin, these do hold the cards strongly, but it would be better if they slid back further to make putting in new cards that much easier.
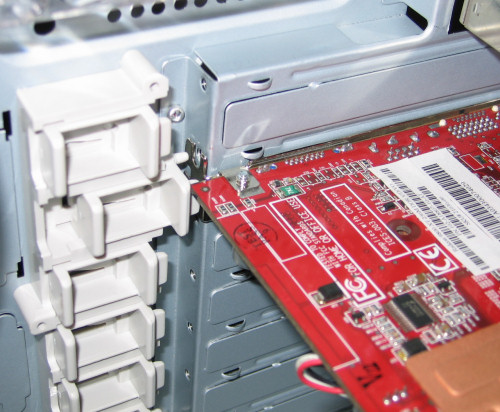
Here, the clip holding our video card is almost pushed in all the way, and after it is, it clicks in place letting one know that the card is being held securely.
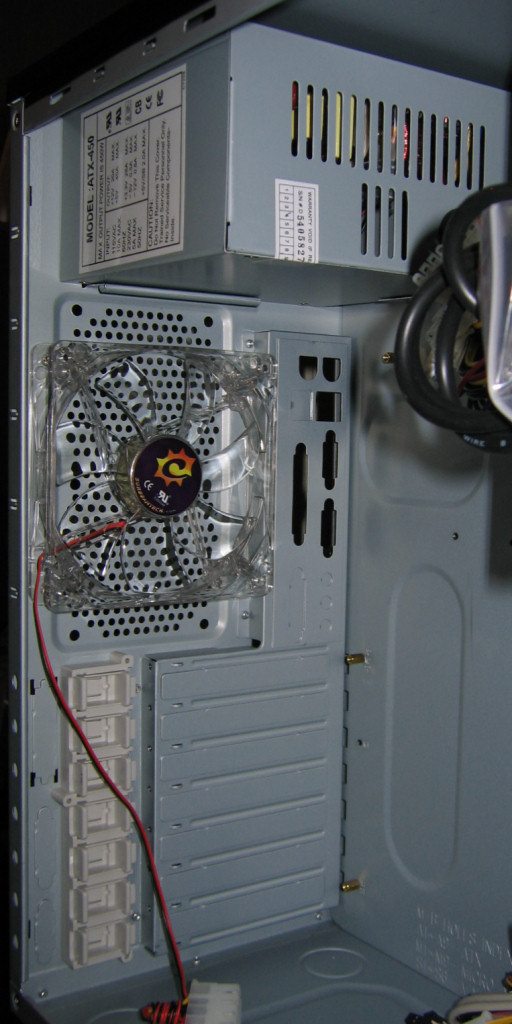
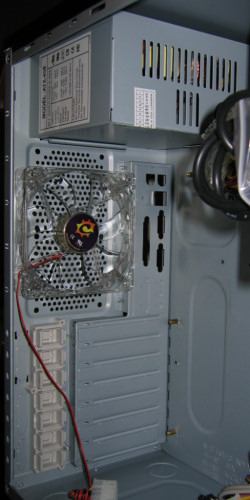
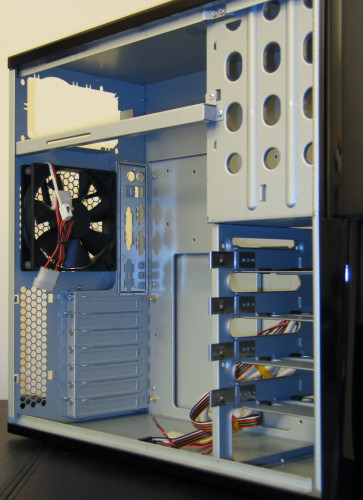
Here, the included 120mm fan for rear exhaust is featured, along with an included 450 watt power supply.
Click to enlarge.
Overall, the Trio is rather normal in pretty much every aspect of a mid-range tool-less ATX case. A final shot of our installed test system confirms this, as the case has neither ample room nor feels too cramped, and the support for the PSU isn't quite strong enough to keep our PowerStream totally upright, but it certainly isn't loose.
Click to enlarge.
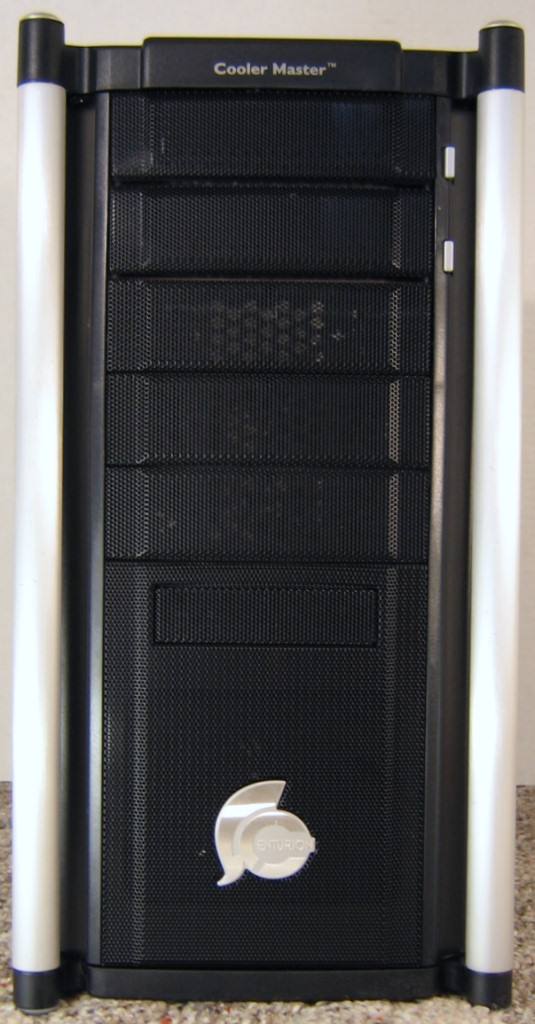
CoolerMaster Centurion 530
As an update to the
Centurion 5 reviewed by us in September, the 530 has a number of improvements and makes a solid appearance in this price range, with a cost as low as $70 without a power supply.
Click to enlarge.
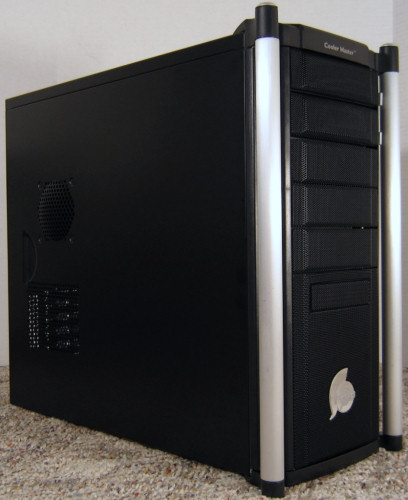
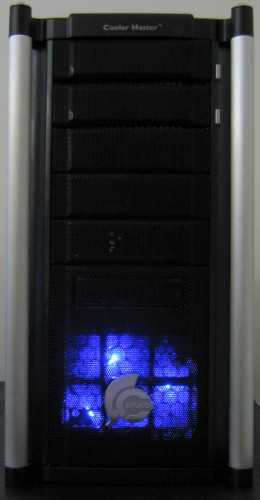
One of the nicer aspects of the CoolerMaster case is its ability to house five 5¼” drives, two of which have stealthy covers to mask any off-color bezels. The entire front of the case is perforated black steel and is flanked by two aluminum cylinders for both looks and a small amount of protection.

Click to enlarge.
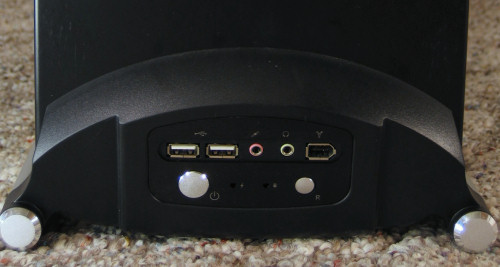
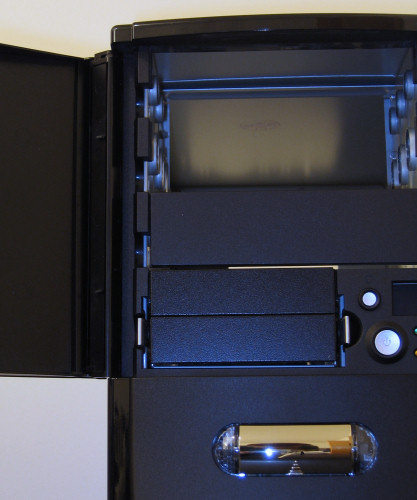
The port cluster on the Centurian 530 is located on the top of the case, towards the very front - a placement that many users who like to keep their computers on the ground next to them will prefer, as there is much chance of accidentally kicking or just stepping on attached peripherals or cables. The power and reset buttons, along with power and HDD LEDs are also located here.
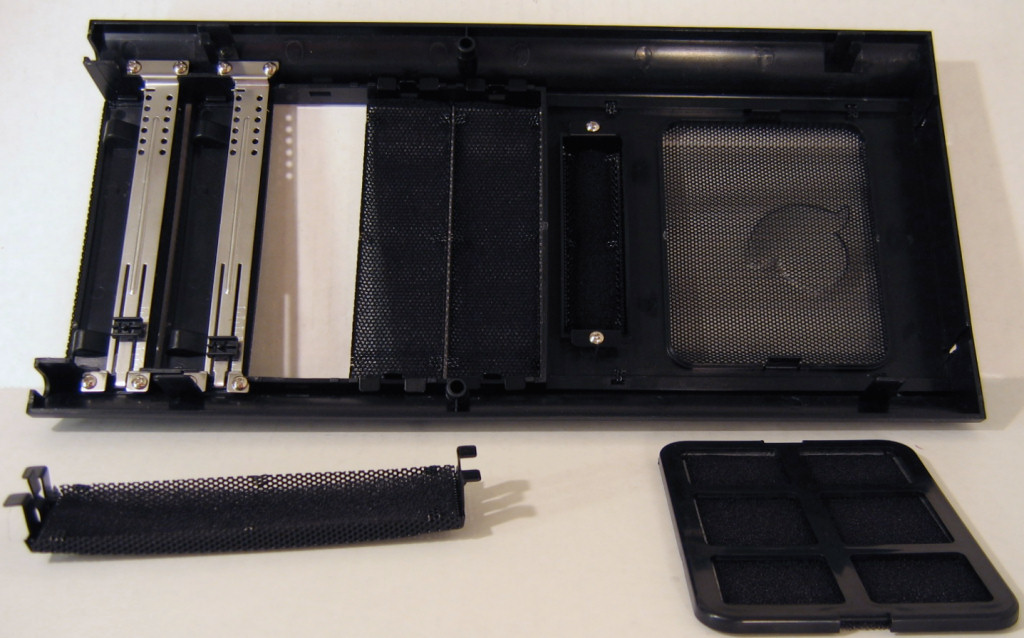
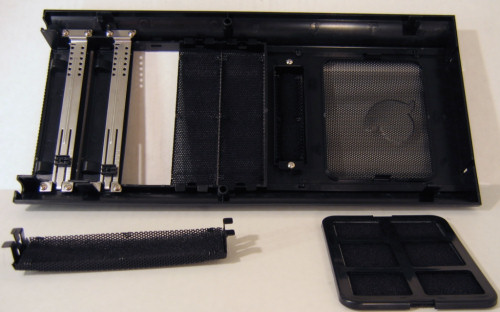
Removing the front of the 530 isn't too terribly difficult, and once it's pulled off, we can get at the removable filters. Each bay over is lined with foam, and the only other place that air can come in is through the 120mm-sized removable filter.
Click to enlarge.
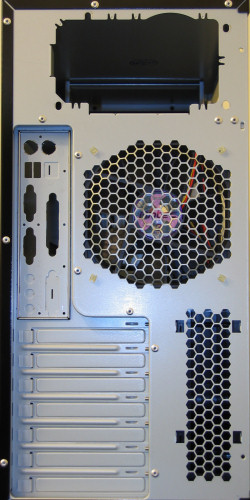
Let's take a look at the back before opening the side of the 530.
Click to enlarge.
The honeycomb pattern of the 120/92/ 80mm fan grill will allow for plenty of air to move through, and we can also see that the case implements tool-less expansion card holders.
CoolerMaster Centurion 530 (cont'd)
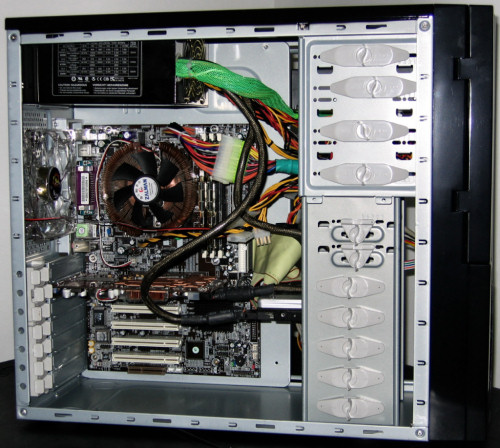
Inside the Centurion 530 is room for five 5¼” drives, something that none of the other cases in our roundup offer. Optical drives simply screw in, but the easily removable side panels make this a very minor complaint. The interior is nice and roomy, and the case seems sturdy enough to keep itself and the parts that it's holding in good shape throughout several years of use.
Click to enlarge.
While the case's drive cages aren't removable, the fact that up to three HDDs can be side-loaded is a major plus. Two more internal 3½” bays sit above the side-loading cage, allowing for a total of five HDDs and one floppy, or just six hard drives.
To use the side-loading drives, plastic rails are simply pushed onto the sides of the disk and then it slides in and locks in place. This is one of our favorite tool-less designs as it's a quick, simple, and secure method.

Another tool-less design can be found on the expansion slots, where CoolerMaster has chosen to use plastic locks that push out the back of the case in a rotary fashion, then push back in against expansion cards to hold them in place.
Click to enlarge.
It's a bit of a shame that the CoolerMaster only comes with one 120mm fan, but if one already has any sized case fan on hand, they can use it to improve the rather poor, out-of-the-box cooling offered by this case.
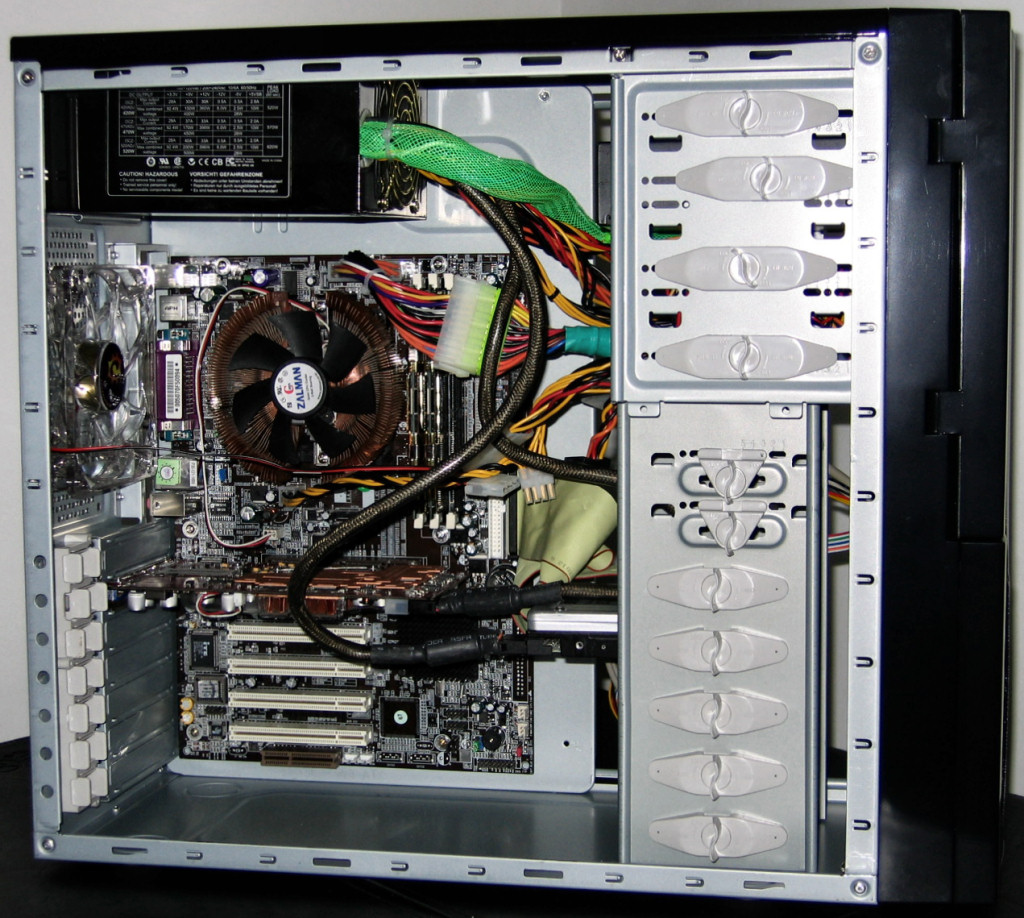
Fully installed, this is what the chassis looks like with our test bed placed inside. The cases that leave even a tiny amount of space between the power supply and motherboard are always easier to work in, and that extra space was easily appreciated, considering the placement of the main power connector on our motherboard.
One last shot showing off the included blue LED 120mm fan lit up - a perfect amount of "bling" for someone not quite willing to get a case with a full-fledged window.
Antec Sonata II
The first of two cases that we'll look at from Antec, a very popular case builder, is the successor to the popular Sonata 1. The Sonata II has changed only slightly on the original in several minor ways, but for the sake of people who are not already familiar with the Sonata, we'll examine the new case in detail.
Click to enlarge.
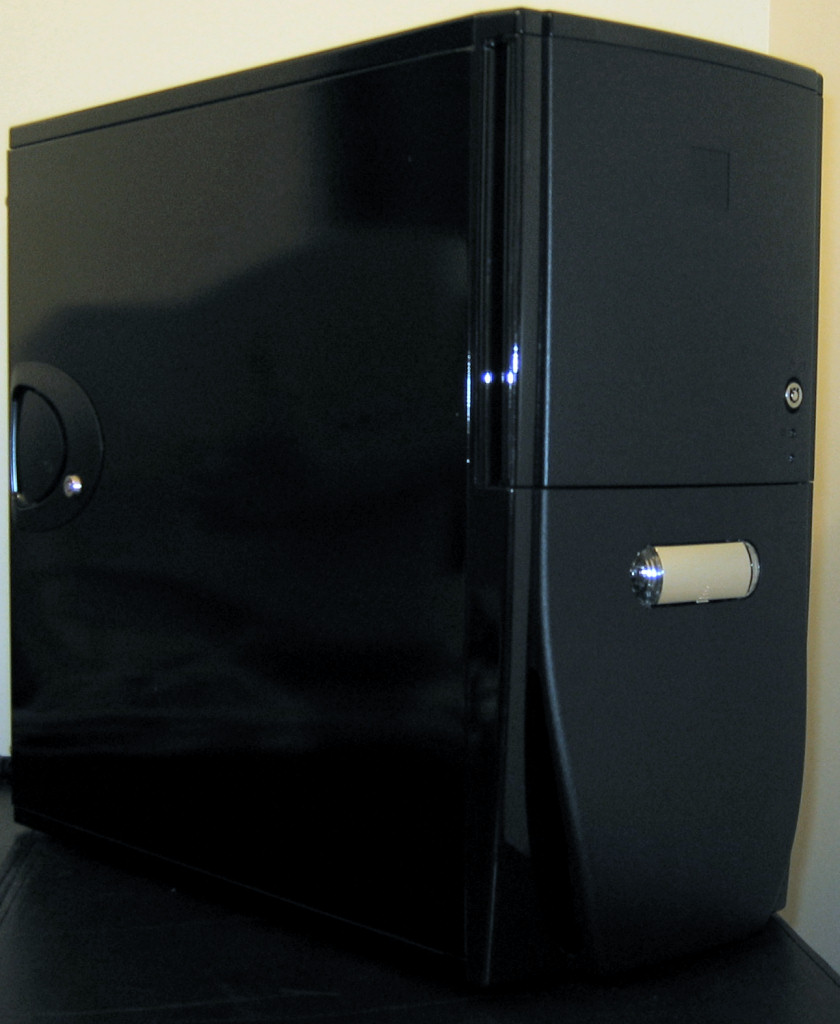
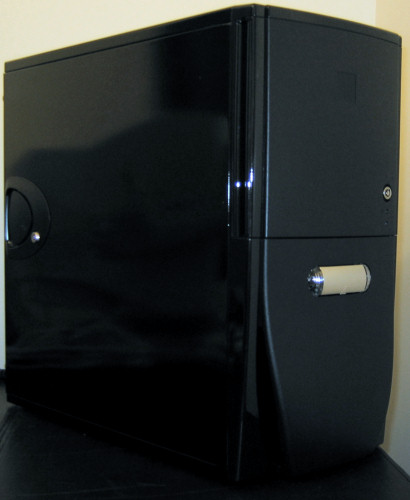
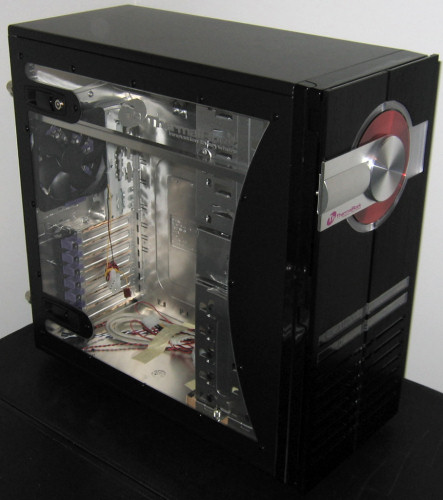
Quite possibly the best looking case that we've looked at here yet, the Sonata II is definitely deserving of a close look for the user who wants a classy machine and not just another box. The high gloss, piano black finish covers the sides and top, while matte black plastic plates make up the front of the chassis.
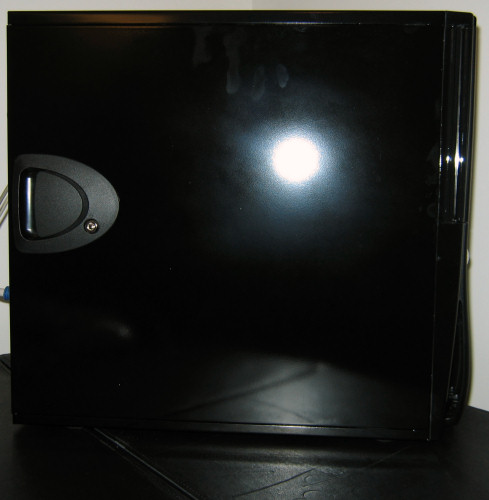
Only the easy-to-use, lockable latch breaks the otherwise immaculate look of the sides. One problem with any finish this glossy is the ease with which it gets dirty by simple handling. Towards the top of the case in the above photograph is a perfect example of this.
The front has been designed to keep functionality to a maximum while keeping as sleek a look as possible.

Click to enlarge.
The drives are hidden behind a double-hinged lockable door, and the bottom half is cut in such a way that there are two large vents for air intake without them being very visible from the front. Towards the top of this half is the covered port cluster, which is flanked by two blue prismatic LEDs.
The chrome cover simply rotates up out of the way to reveal the usual dual USB, single Firewire, microphone, and headphone jacks. Note also in the detail of this picture the texture of the black plastic - thankfully, this surface doesn't share the same problem of getting smudged so easily.
The door opens up to just three 5¼”, but two external 3½” drives. To prevent accidental presses and also to continue the sleek look, the power and reset buttons are also located here.
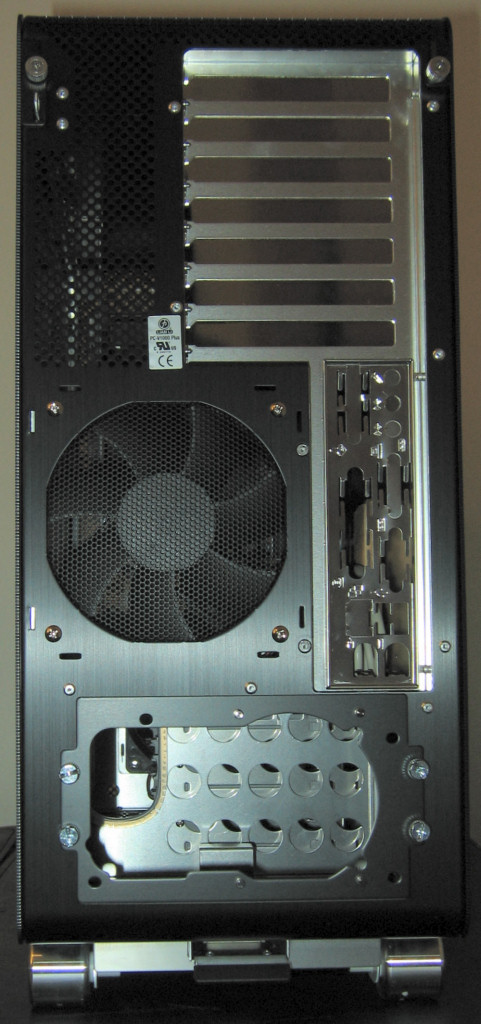
Looking at the rear of the Sonata II, we find the same honeycomb pattern that we just saw on the Centurion, but not just on the rear-mounted 120mm fan - it is also along the right side for the intake duct that we'll notice later, which helps the hottest components to continue to get the cool air that they need.
Antec Sonata II (cont'd)
Something that is often an annoyance with cases is poorly-fitting or just plain difficult to use side panels, and thankfully, the Sonata II is an exception. After removing the panels, the case is quite different looking on the inside from most enclosures.
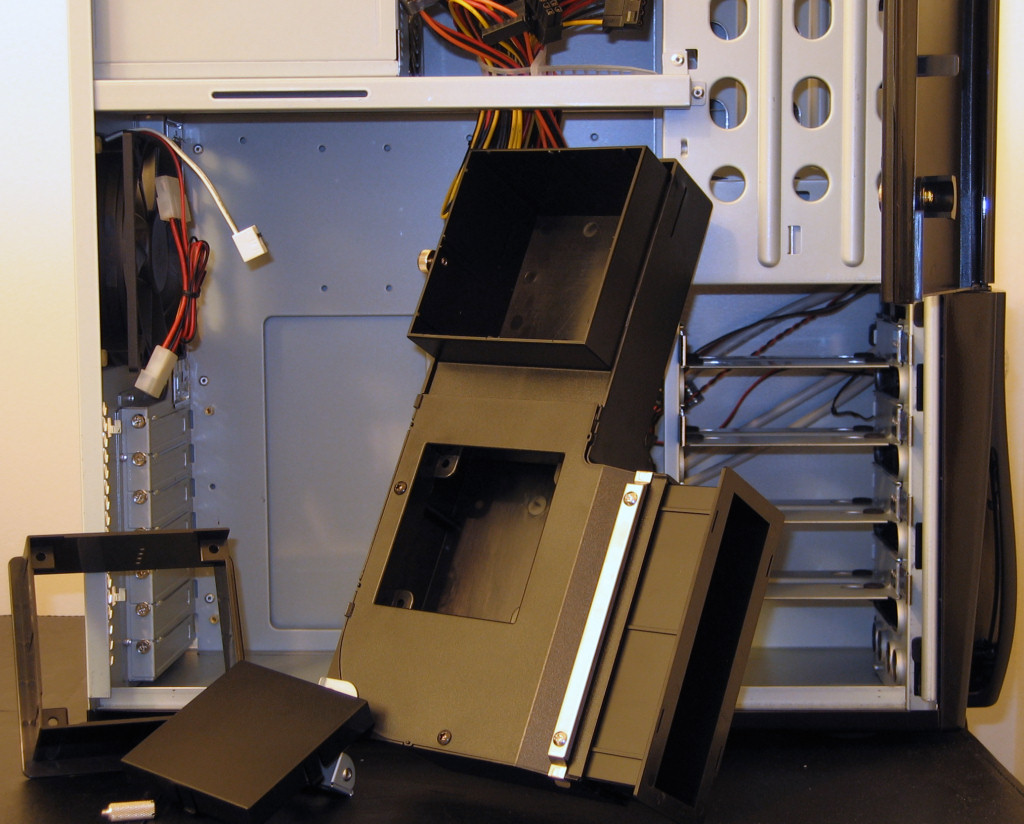
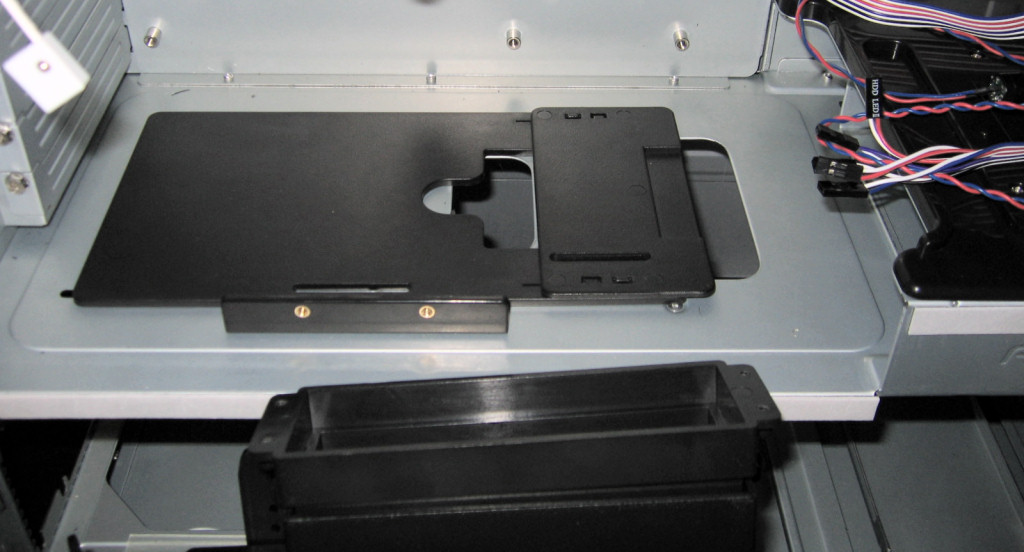
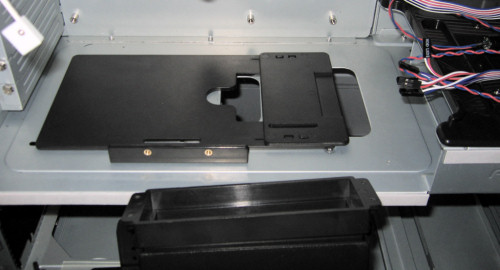
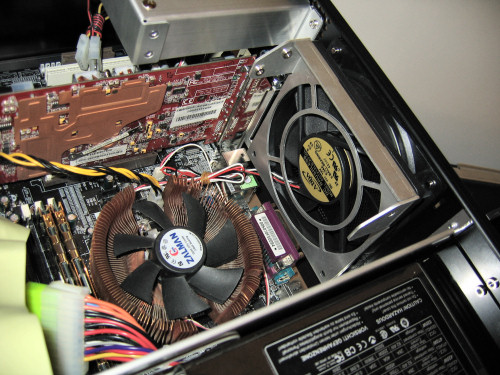
The most notable difference is the large duct that we mentioned earlier, and for a better understanding of this piece, here's a closer shot with it taken out and turned around.

Click to enlarge.
The upper part is where the additional square bracket (pictured on the far left) attaches to cool air directly to the CPU cooler better, and the smaller hole beneath can either be covered by the second square piece to the left or filled in with an 80mm fan for extra air flow directed right at the hottest expansion cards. Since an 80mm fan wasn't included for this purpose, our testing was done with the plastic piece in place. Even without any active parts directly attached to the unit, our Zalman CPU cooler benefited from the direct access to cool air, thanks to this duct.
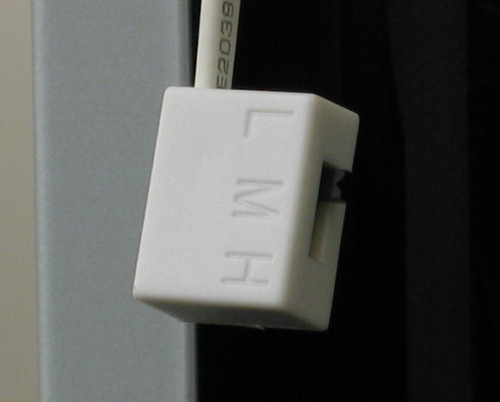
Another nice aspect of the duct is that it is very adjustable to fit a large variety of motherboards to properly place the CPU outlet. However, if there's still no way to get the unit to fit how one would like, it is totally optional and fairly easy to remove. The rear-mounted 120mm fan will still do a lot to help the case keep the CPU and components cool, and it is adjustable to low, medium, and high speeds. Unfortunately though, it is the only included fan, so when set to low, it probably won't be quite enough to keep up with the other cases in our roundup.
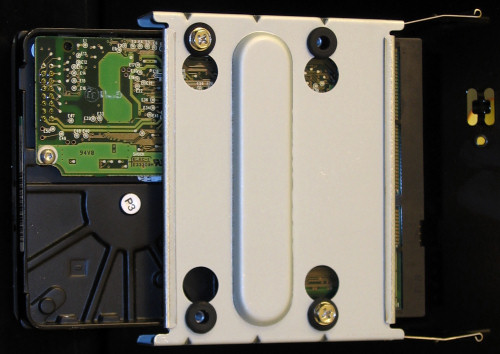
To handle the 3½” drives, the Sonata II implements vibration-deadening sleds that attach to the drives from the bottom.

Since the rubber grommets are completely isolating the screw from the actual metal of the sled, any noise caused by the hard drives should be kept from vibrating the rest of the case. This will go a long way to keep the case very quiet under normal use, and is not something to be overlooked when considering your next purchase.
After screwing in the four screws, the sled is simply put into position until it locks in place. Notice that the Sonata II allows for four hard drives mounted this way, but up to two more could be screwed into place using the external drive sled.
Antec Sonata II (cont'd)
The external drive sled comes out of the front after pressing the tabs in on either side, making it very simple to install floppy drives or a couple of additional hard drives.
Click to enlarge.
For the 5¼” drives, purple rails are used, and much to our appreciation, they are actually held right in the bay covers in pairs, which makes perfect sense.
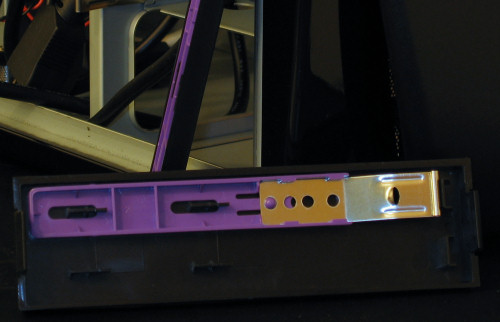
To secure the rails, normal optical drive screws are used, then the drive slides in from the front until it locks in place. While this isn't completely tool-less, it still is easier than having to take off both sides just to install or remove optical drives.
In terms of construction, the Sonata II, just like its predecessor, is a very solid case. Its steel construction definitely has something to do with this, but other elements factor into the equation as well, such as the larger-than-normal crossbar.
Click to enlarge.
This bar will help support the weight of even the largest power supplies out there, but by the time you include the weight of all the steel and beefy components, don't expect this case to be easy to move around.
Before we move on to our next case, we wanted to show at least one shot of the duct placed over our Zalman cooler as best we could muster.
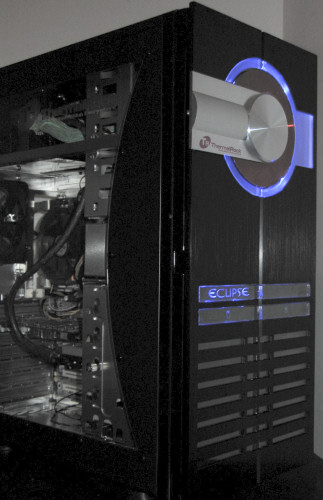
ThermalRock Eclipse
As a smaller division of ThermalTake, ThermalRock's aluminum Eclipse pays many design traits to other ThermalTake cases. Breaking off from tradition though, the front of this one is primarily taken over by a CD holder, which includes a blank red CD-R. No, it is not an actual drive or reader of any sort, unfortunately; it simply holds a CD for storage and looks.
Click to enlarge.
To get at the real drives, the front of the Eclipse opens up with a dual-hinge design and reveals four 5¼” and two 3½” bays.
Click to enlarge.
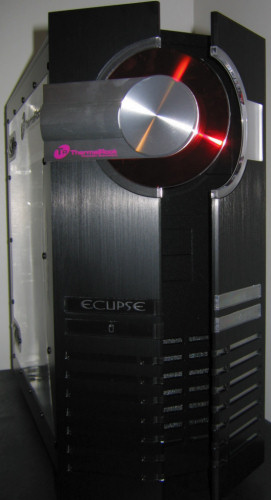
Notice how the Eclipse uses several different finishes to give it a unique look that's classy, yet will still appeal to most gamers out there. The revealed front for instance is a sparkle black not unlike a lot of guitar or even automotive finishes.
Click to enlarge.
Power and reset buttons are hidden to clean up the look of the case when closed, and towards the bottom, the vents for the intake fan can be clearly seen. Getting back to the front before opening the doors, we can take a look at the intake vents there as well along with a couple of other items.
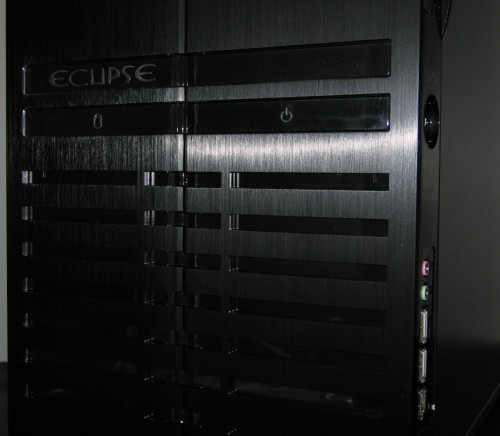
Besides the plastic-embossed "ECLIPSE" insignia, there are also strips that will light up showing that the case has power and there is hard drive activity above the vents as well. Turning the case to the side slightly gives us a better look at the port cluster, which may or may not be the best placement for one's particular setup.
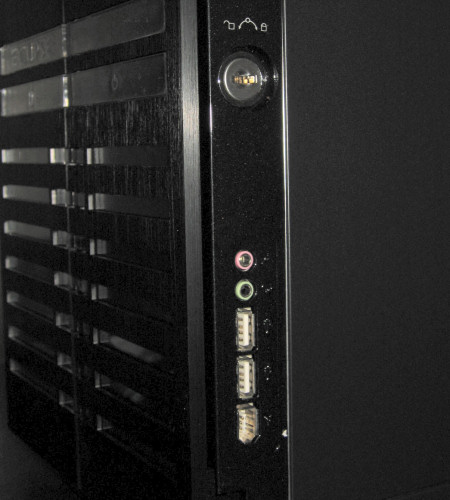
We really wish that manufacturers would space the ports out a bit more on the clusters like this, since more and more devices are coming out that have little to no cable at all, making plugging in more than one peripheral difficult or even impossible. Moving on, there is also the option of locking the entire front bezel here on the side. When unlocked, the bezel can be swung open to allow unrestricted access to the removable dust filter.
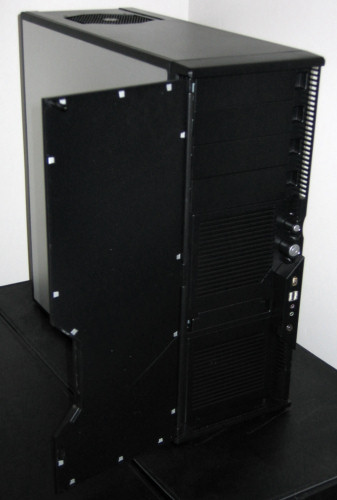
Turning the case 180 degrees, we can see how the Eclipse looks from the rear, and are happily surprised to find massive thumbscrews in typical ThermalTake/ThermalRock fashion.
Click to enlarge.
We can also tell from this one picture that there are two included fans with the Eclipse, both of which are 120mm in size.
ThermalRock Eclipse (cont'd)
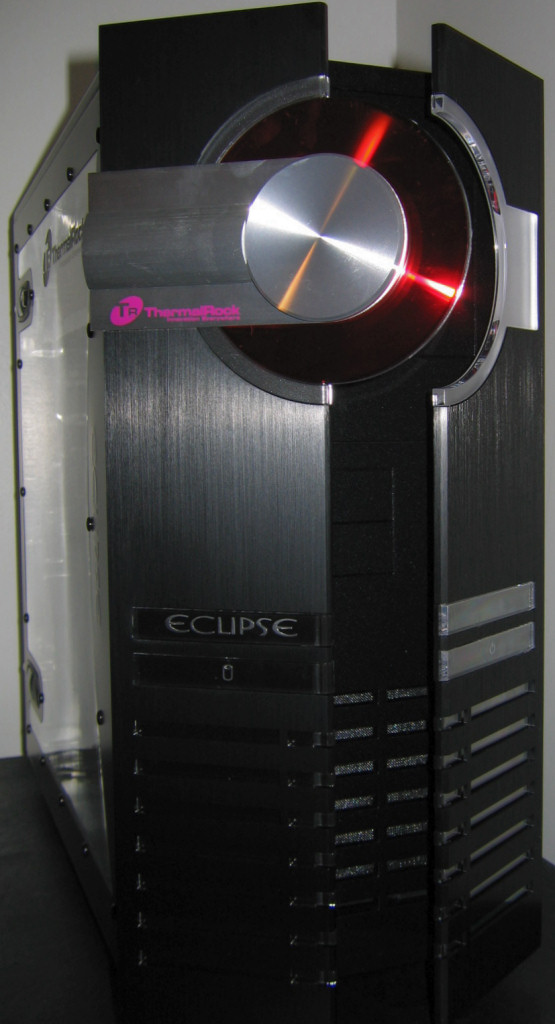
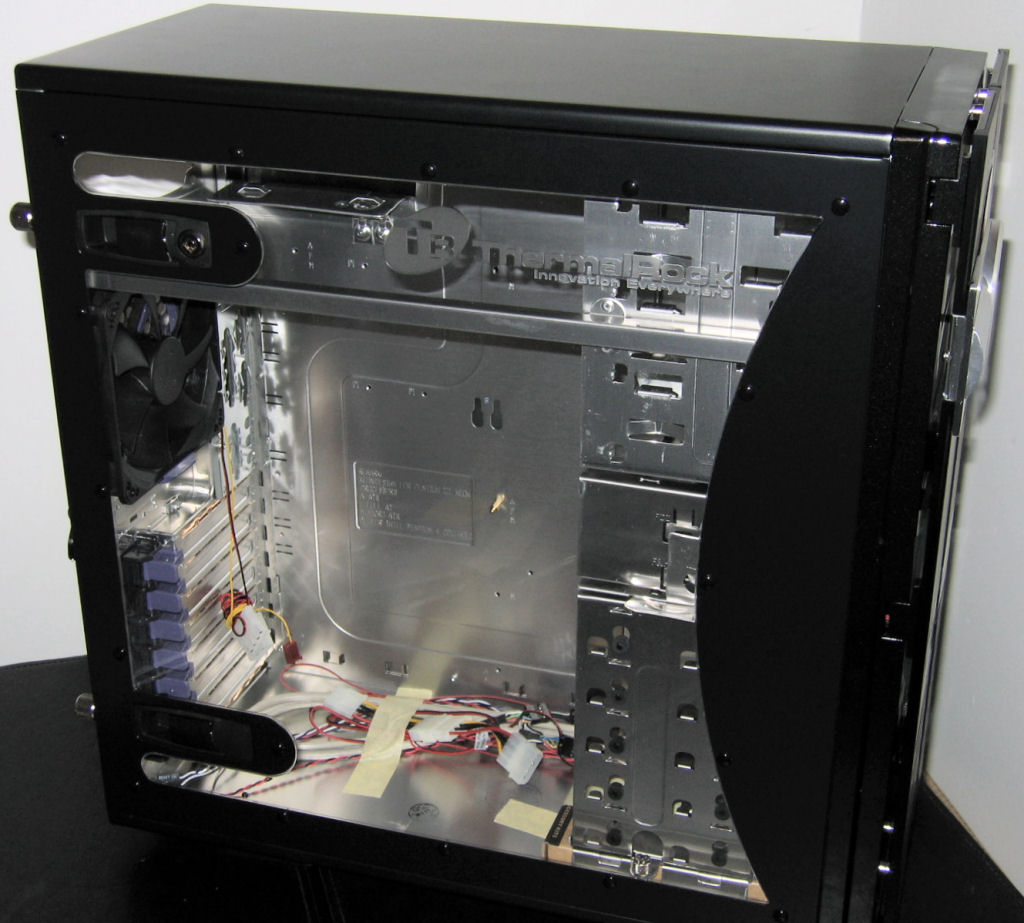
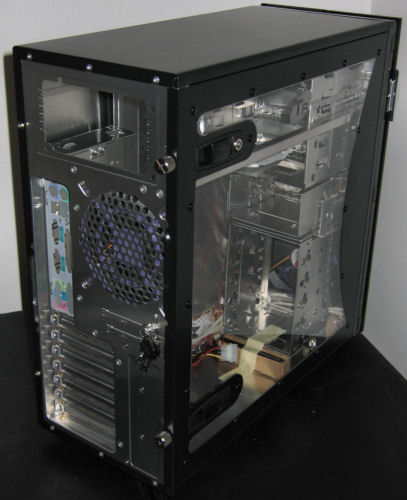
Instead of immediately jumping inside the case, we're going to show just a couple more pictures showing off the side of the Eclipse, as it uses a pretty uniquely-shaped window that really adds to the overall look of the chassis.

Click to enlarge.
All too often, windows on cases are too limiting on what one can see in our opinion, but the Eclipse's side really doesn't suffer from this same shortcoming. Along with giving a great view of the internals, black rivets line the window and an embossed logo also sits there.
As nice as the included "hand screws" are, they aren't even needed to secure the side panel of the Eclipse, since it is also latched at the top and bottom. Just like ThermalTake cases, the side panel of this case removes and attaches so easily that it makes one wonder why they're so clumsy on most cases.
Click to enlarge.
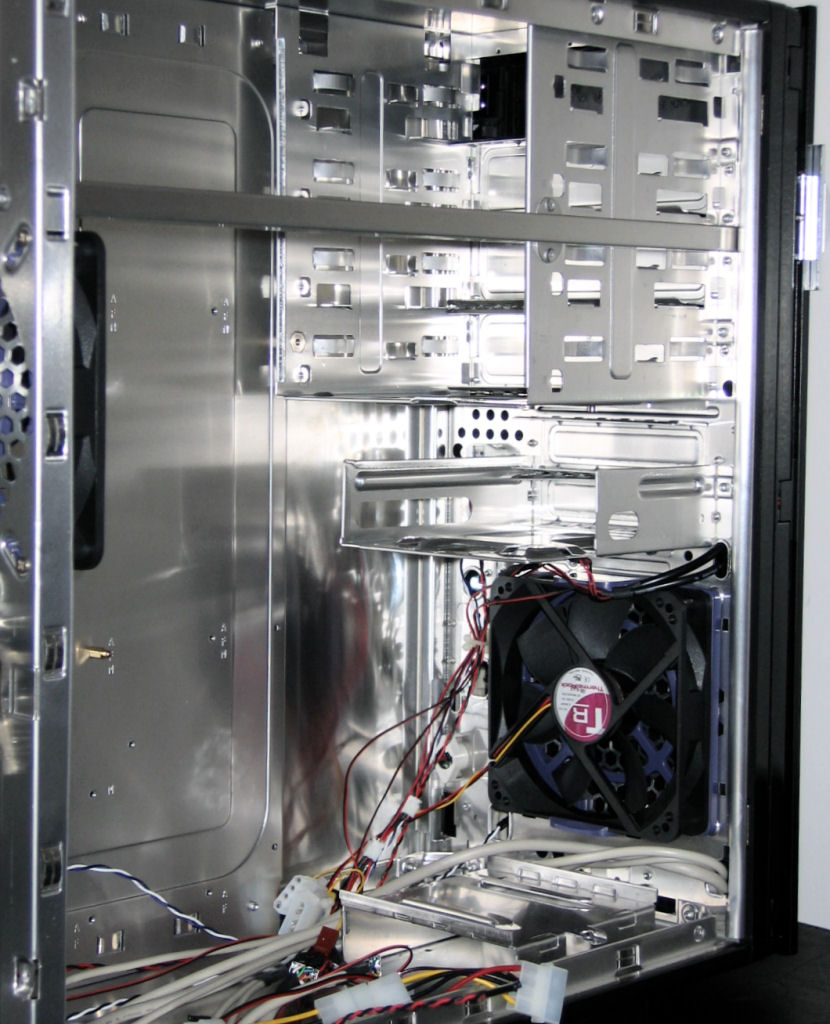
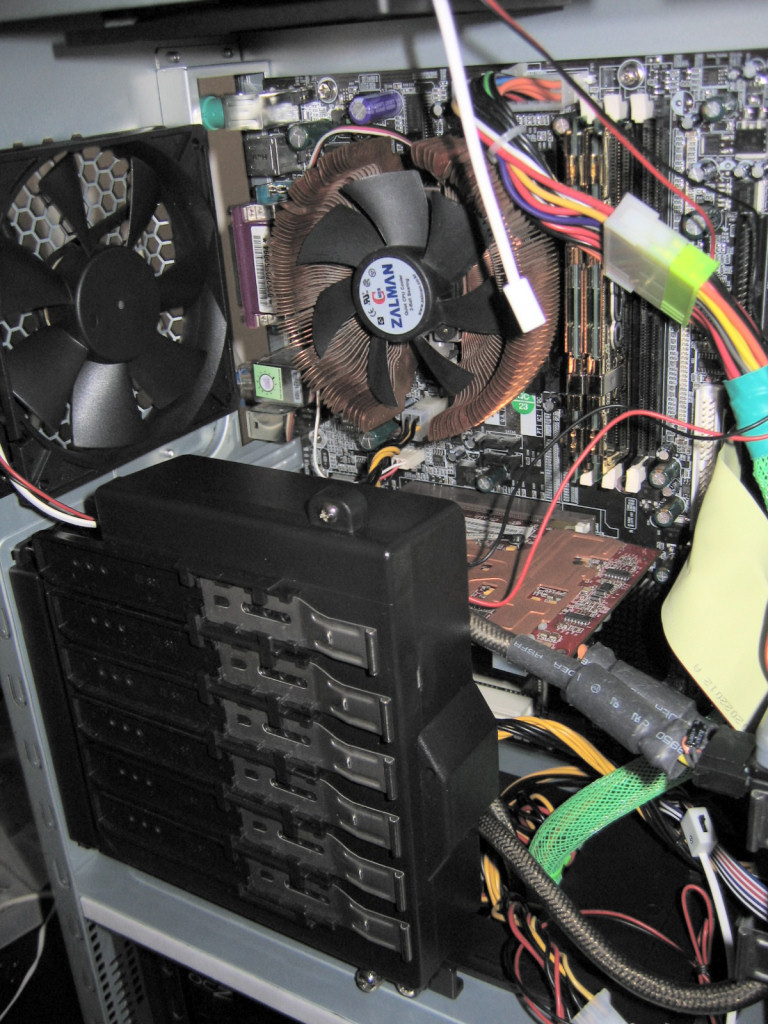
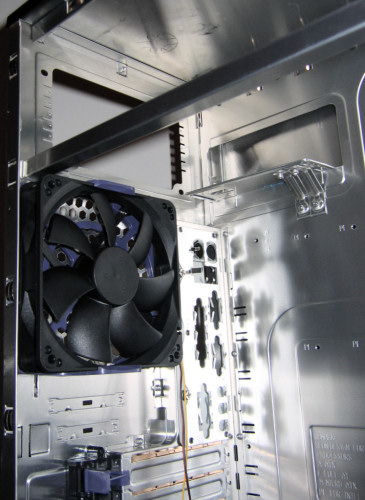
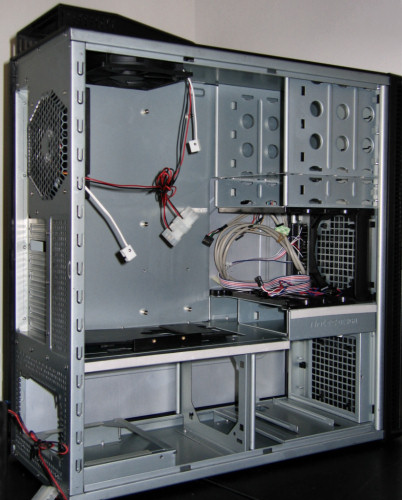
Looking towards the front, this is what we're left with after removing most of the components from the chassis. The large fan in front will help to keep the hard drives cool, and slightly below that is a holding place for the included accessories box.
Click to enlarge.
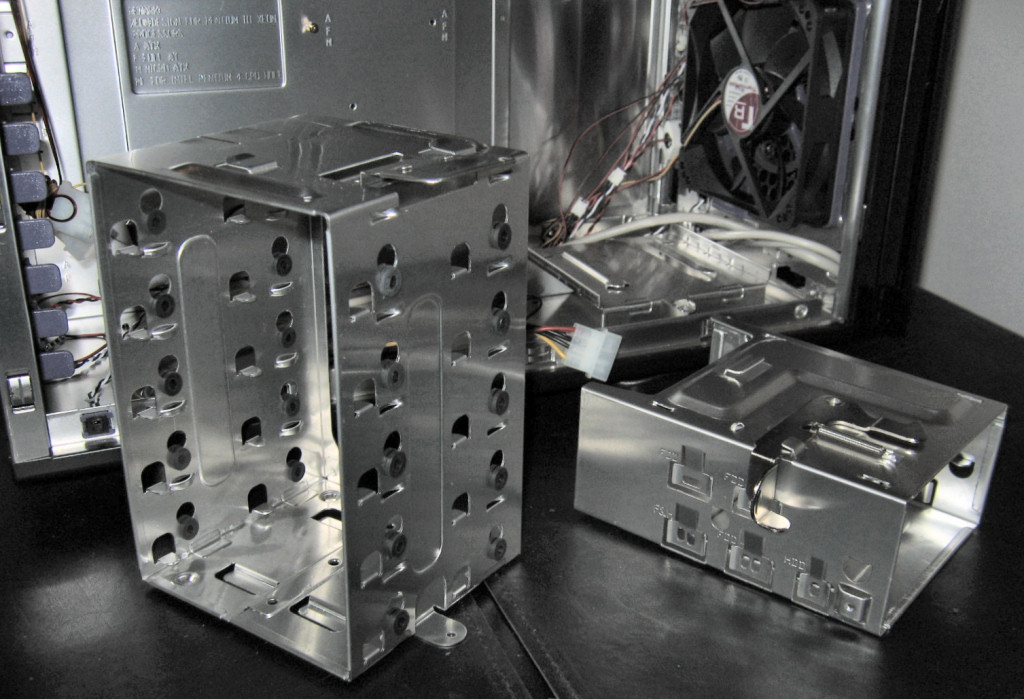
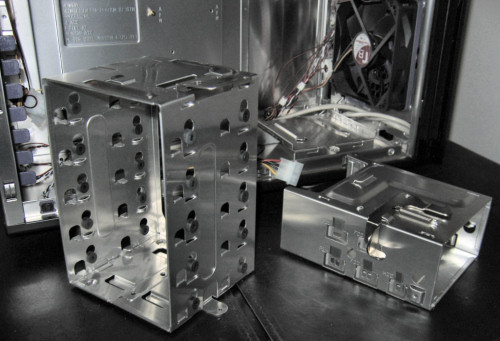
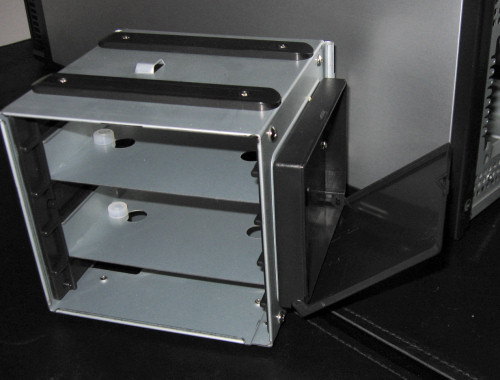
To get a feel for how the Eclipse holds the other internals, here's a shot of the two main removable cages.
Click to enlarge.
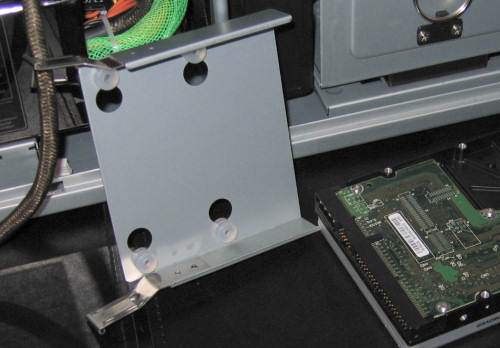
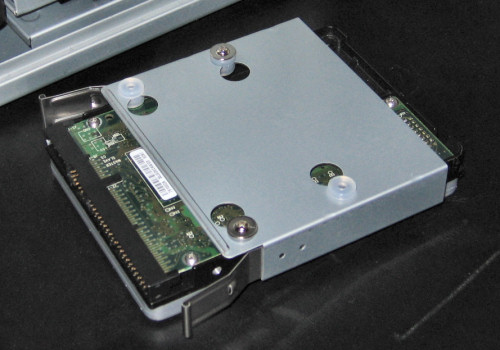
Like the Sonata, this case uses rubber grommets to isolate vibrations from the drives, but unlike the Antec case, these grommets are on the sides of each drive. In the following picture, one can even see how this simple tool-free design can still be very effective at reducing noise.
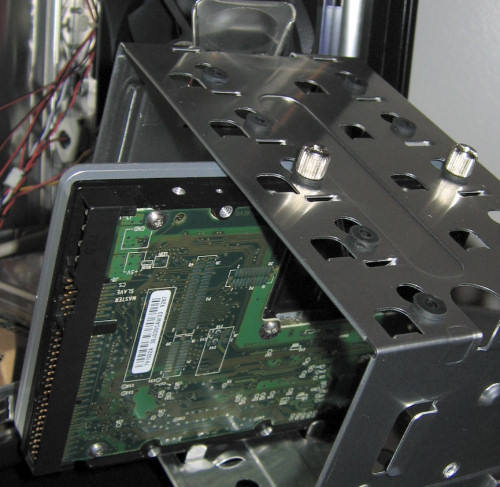
Once the 3½” drives are installed into their respective cages, they slide along rails until they latch securely into place, with the external cage sliding towards the front and the hard drive cage sliding in from the side.

ThermalRock Eclipse (cont'd)
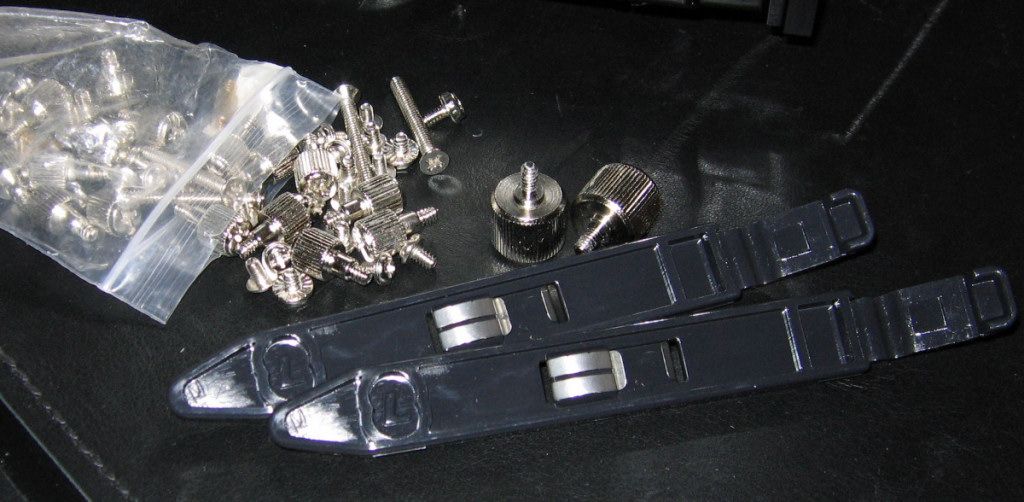
To secure 5¼”-sized drives, rails are once again used, but this time, they are simply kept in the accessories box when they are not in use.

Click to enlarge.
It's also nice that a couple of spares of the giant thumbscrews are included, and plenty of the hard drive thumbscrews as well.
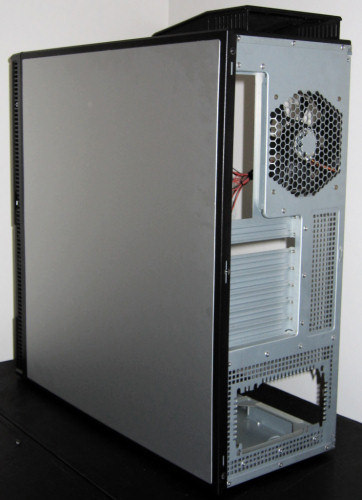
Moving on, the rear of the Eclipse is relatively standard, but a couple of items are still worth mentioning.
Click to enlarge.
First, notice the support for the PSU, as this along with the crossbar will make this a fine case for LAN-ing or just normal transport. Also, you can just barely see one of the tool-less expansion card clips, but this is one area where the Eclipse could use a little work, so we're going to elaborate on them.
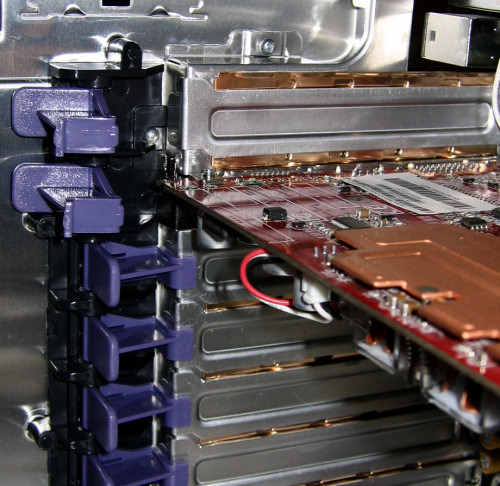
They are designed to simply flip out to allow for cards to be placed into position, but even when fully open, they're not quite far enough away to make inserting a new card completely easy.
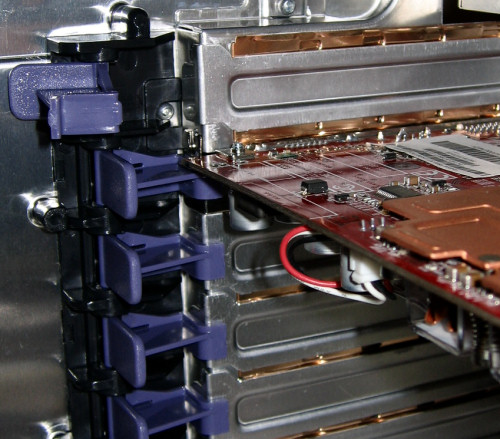
When they are locked in place, they still do not hold a card as firmly as a normal screw would, but if one really wanted the extra security, a screw could still be used as well.
Once our test bed was installed, we took a couple more pictures of the various parts that light up, including the front insignia and power/HDD lights.
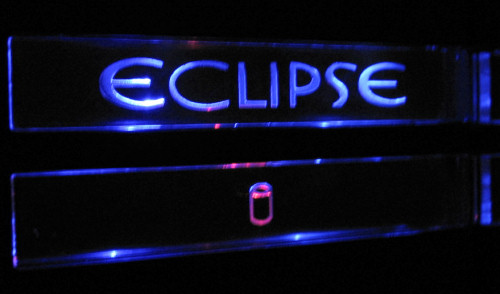
Since the blue is always on as long as the system is turned on, the red led that activates when there is HDD activity actually turns the embossed drive icon a purplish hue, which is a pretty neat effect. The even more significant light is a couple of blue LEDs, which light up the ring of plastic surrounding the CD storage.
Antec P-180
The other case that we'll be looking at from Antec is the P-180. The case was available for as little as $110 - with most shops selling it for much closer to $130 - which is really amazing considering how much case you get for your money. This chassis has really been stirring things up within the community, and not without reason. Let's take a closer look to see what makes this unit so special.

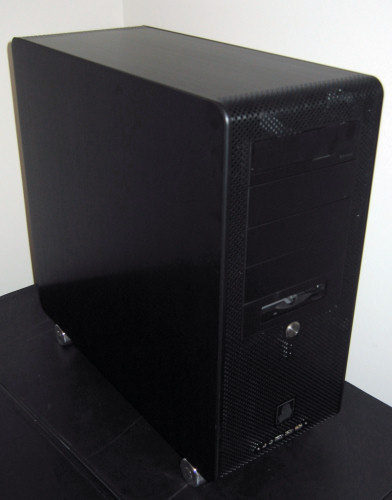
Click to enlarge.
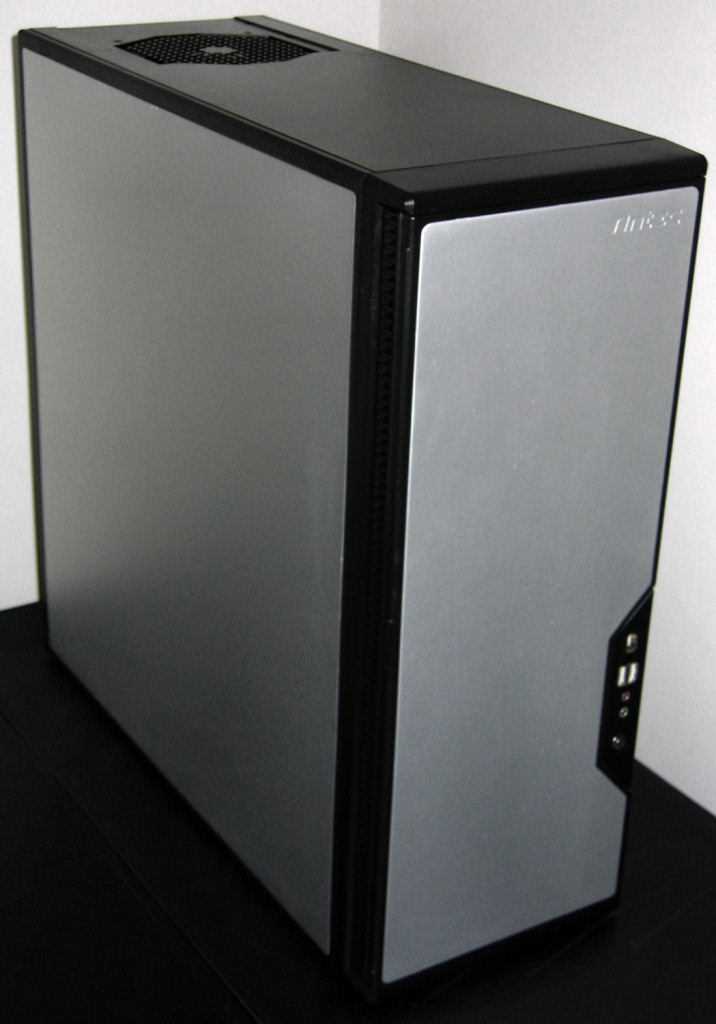
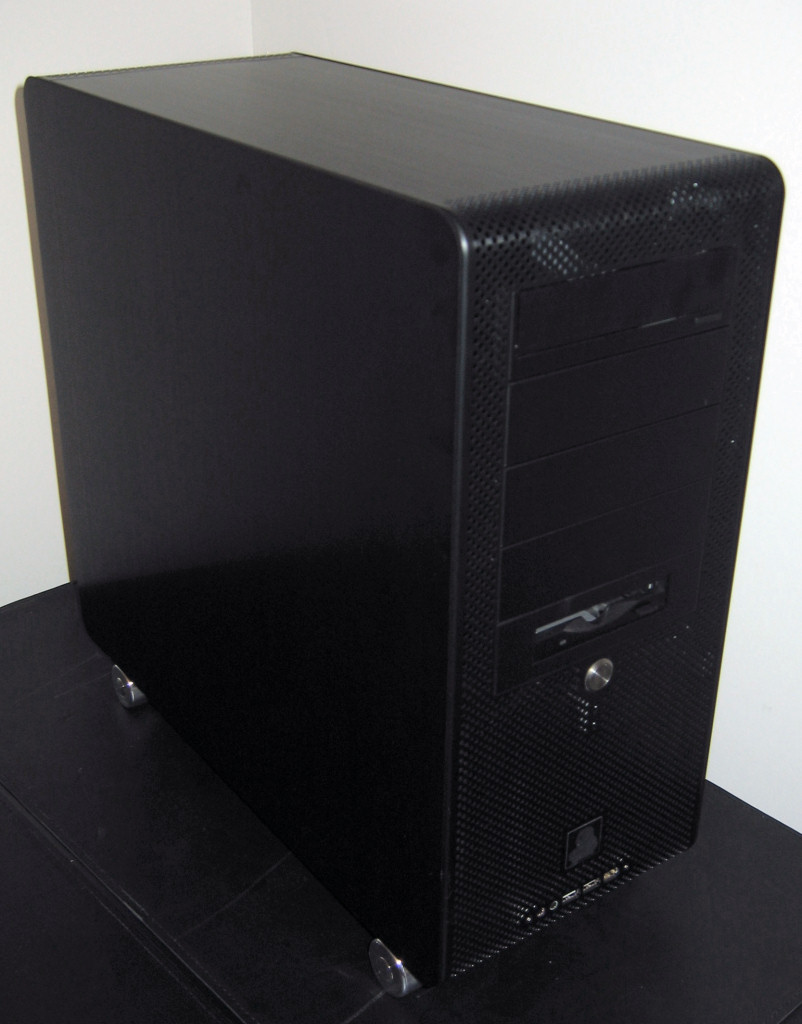
From the outside, this is quite possibly the sleekest looking case that we've ever reviewed. The entire top is black and so is the trim around the edges, but the side and front panel are all aluminum with a silver colored matte finish.
Click to enlarge.
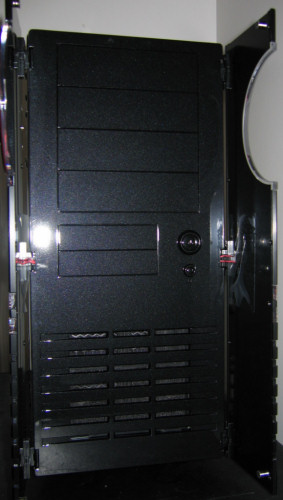
The magnetically latched front door opens (and can continue swinging all the way to touch the side of the case, thanks to the double-hinge design) and reveals the four 5¼” drive bays, the single 3½” bay, and the two 120mm-sized air intakes. In order to pull in air with the solid door closed, the sides extending the door part forwards are lined with rectangular holes, which shouldn't hamper the case's ability to take in plenty of cool air. The filters behind the actual case intakes can be accessed easily by pushing on the hinged plastic grill on the right side.
Click to enlarge.
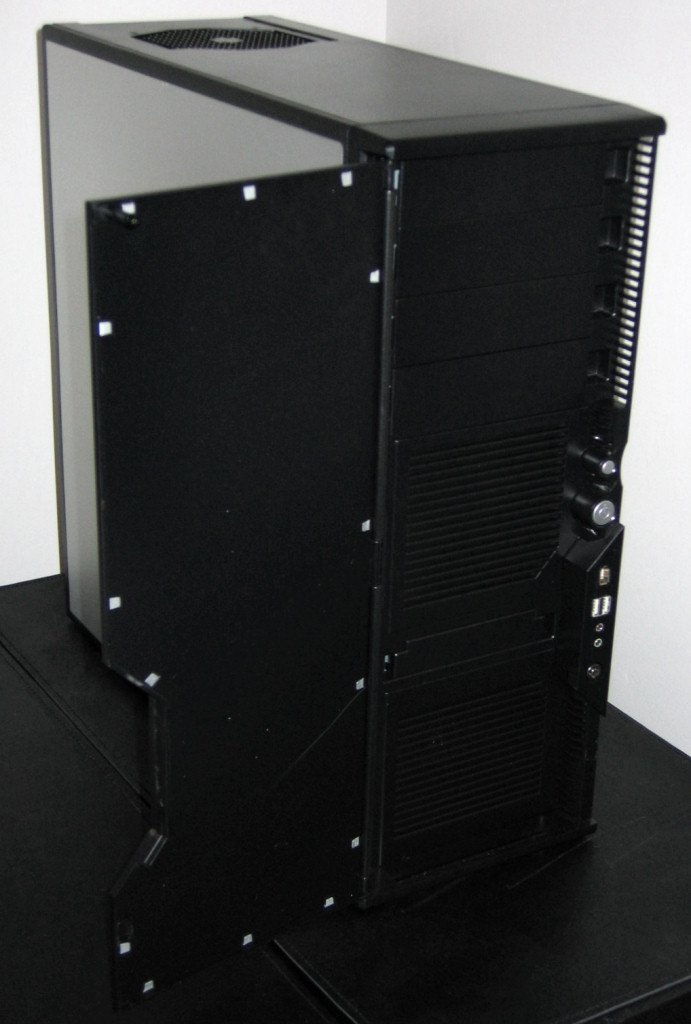
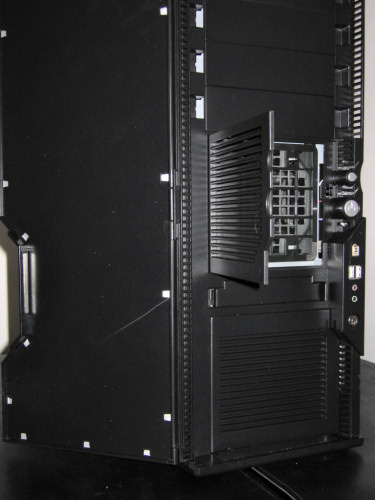
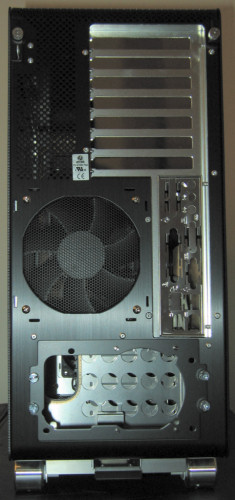
Also viewable in this shot is the P-180's front panel connectors, which include the standard affair of Firewire, USB, and audio connections. Sitting on top at the back of the unit is a removable grill that is designed to help direct some of the warm exhaust air back. In this picture of the back of the case, this grill, the main rear 120mm fan, and the different placement of the power supply are all present.
Click to enlarge.
Right away, we worried about power supply/motherboard compatibility with this case, as a bottom mounted power supply will need a long cable to reach the motherboard power connection comfortably. We'll find out if our test bed installed OK in a bit.
The side panels of the P-180 have a three-piece construction comprised of metal, plastic, and then metal again. The aim in this assembly is to help keep the case as quiet as possible, and since these panels resonate much less than a typical metal sheet, it will indeed do just that.
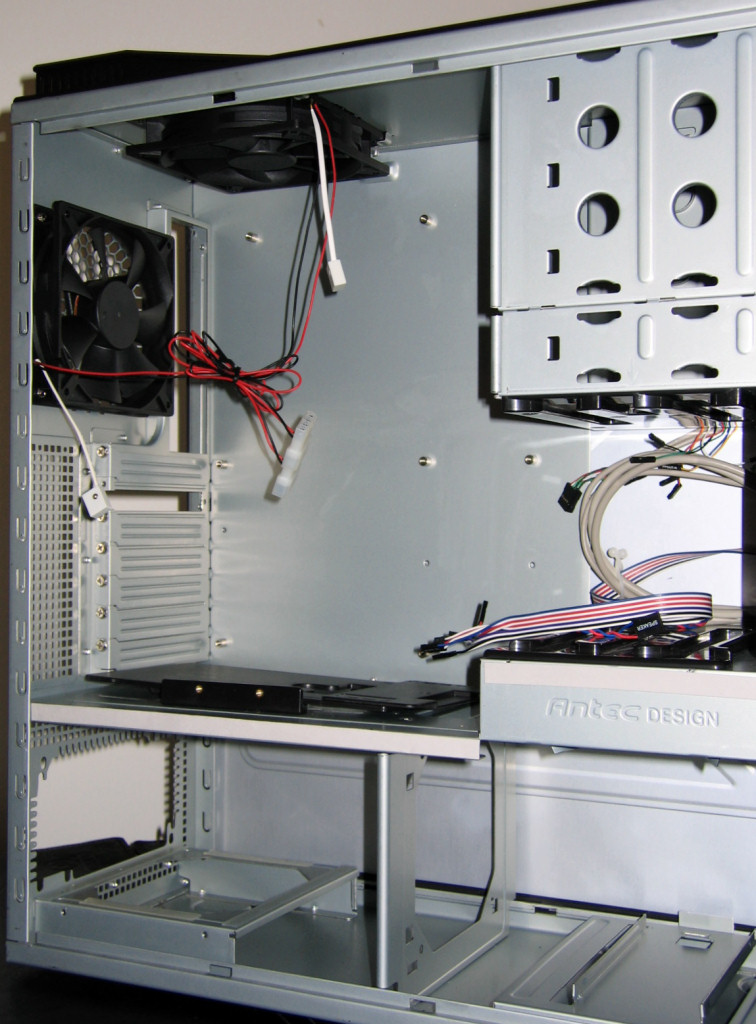
Once removed, we took most of the removable pieces out and were left with a very interesting, two-chamber design. Take a look:
Click to enlarge.
The top portion houses the motherboard, all external drives, up to two hard drives, and two 120mm exhaust fans. The bottom chamber holds four more hard drives and the power supply, and can house one 120mm fan to keep this portion cool.
Antec P-180 (cont'd)
The P-180 has been designed from the ground up to be as quiet as possible, and for once, it seems that a manufacturer has not missed any minute detail. For instance, there are strips of silicone rubber lining where the power supply sits, minimizing vibration noises from its fan(s). They are visible in this picture aimed at the rear of the case that also shows the interior.

Click to enlarge.
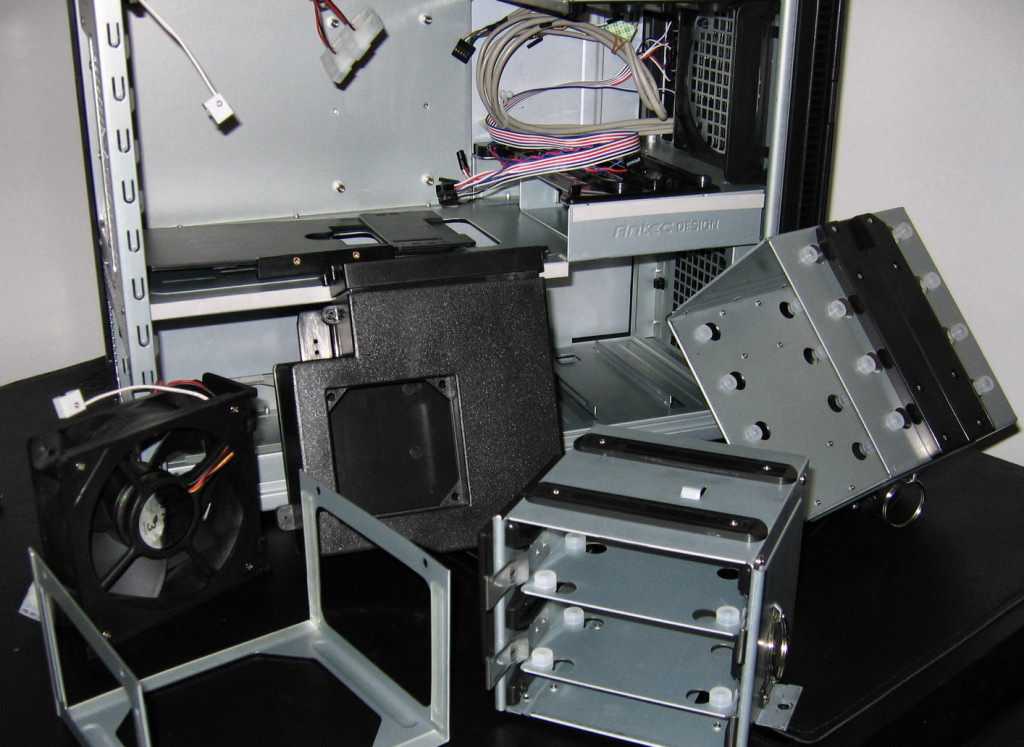
In another effort to keep noise levels to a minimum, all hard drive mounts inside the P-180 have really soft silicone-rubber grommets that extra-long bolts go through in order to secure the drive. In this shot of all the components that we removed, you can see the grommets on both hard drive cages.

Click to enlarge.
The cages are also designed so that there is ample room in-between each drive for airflow. While this certainly is a valid concern, we think that it might have been nicer to be able to hold three drives in the top cage rather than use that whole space for only two drives. Another convenient add-on to the top cage is an accessory box for holding bolts and other spare parts.
To actually install the hard drives into this upper cage, the drive "sleds" are first removed so that the extra-long bolts can be used to go through the silicone grommets into the bottom of the drive. In practice, this - along with the dampening side panels - really does help to quiet a noisy hard drive.
And here is an attached drive ready to go back into the cage.
Yet another case in which Antec has paid attention to detail is how the rings that help one pull the cages out can be pushed into place so that they will not make any noise by rattling around. Also, similar to the rubber strips that we talked of earlier are the foam strips on either side that sit in-between the steel and the side panel to reinforce the side panels from reverberating in yet another way. Read on to find out how this intricate case keeps its components cool.
Antec P-180 (cont'd)
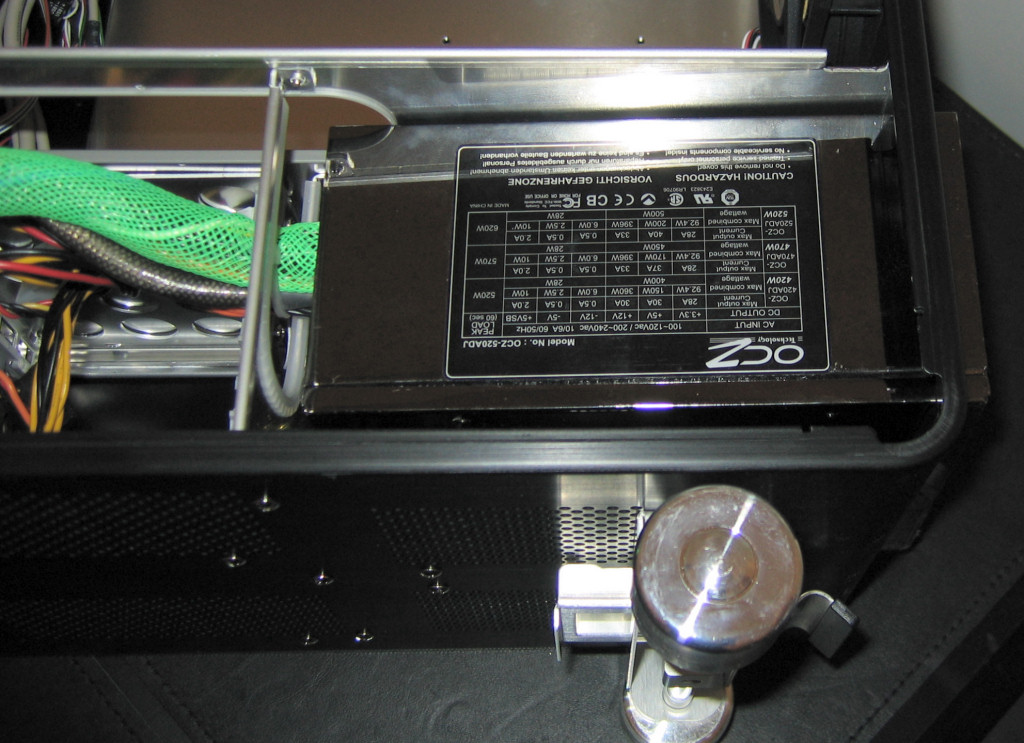
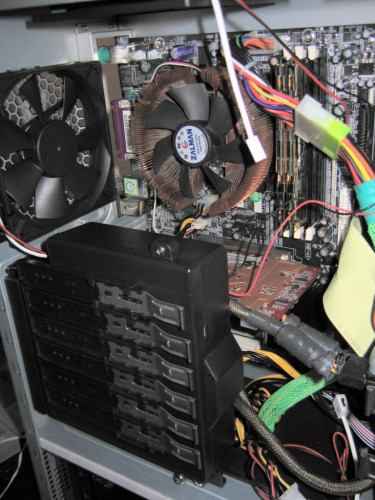
The P-180 ships with an unprecedented
three 120mm fans, each of which has a switch identical to the ones that come with the Sonata. Out of the box, they are attached on the top panel pointing out, the rear panel pointing out, and the last is in the bottom chamber between where the power supply goes and the hard drive cage, directing air towards the power supply. Right away, we ran into a problem, however, with this third fan, as the power supply that we used for testing was too long to allow us to keep the fan where it was. To solve this problem, we made use of the case's fantastic customizability, and moved the fan to the other side of the bracket and turned it so that it was still blowing air towards the PSU. In this arrangement, it is no longer possible to put standard hard drives into the bottom drive cage, but there is still room for two in the upper cage anyway, so this was not a problem for us. In this picture, the bottom cage is half-way out, and the piece that holds the ring in place, both the upper and lower plastic rails on which the cage slides, as well as the tabs that the fan cage uses to hold the fan in place, are all visible.

Click to enlarge.
The fact that we didn't use the included mounting bracket for the power supply is apparent from this picture as well, and the reason why is because we actually found it harder to fit out power supply into this bracket than just fastening it directly to the back plate. Ideally, this bracket's six rubberized strips could be used to keep vibrations from the power supply isolated, but our OCZ unit is rather quiet anyway.
As we mentioned earlier, the sheer design of this case - namely the decision to put the power supply at the bottom without inverting the motherboard - creates a potential problem: the motherboard power cables might be really tight, or unable to reach at all. With our Chaintech motherboard, we were actually testing just about the worst-case scenario, given that its power plug is at the very top of the board. Luckily, since we have to use the 24 to 20 pin adapter, our OCZ PowerStream power supply has enough cable to make the trip comfortably. This is definitely something to keep in mind, however, if one has an existing power supply and/or motherboard that they'd like to use in this case.

Click to enlarge.
What is also visible in this picture is Antec's attempt at a system to isolate the two chambers thermally. The black plastic piece that the cables are going through can slide in two separate ways to make cable routing easier, but then slide back to provide a seal to keep the air moving only within each chamber.
Click to enlarge.
Depending on one's particular setup, this cover could be used rather effectively or barely at all, depending on how many cables are needed to go through the two openings into the bottom chamber. For us, we must admit that we found the cover to be a bit more clumsy than useful, but this might not be the case for someone else.
One last piece to investigate with this case is the PCI card air duct. After everything else in the case was installed, the duct can be put into place and fastened through the back vent holes and at the bottom with two included bolts.
Click to enlarge.
In our components picture on the previous page, the hole where an additional 80mm fan can be attached is visible, and it is this fan that would pull cool air from outside and direct it at the video and other cards to help keep them from getting too hot. Without the 80mm fan installed, the 120mm fans actually create enough suction to pull some air through this duct anyway - as long as they're on the medium or high speed setting - so purchasing an additional fan isn't totally necessary to make this duct usable. It also serves as the holder for the 5¼” drive rails, so losing them shouldn't be a problem; something that certainly can be in frequent traveling or uninstalling/reinstalling expeditions.
Lian Li PC-V1000
And finally, at the highest price point out of our selection, is the case that comes with our recently reviewed F1B desk. Since we have
already reviewed this case in great detail before, we will only be using the case as a base of comparison and highlighting a couple of points regarding its price premium over the other cases in this roundup. The PC-V1000 was available for as little as $180, but typically closer to $200.
Click to enlarge.
Another reason why we'll show a bit of this case again now is because in our first review, we looked at a silver case, and this one is finished in black, which gives it a rather drastically different look.

Click to enlarge.
However, the most important reason why we're looking at this case again is because this time, the case came with even more cooling accessories, which will change the case's abilities to cope with high temperatures.
Click to enlarge.
For a quick recap of what makes this case so unique, a quick glance at this picture does the trick. The PC-V1000 inverts the typical computer, placing the power supply in its own area along with the hard drives, while the motherboard and external drives are all accessed via the other side of the case.
We noted before how the power supply compartment has issues with large power supplies, but after a careful inspection of this black model, we found a way to compensate for the problem.

Click to enlarge.
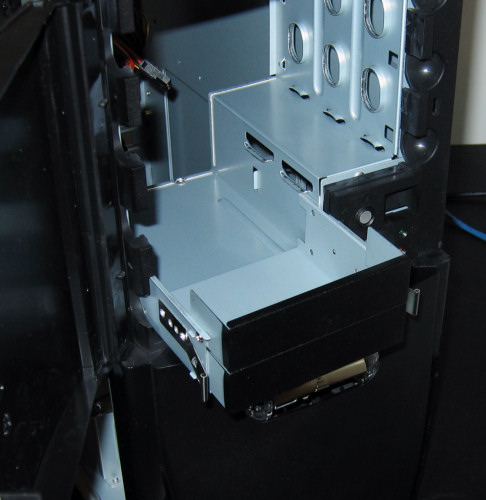
The problem is that there is a dividing plate separating the PSU from the second set of hard drives, and it is this plate that prevents longer supplies from fitting properly.
With this black model, this plate is removable, allowing the supply to slide all the way, but at the cost of making some of the hard drive bays difficult to impossible to use.
With even two of the bays hard to reach now, there are still four usable bays, which will be more than enough for most users.
Click to enlarge.
Lian Li PC-V1000 (cont'd)
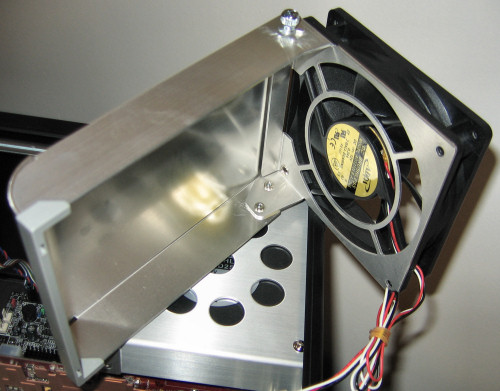
The first of the two extra cooling accessories is a large blower fan designed to help draw the rising hot air out of the inverted case.

This piece simply mounts with included screws directly to the perforations in the back of the case, which allows for the fan to be moved to many slightly different positions.

The second addition is simply an attachment for the included rear 120mm fan.

Normally, the fan just pulls air in the surrounding area equally, but after attaching a special piece, a shroud can be added as well.
With the shroud attached, the fan should only pull air directly around the CPU area.
If one wants, the shroud could be locked in a position that keeps it at a good distance from the CPU cooling hardware, allowing for more air from the rest of the case to be pulled out here as well.
However, the shroud can also be lowered very close so that the CPU is pretty much the only hardware benefiting from the additional cooling. We will test the PC-V1000 in this configuration to see how well this approach works.

Overall, the PC-V1000 is a joy to work in - the side panels are second to none, the side-mounting hard drive system works flawlessly, and the inverted design actually makes the case quite easy to work in, as opposed to the P-180's "half inversion", which can be very limited by the length of the power supply leads.
However, cases like the P-180 and Eclipse implement many more sound dampening features, and we'll notice that when we get to the sound benchmarks. In the end, we think the price-premium for a case like the PC-V1000 is a tough sell, considering how much you can get for your money from other manufacturers.
Benchmark Comparisons
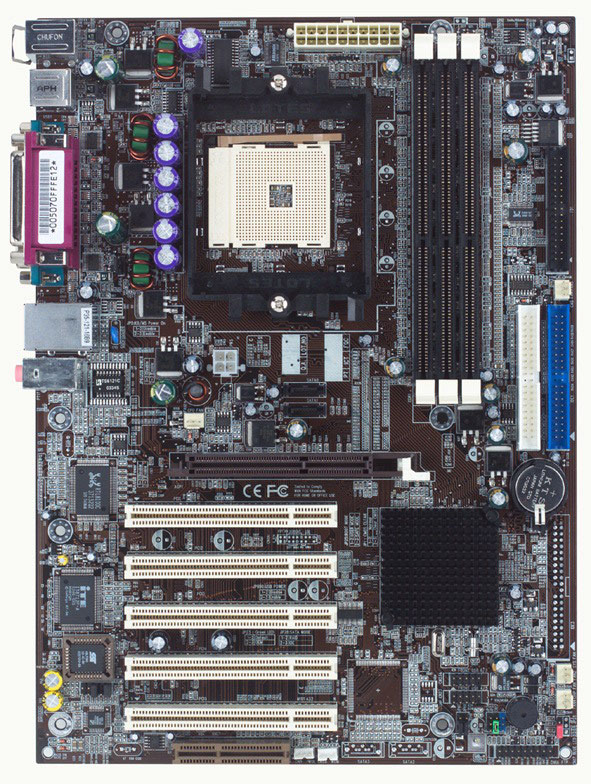
To get as meaningful a comparison as possible between the different cases, we installed the same set of hardware into each one, our standard ATX test bed.
| ATX Test Bed |
Chaintech VNF3-250
AMD Athlon 64 3200+
OCZ PC3200 512MB DDR x 2
Zalman CNPS7000 Copper
Western Digital IDE Hard Drive
Sapphire 9800XT AGP8x |

Click to enlarge. |
We have compiled the results of all the head and noise testing into a master chart. Cases with variable-speed fans were tested first on their highest setting and then on their lowest setting to get the two different audio measurements. The "Exhaust" column refers to the temperature of the air coming out of the unit's main rear exhaust vents, where if there were more than one fan, the highest temperature was used.
| Heat and Noise Comparison Chart |
| Case |
Component Temperatures (idle/full load) |
Air Temperatures |
dBa Measurements |
| CPU |
GPU |
N. Bridge |
PSU |
Exhaust |
Front |
Rear |
Top |
| X-Cruiser |
45 / 54 |
64 / 71 |
34 |
33 |
31 |
42 |
55 |
58 |
| F3323 |
42 / 53 |
63 / 69 |
31 |
32 |
28 |
40 |
42 |
41 |
| Trio |
44 / 54 |
67 / 72 |
36 |
36 |
29 |
41 |
42 |
41 |
| Sonata II (low) |
45 / 59 |
67 / 72 |
34 |
34 |
30 |
41 |
40 |
39 |
| Sonata II (high) |
43 / 57 |
66 / 71 |
33 |
34 |
29 |
54 |
62 |
57 |
| Centurion |
48 / 59 |
67 / 73 |
36 |
35 |
34 |
40 |
42 |
40 |
| P-180 (low) |
47 / 58 |
66 / 71 |
34 |
33 |
32 |
38 |
39 |
39 |
| P-180 (high) |
44 / 55 |
64 / 69 |
31 |
29 |
28 |
60 |
62 |
61 |
| Eclipse |
43 / 56 |
64 / 70 |
31 |
34 |
32 |
40 |
41 |
40 |
| PC-V1000 |
42 / 55 |
64 / 72 |
38 |
36 |
32 |
44 |
58 |
40 |
So, are you really getting what you pay for with these units? It certainly seems that this is the case with the P-180 and PC-V1000, as they both pull away with the best temp/noise numbers, but for nearly half the cost, the X-Cruiser puts up great temperatures as well, thanks to its CPU shroud, albeit at the cost of a bit more noise.
Interestingly, the F3323 also looks like an amazing deal from this chart, but those numbers must be taken with a grain of salt as we used a particularly high-performance fan, which although doesn't show up as a loud unit on our dBa meter, does make a rather audible metallic-sounding whine. If the type of noise isn't much of a problem, perhaps the greatest lesson to take away from this entire review is: all that a case really needs to cool rather well is one, high performance fan. For most users, however, the use of several quieter fans would be more ideal, and this is where a design such as the P-180 really comes out with a major advantage.
One other interesting point to elaborate on is the difference in dBa ratings taken from different sides of the cases. For most users, the top and front measurements should be the main ones to focus on. Notice how the V1000 is only quieter than the Antec cases when their fans are set to full-blast. This is probably due to the blower
and 120mm running at their stock voltages. With the use of a fan controller, this noise could be controlled much better. In addition, it does look like using the air deflector inhibits the power supply's ability to exhaust air easily, as it has the highest PSU air temps.
Feature Comparisons
To take into account the heat performance, we added all the temperatures together and then ranked the cases from coolest to warmest. We did the same thing with the dBa values as well. Note that these "total" numbers have no real-world value at all. They're simply being used to give the cases another value for which to judge them against each other.
Here is a breakdown of how all the cases scored:
| Attributes |
X-Cruiser |
F3323 |
Trio |
Centurion |
Sonata II |
P-180 |
Eclipse |
PC-V1000 |
| Ease-of-use |
2 |
2 |
2 |
2.5 |
2 |
3 |
2.5 |
4 |
| Sturdiness |
1 |
4 |
2 |
3 |
3 |
3 |
2.5 |
3 |
| Included Fans |
2 |
0 |
2 |
1 |
1 |
3 |
2 |
3 |
| Front Door |
1 |
0 |
1 |
0 |
1 |
1 |
1 |
0 |
| Stealthy CD Drives |
0 |
0 |
0 |
2 |
0 |
0 |
0 |
1 |
| Removable Drive Cages |
0 |
0 |
0 |
0 |
1 |
2 |
2 |
0 |
| Side-loading HDD's |
0 |
1 |
0 |
1 |
1 |
0 |
0 |
1 |
| Drive Rails (cages or drives) |
0 |
1 |
0 |
1 |
1 |
1 |
1 |
1 |
| Soft HDD Grommets |
0 |
0 |
0 |
0 |
1 |
1 |
1 |
0 |
| Lockable |
0 |
0.5 |
0 |
0 |
1 |
1 |
1 |
0.5
(with padlock) |
| Front Port Cluster |
1.5 |
1 |
1.5 |
1 |
1 |
1 |
1 |
1 |
| Removable Filters |
0 |
0 |
0 |
1 |
0 |
2 |
1 |
1 |
| Tool-less 5¼" Drives |
0 |
1 |
1 |
0 |
1 |
0 |
1 |
0 |
| Tool-less 3½" Drives |
0 |
1 |
1 |
1 |
0 |
0 |
.5 thumbscrews |
0 |
| Tool-less PCI slots |
0 |
1 |
1 |
1 |
0 |
0 |
1 |
.5
thumbscrews |
| Built-in meters |
2 |
0 |
2 |
0 |
0 |
0 |
0 |
0 |
Total dBa /
rank
(out of 9) |
155/8 |
123/5 |
123/5 |
122/4 |
(low) 120/2
(high) 173/8 |
(low) 116/1
(high) 183/9 |
122/3 |
142/6 |
Total temp/
rank
(out of 10) |
332/4 |
318/1 |
338/6 |
352/10 |
(low) 342/9
(high) 333/5 |
(low) 341/8
(high) 320/2 |
330/3 |
339/7 |
| Anti and Extra Features |
| |
Top fan conflicts w/PSU |
Motherboard mounts finicky |
Tool-less PCI locks poorly designed |
|
|
PSU far from motherboard |
Tool-less PCI locks could be better |
Big PSU's make it hard to fit six hard drives |
| |
-1 |
-0.5 |
-1 |
|
|
-0.5 |
-0.5 |
-0.5 |
| |
|
Easy side door |
|
Five 5 1/4" bays |
Duct for expansion cards |
Extra sound dampening |
Light weight |
Easy side doors |
| |
|
1 |
|
1 |
0.5 |
1 |
1 |
1 |
| |
|
Hard drive rails difficult |
|
|
|
Duct for expansion cards |
|
Specific, targeted cooling |
| |
|
-1 |
|
|
|
0.5 |
|
0.5 |
| |
|
|
|
|
|
Six HDD bays |
|
Six HDD bays |
| |
|
|
|
|
|
1 |
|
1 |
| Total Score |
8.5 |
12 |
12.5 |
15.5 |
14.5 |
20 |
17.5 |
17 |
| Score + Ranks |
15.5 |
25 |
20.5 |
20.5 |
(low) 22.5
(high) 20.5 |
(low) 30
(high) 28 |
30.5 |
23 |
First, an explanation of the "Score + Ranks" field; this simply means that we took the total features score, then added the number of ranks (10 for temperatures, 9 for noise due to a tie), then deducting the rank that the case actually received in the respective test. For instance, the Aspire case received 7 total rank points, because it placed 8th in the noise rankings (9 - 8 gives it one point there), and 4th in the temperature rankings (10-4 gives it 6 points there). This is merely a system that we're trying to use to compare the cases against each other. The simple "total score" field is more reflective of how the case is on its own, but obviously, if there are features which are more or less important to the individual, then these scores must be taken with quite a bit of caution. One nice thing is that we had no issues with any of these cases in terms of sharp edges, so we didn't even bother including a field for the "feature" of rounded edges. Also keep in mind that we didn't consider the inclusion of power supplies for any of the cases as a feature, since buying these cases from different distributors can affect what power supply is included, if any is at all.
Now, in terms of analyzing the results, we were rather amazed at the performance of the P-180 and Eclipse cases. It was satisfying to see cases that we felt so good about in our examination score so well. Also, the exceptional air-moving capabilities (not to mention high-pitched whine) of the Panaflo fan that we added have to be taken into consideration on the F3323's final score. With a more mid-range fan in place, it might not have scored nearly as well.
Perhaps most interestingly of all is the Lian Li's seemingly poor performance, but this is a case where the scores simply can't quite capture certain traits of a case that's so different. The PC-V1000 is still our favorite out of all of these in terms of sheer usability, and it offers a certain look that if it's what one wants, it's one of the only options out there like that. That being said, most all of the cases in this roundup have very unique looks that will certainly satisfy people looking for a particular style.
Final Words
At the end of the day, what is it that really matters then in a computer case? For most people, once a computer is installed, it will probably sit however you place it for a very long time, making only its looks, noise, and temperature performance important. If this is the case, perhaps a cheaper enclosure such as the Trio would be best, given its relatively good cooling and modest noise levels.
For the enthusiasts, however, how easy it is to install and remove parts and how securely the case can hold those expensive components will be much more important, and it is this premise on which the rating system was based in this review. Both of the Antec cases show the maturity of the company and their willingness to do things a little differently from everyone else, which help them secure the top two spots in the noise levels test. The Lian Li's higher cost will certainly be unjustified to most, but with it comes the most thoughtful layout and greatest ease-of-use.
With all else said and done, though, out of nowhere came a company with an amazing product. The Eclipse's exceptional cooling, light weight yet sturdy construction, bold-yet-classy looks, and tool-less, noise-reducing features all come at a knock-out value with a price right around $115, fully justifying (in our opinion) the awarding of a Gold Editor's Choice award.
Almost all of this can be said about the P-180 as well, but its design choice to mount the power supply so far away from the top of the motherboard really makes power cable routing difficult or even impossible for some PSU/motherboard combinations.
With a little effort, however - and a very similar price point, we might add - comes exceptional pay-offs, and this is why we are still rewarding the P-180 with our Silver Editor's Choice award. The more mature, seamless looks of the P-180 will appeal to many, we think, and if the power supply placement and tool-less parts aren't an issue for you, you too will be able to enjoy the case's fantastic customizability, over-the-top noise limiting features, high-quality 120mm fans, and great ease-of-use.

ThermalRock Eclipse |

Antec P-180 |
Many congratulations to both ThermalRock and Antec for top-notch cases!