Introduction
It hasn't been that long since we last examined the HTPC scene, and afterwards, we were starting to wonder if anyone knew just exactly what it took to engineer a perfect HTPC case. We say this not because the last four cases we reviewed were poor performers, but simply because it seems like each one managed to just barely miss something that, when it comes right down to it, is pretty important in an home theater case.
Zalman hasn't had much of a history in case design
per se, but their presence in the cooling industry is now practically ubiquitous. Starting especially with the fantastic 7000 series CPU coolers, and also with the outlandishly extreme TNN500A 100% passive case, they've made a name for themselves as the forefront proponents of silent computing.
Now going directly after the HTPC market, Zalman has recently released the HD-160 case, a moderately sized, mid-to-high priced, 100% aluminum ATX compatible chassis available in black and silver, and accompanying our review of the case, we'll be looking at their latest power supply, the ZM460-APS, their latest CPU cooler, the CNPS-9500, and their popular GPU cooler, the VF700-Cu.
First, we'll examine the case and test it using the same hardware that we've used to test our other HTPC cases, but then we'll switch our standard ATX test bed's CPU and GPU coolers for Zalman's and analyze how the performance changes.
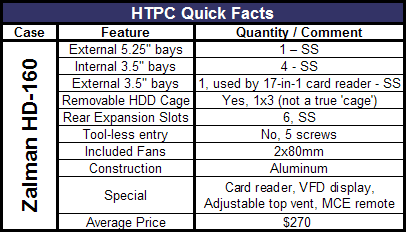
(TL: Tool-less, TS: Thumbscrews, SS: Standard Screws)
Hopefully, the HD-160 will get everything right and be a perfect fit for people who would like to build a home theater computer. This might be a tall order, but if Zalman's track record is any indication, then perhaps the "experts in silent computing" have the best shot at doing just that.
For more information on the HD-160 and the other products in this review, please check out
Zalman's website.
HD-160 Case - Exterior
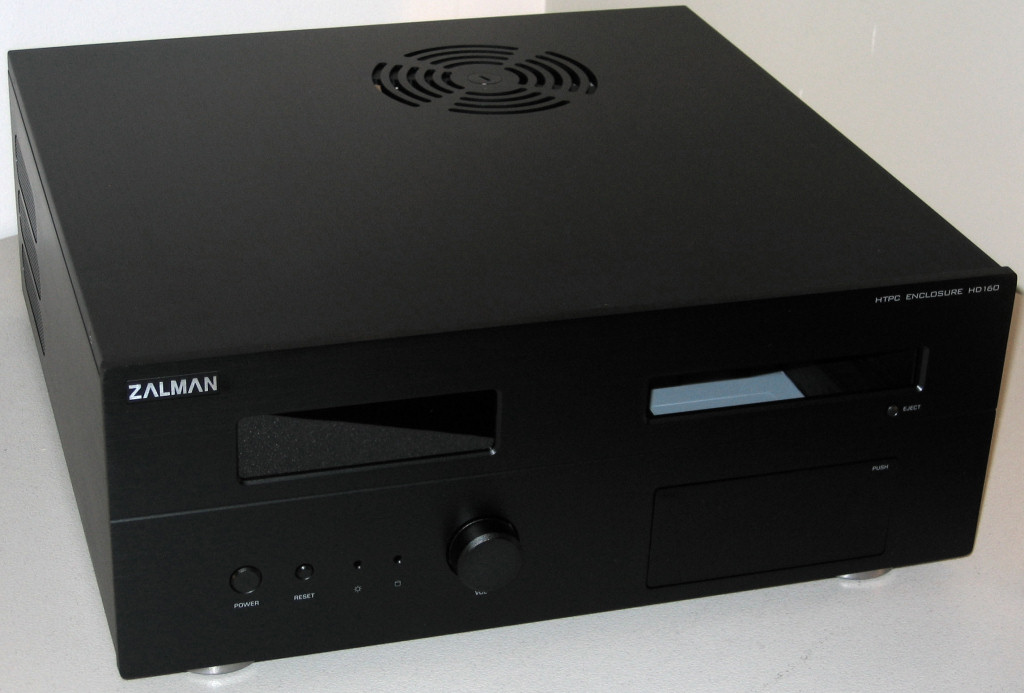
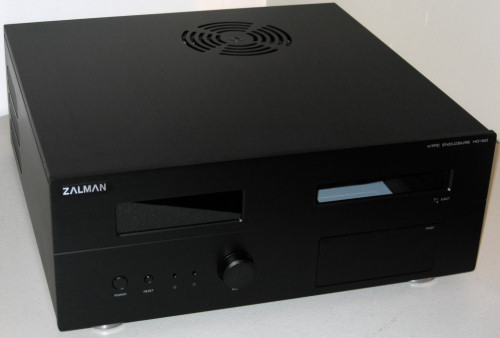
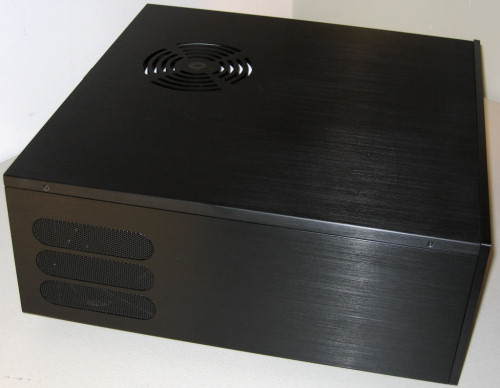
Like any good HTPC case, the HD-160 makes a great immediate first impression, with a simple, uncluttered front and general design characteristics that should blend in well in any home theater situation.
Click to enlarge.
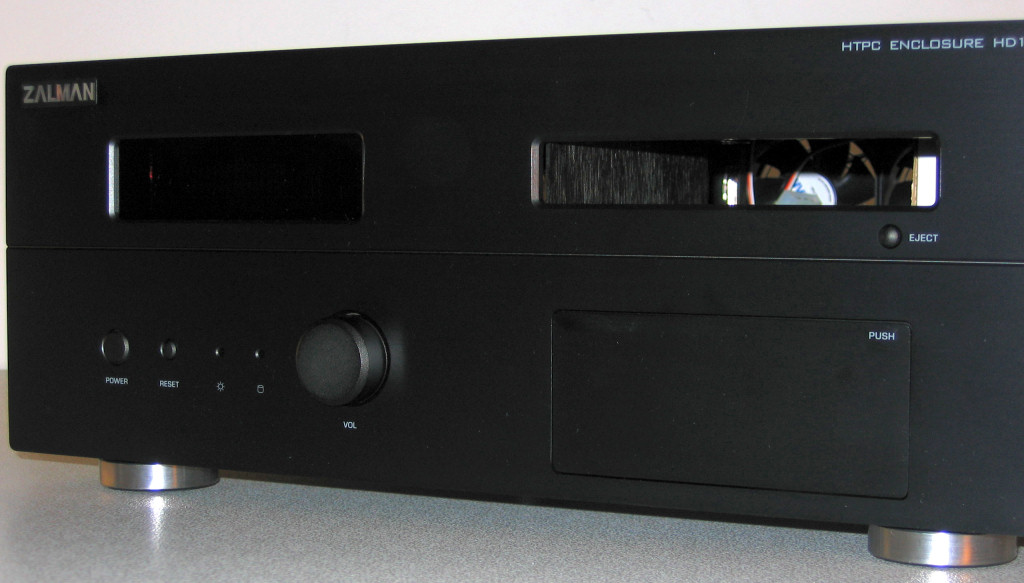
A few promininate features include the VFD display, volume knob, and the hidden media slots/ports access. Also note the large vent on the top towards the rear. In this next more head-on shot, the clear labels are easier to see. Without a lot of extra buttons or features on the front, the HD-160 should be a breeze to use, even for a complete beginner to the HTPC realm, and the volume control is a nice touch that only adds to this concept.

Click to enlarge.
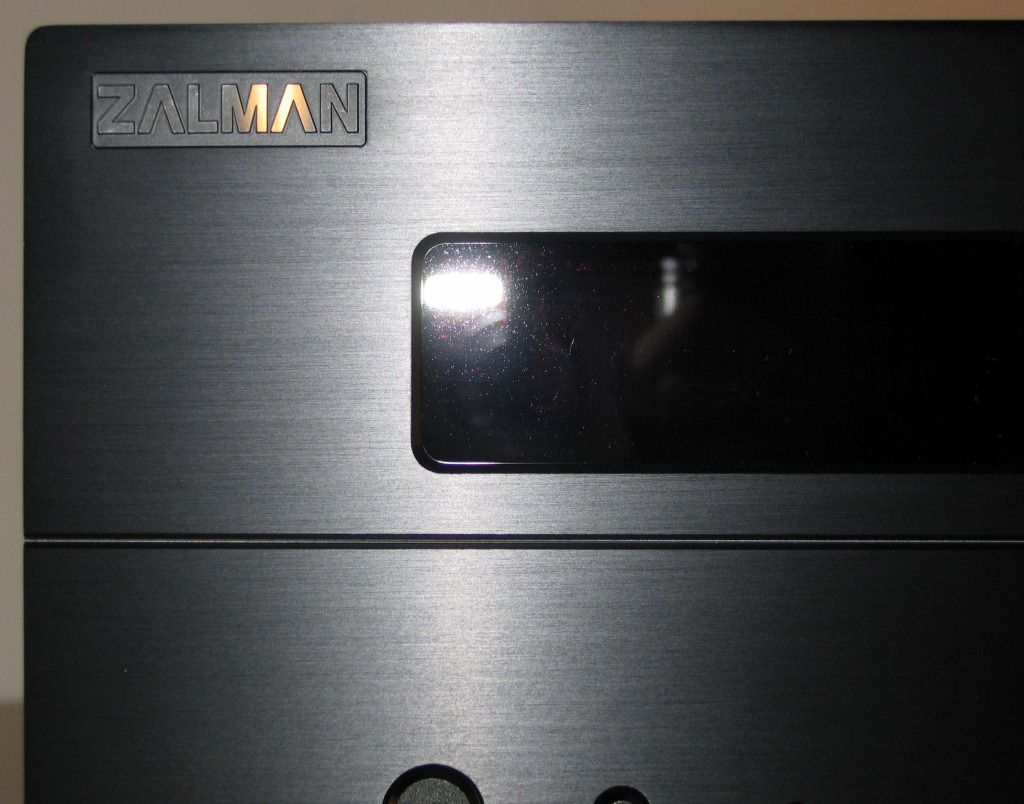
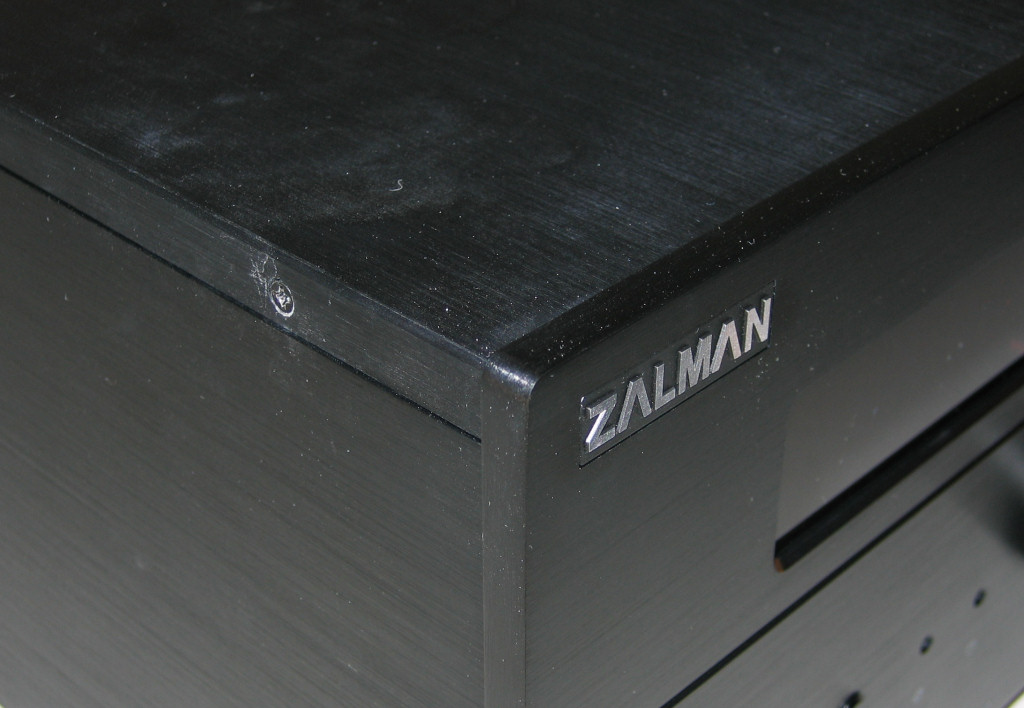
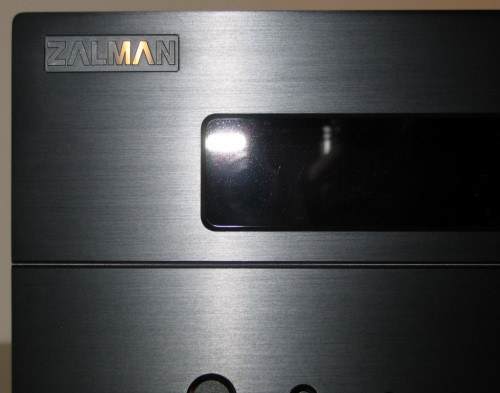
An extremely close-up picture shows the brushed aluminum finish of the case fairly well, and also the nice integration of the VFD display. The Zalman symbol in the upper left corner is chrome-finished with miniscule horizontal etchings, and is on its own set-off area.
Click to enlarge.
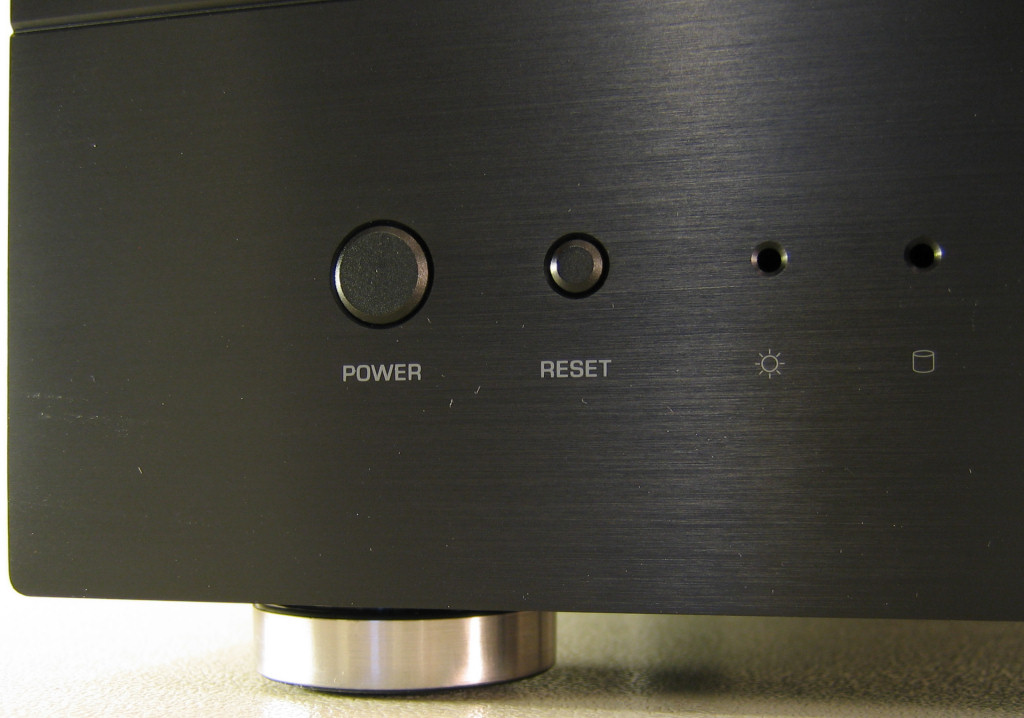
The lower left corner houses the power and reset buttons and standard dual LEDs, without anything out of the ordinary really worth mentioning. The feet of the case itself are also visible in this picture, and once again, fit the standard HTPC look just fine.

Click to enlarge.
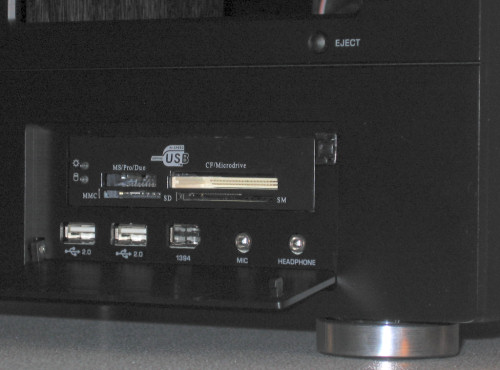
The lower right corner has a flap, which covers an included 17-in-1 card reader and typical ports as well. When open, it's nice to see that the ports aren't crammed together too tightly so that using all of them at the same is difficult. This is the only externally available 3½" drive, so if one would want a floppy, they'd have to replace the card reader drive.
Click to enlarge.
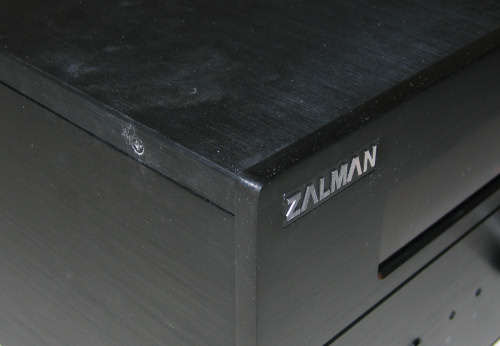
The overall construction of the case is superb. With the slight exception of the volume control, (which still feels fairly good) everything feels solid and fits together very tightly. Another close-up shows the thickness of the front bezel and the quality of the Zalman symbol slightly better than before.
Click to enlarge.
HD-160 Case - Exterior and Interior
The HD-160 overall has a generous size. It's a little larger than most other HTPCs that we've looked at in the past, but it's still a manageble size that should work fine; whether or not additional components are included in a stack shouldn't be problematic for most users.
Click to enlarge.
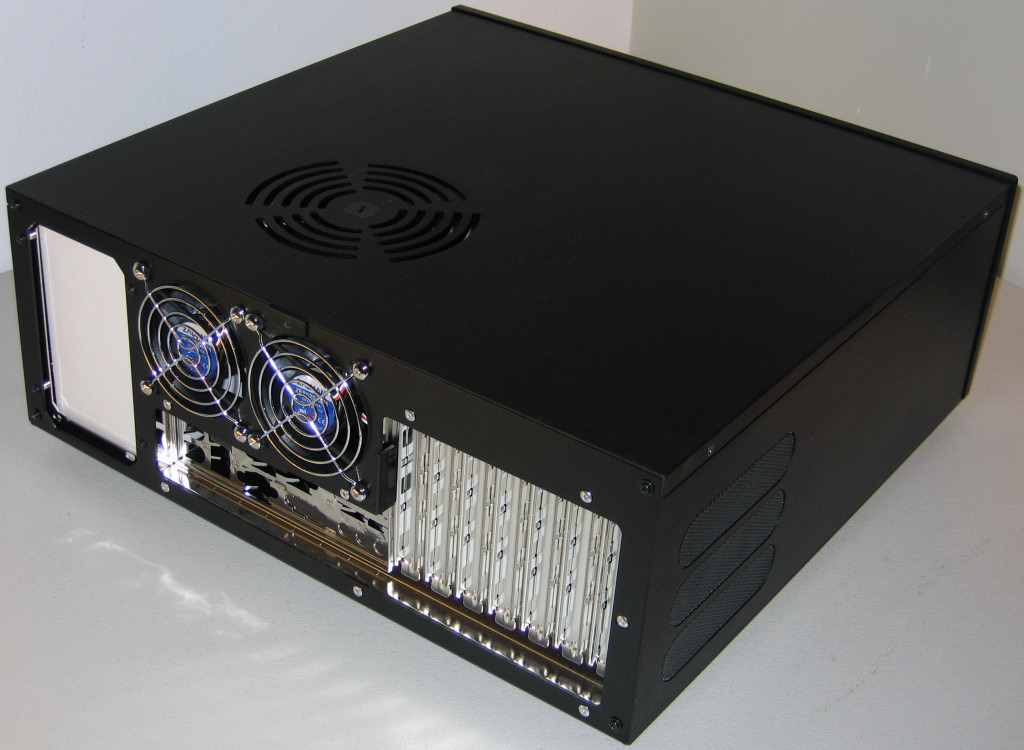
In addition to the vent on the top, this picture shows off one of the two sets of side vents, as well as the removable lid and two of the five screws that hold it in place.
The rear of the case is a bit more interesting, and shows a relatively strong resemblance to Thermaltake's Tenor chassis, reviewed in our last HTPC roundup. Dual 80mm system exhaust fans work in conjunction with the power supply to provide the entirity of the case's active cooling.

Click to enlarge.
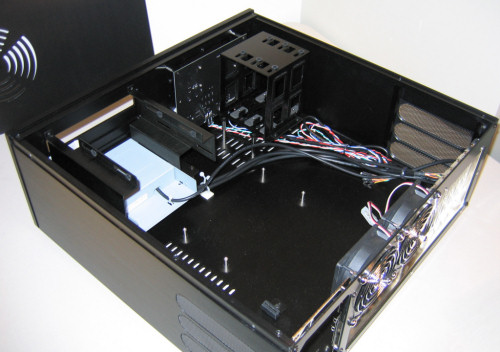
While external looks are certainly important, what really matters in an HTPC is the layout of the internal components. Without careful consideration, the components can overheat due to the demands for such a quiet environment, or worse yet, have problems physically fitting with other pieces of hardware. The good news is that the HD-160 has a thoughtful design and shouldn't suffer from any problems with most setups.
Click to enlarge.
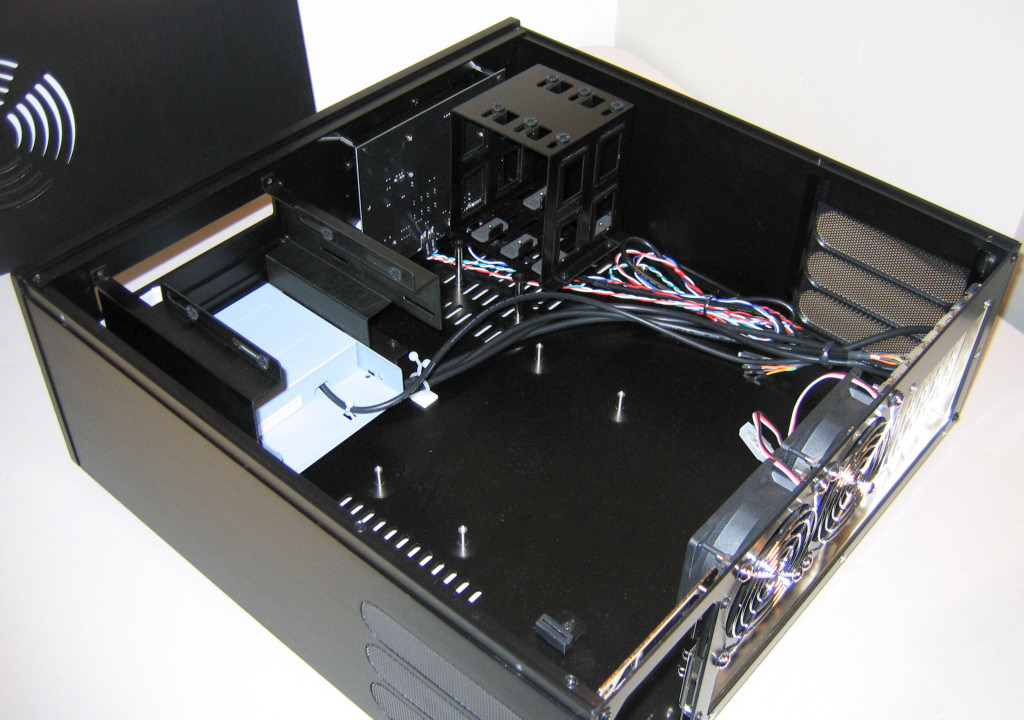
Perhaps the most prominent design mark is the vertical hard drive cage situated towards the front, which is a good idea for getting more available hard drives without having to make the case any larger. In addition to a single spot above the 5¼" drive, this leaves the HD-160 with a total of four internal hard-drive slots.

Click to enlarge.
From a slightly different perspective, it's easier to see how the cage is positioned well, for instance cabling shouldn't be too difficult with the decent amount of space between the two removable cages.
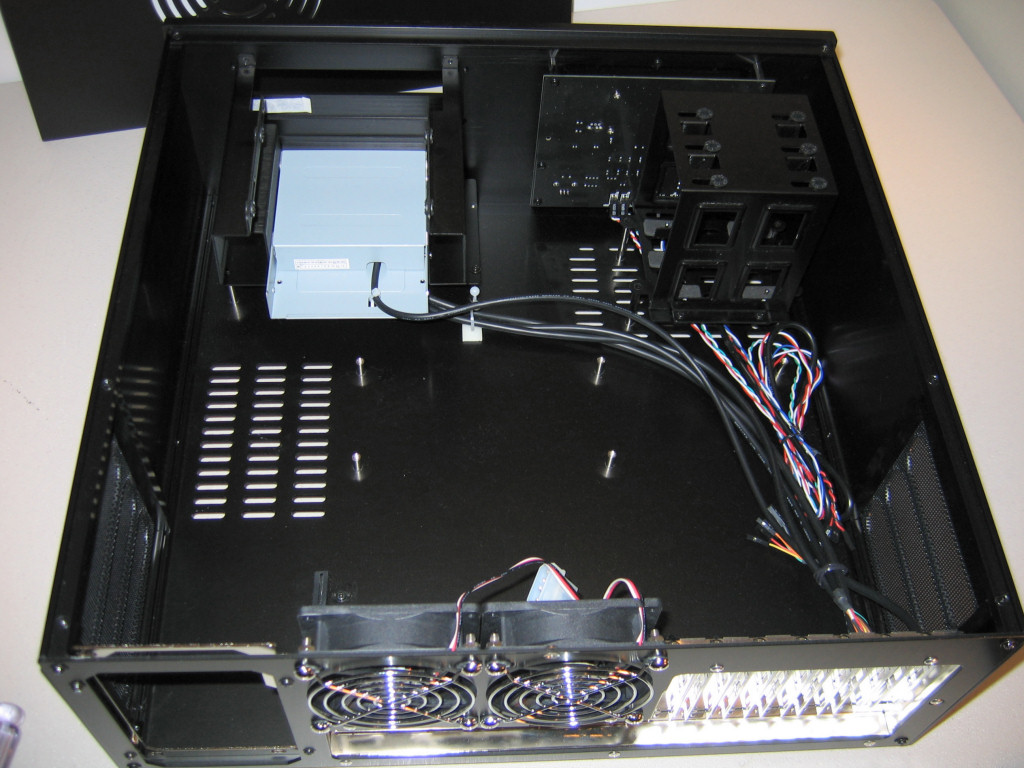
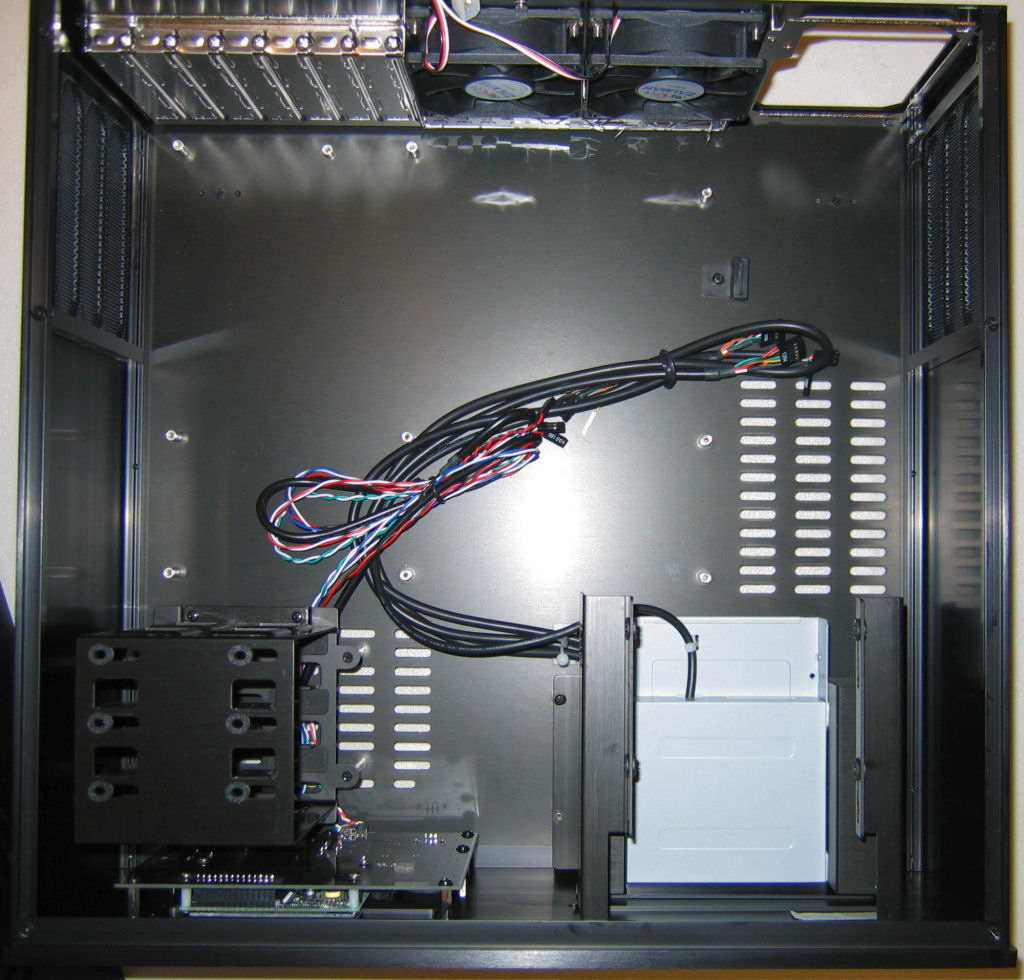
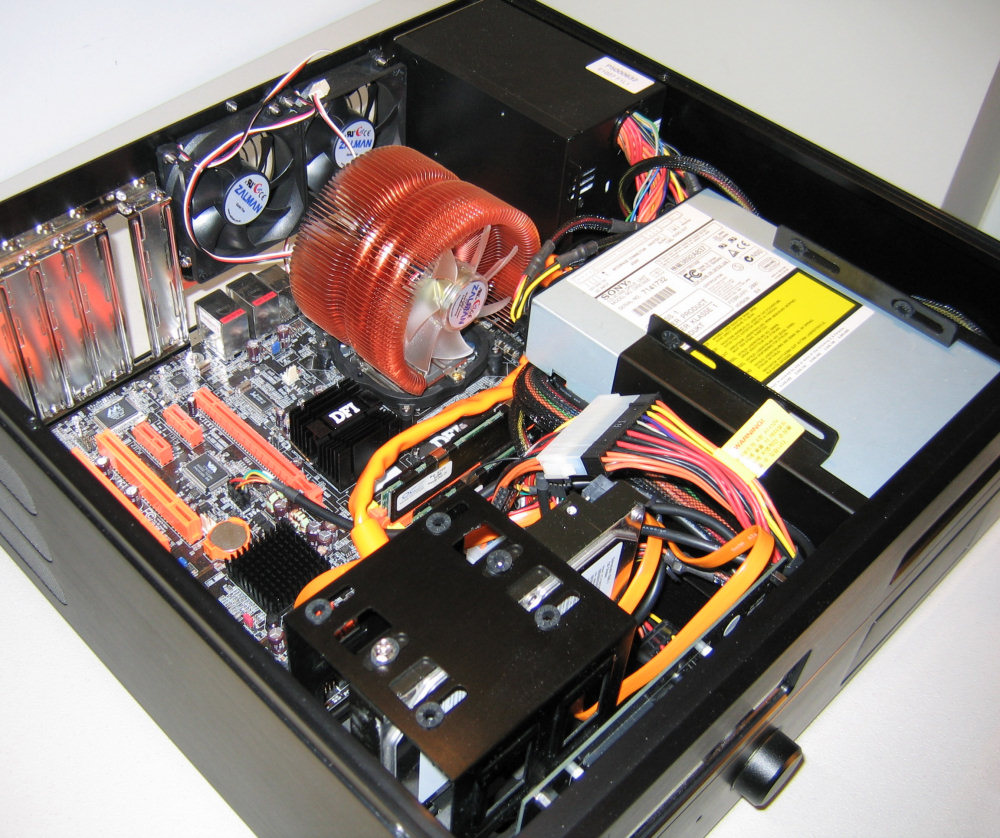
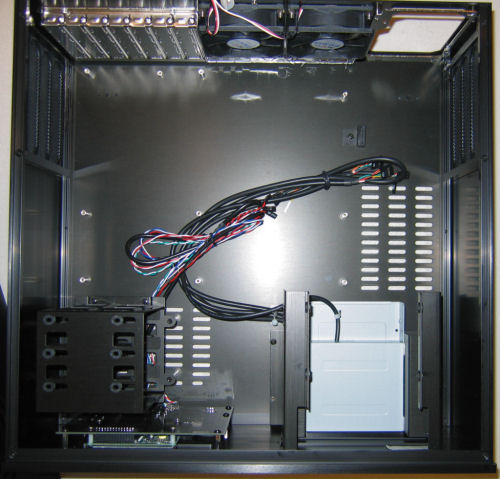
Next, we'll examine the back of the case from inside, and upon doing so, we notice that many similarities can be drawn between this layout and a rather typical tower chassis that's simply been laid on its side.

Click to enlarge.
With this observation, it's pretty safe to assume already that the cooling performance of the HD-160 is bound to be on par with other tower designs or, at the very least, among the best of HTPC cases. From a direct top-down view, this claim is even better substantiated, as the case has well-placed intake venting under the hard drives and under the area that wouldn't be blocked by any components.
Click to enlarge.
HD-160 Case - Interior (cont'd)
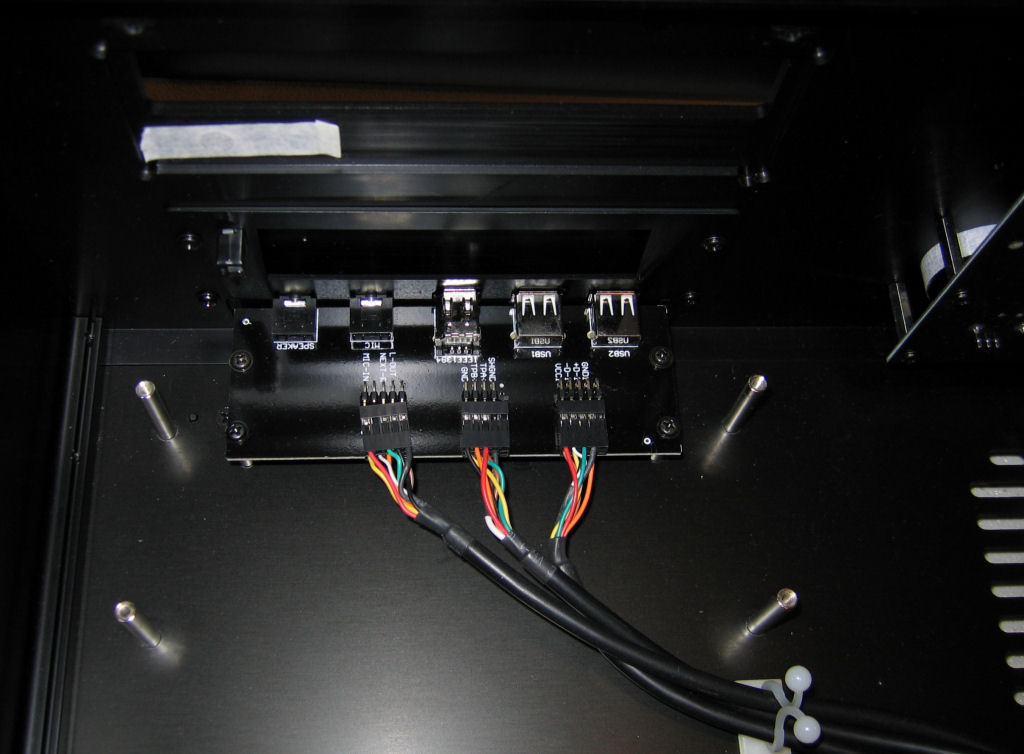
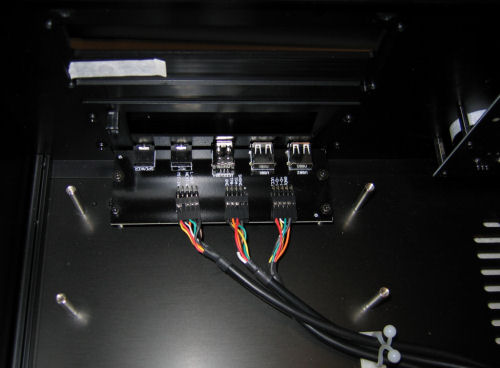
To take a closer look at the HD-160, we removed components and examined them individually. First, here's a picture of the multi-card reader/port pieces, which (thankfully) uses standard USB connections and is mounted sturdily by several bolts.
Click to enlarge.
The cage itself that was removed to get this picture is pretty standard, which like many other HTPC cases has to be completely removed to install drives, unfortunately. One nice feature is the use of soft rubber grommets to absorb vibrations from the installed hard drive on top.

Click to enlarge.
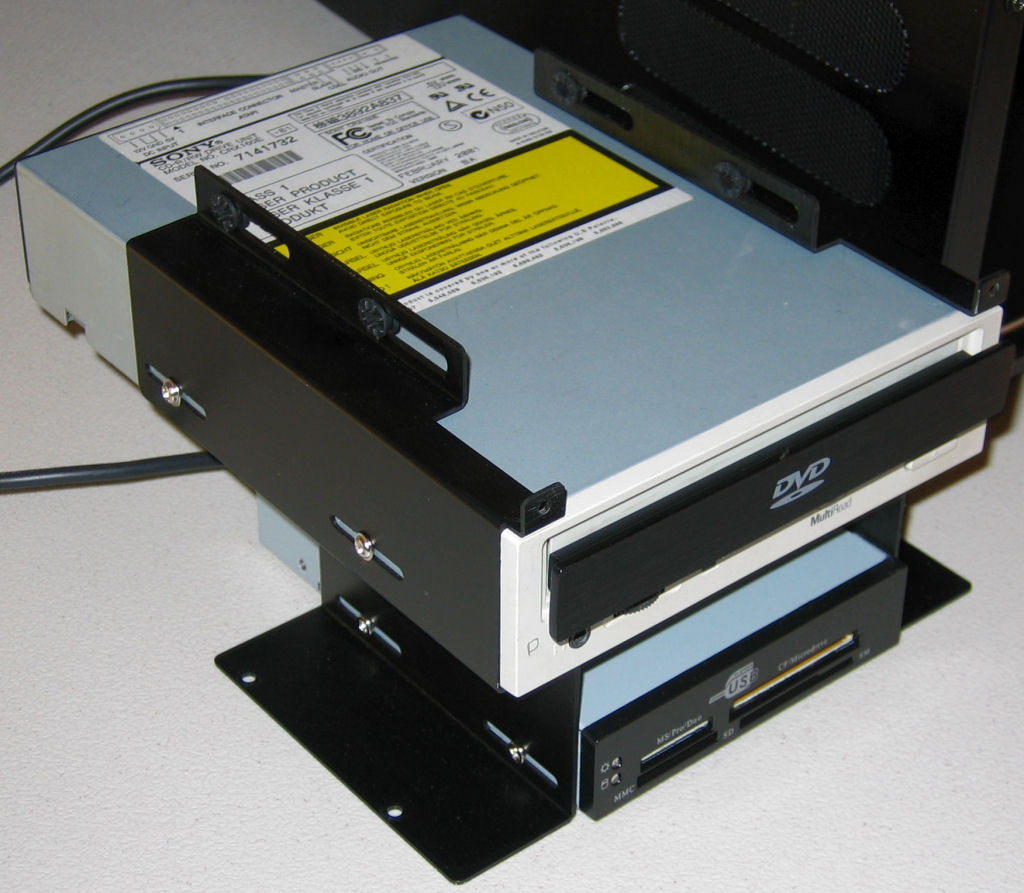
The new Zalman case's method of stealthing the optical drive is to replace the drive tray's bezel with an included black aluminum piece, and while the fit is pretty good and the end result can be great looking, the double-sided adhesive tape doesn't always guarantee a perfect mount and could be problematic if not attached perfectly the first time.
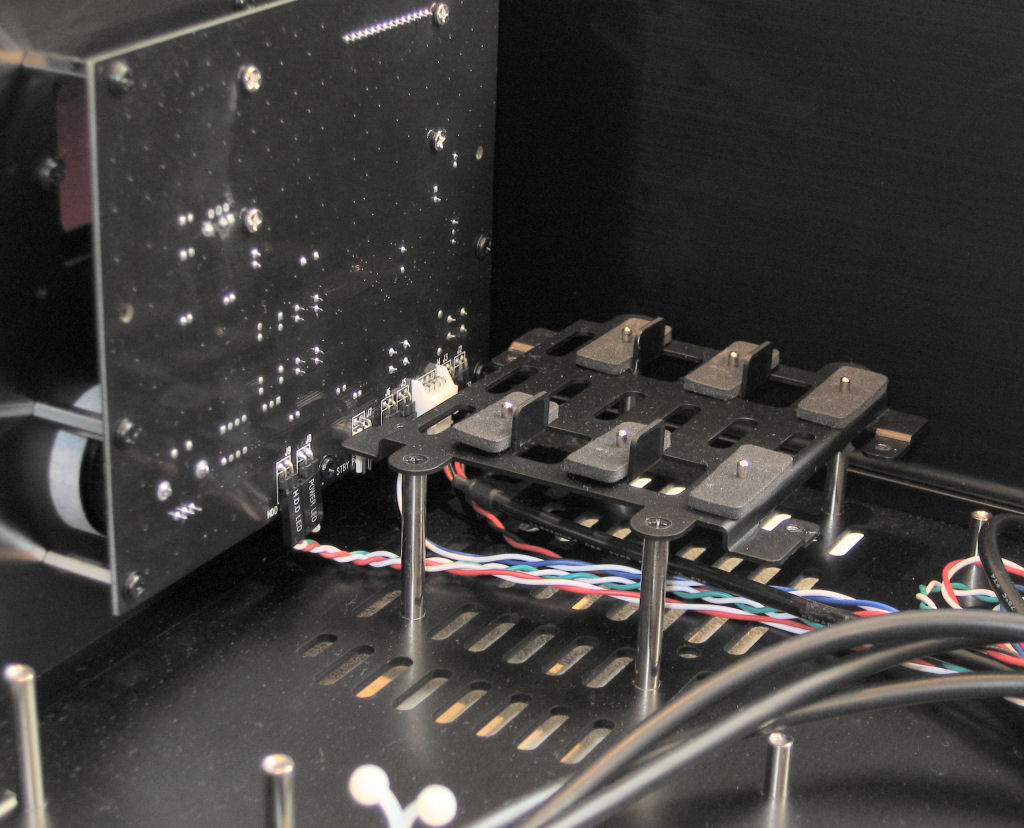
With the top of the other hard drive mounting unit removed, we can see how these drives are held in place.

Click to enlarge.
The six visible metal pins serve to anchor one side of the drive, while foam pads still get the majority of the pressure from the mount to help control noise. The top of the cage uses the same grommets mentioned before, and after the drive is bolted to the top piece, the entire unit simply screws down at the four slightly recessed corners that are visible here. Besides the somewhat tricky task of lining up the two screws on the front side of the cage (we found the use of a magnetic screwdriver imperative), the installation is on par with other HTPC designs, and ultimately, the slight difficulty of installation is offset by the low operating noise and good cooling performance of the design.
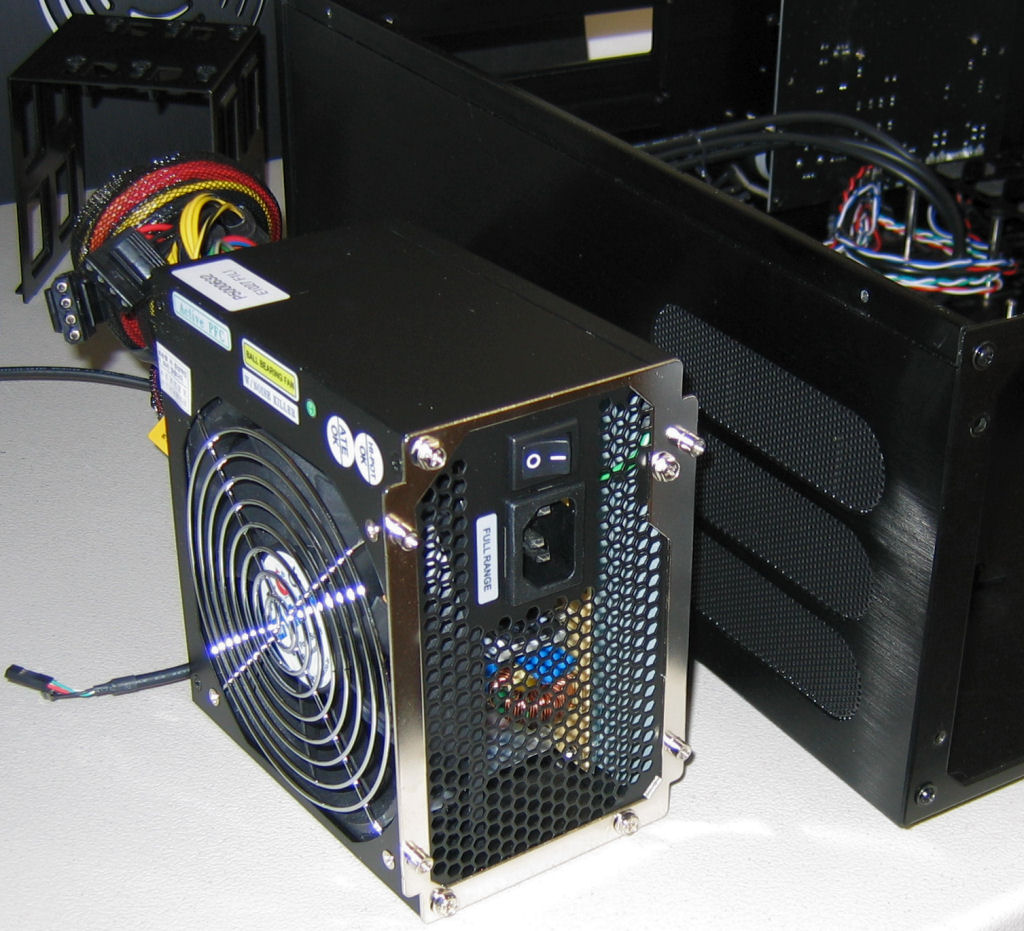
The installation of the power supply is quite similar to other designs that we've looked at before, with a separate plate first attaching to the supply, which then screws into the case. The plate itself is symmetrical with respect to the case's mounting points, so any compatible power supply can be turned either direction in the HD-160.

Click to enlarge.
Something rather interesting about the installation instructions of the HD-160 is the fact that they suggest a different orientation of their own power supply, the ZM460-APS, than they suggest for other supplies. The instructions have the supply's large intake fan oriented towards the side vents, most likely due to the fact that often the ZM460-APS is able to keep its fan still or barely rotating, and if it was pointed towards the inside of the chassis, warm air could be drawn
through the supply into the case.
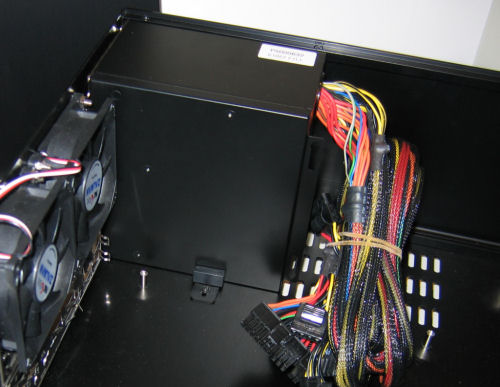
Click to enlarge.
One more soft pad is used again to help dampen possible vibrations, this time from the fan in the power supply. Also worth mentioning is that the whole power supply unit area is nice and spacious, and should work fine even with larger units.
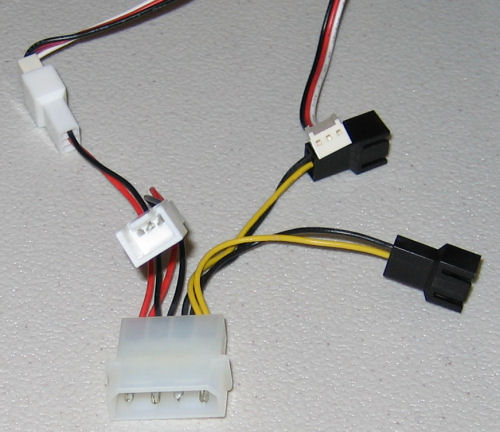
Before getting to the details of the rest of the installation process, it should be noted that Zalman includes a versatile molex adapter with the case that allows the user to run the two rear exhaust fans at either 5v or 12v, depending on the desired cooling performance/noise level. Little inclusions like this are certainly welcome additions to any higher-end chassis; it's always nice to have options.
HD-160 Case - Installation
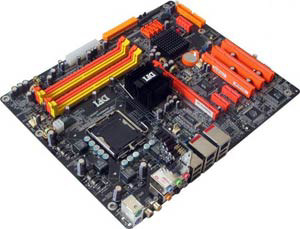
After the power supply, the motherboard is really the next logical unit to put in the HD-160.
Click to enlarge.
With the cages out, our standard test motherboard assembly was very simple to put in place and attach to the included standard ATX mounting points.
Next up is the hard drive, which (as we mentioned before) wasn't too bad except for the two screws that have to go towards the bottom on the front side of this cage.
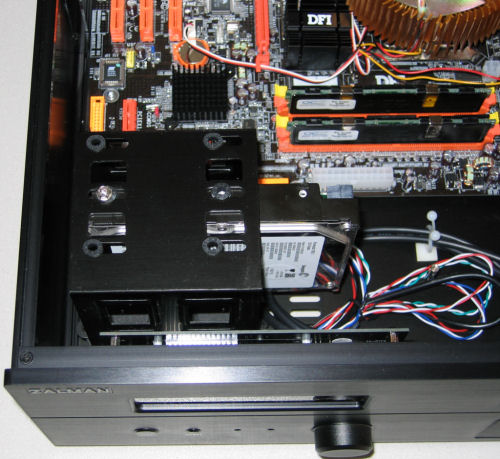
Click to enlarge.
As it usually tends to be, our sideways-facing primary IDE channel port was once again a bit of a nuisance, but certainly not as bad as it has been in the past. With the option to take out the entire HDD cage (bottom piece included) if necessary, this is really only a minor complaint.
Click to enlarge.
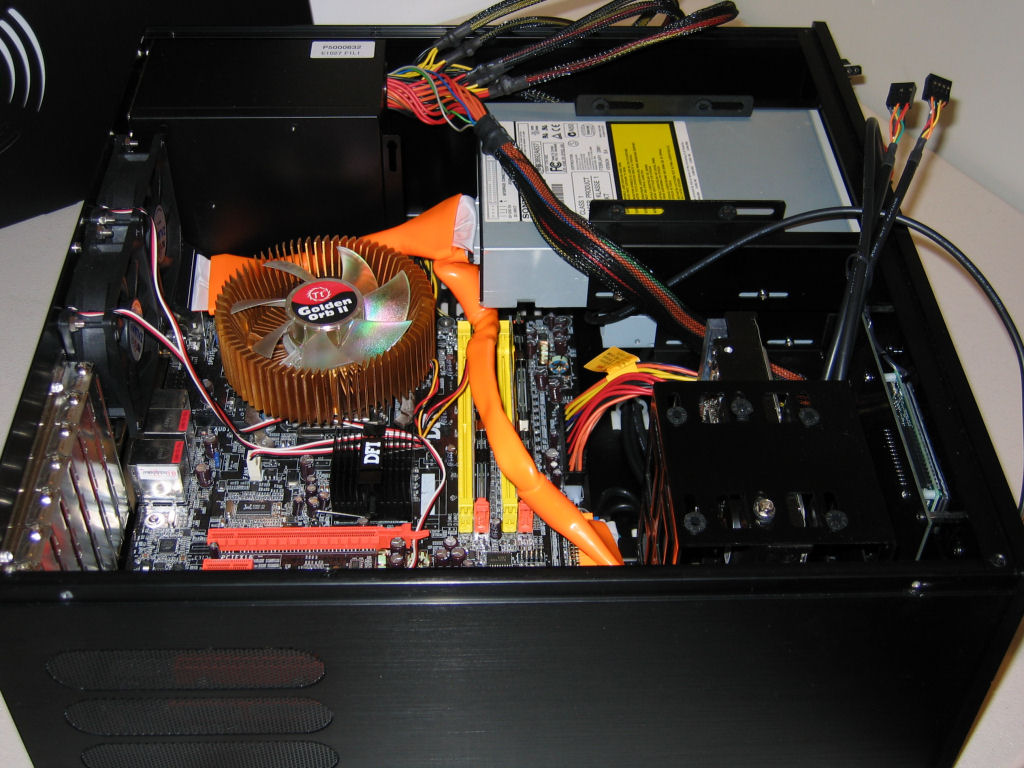
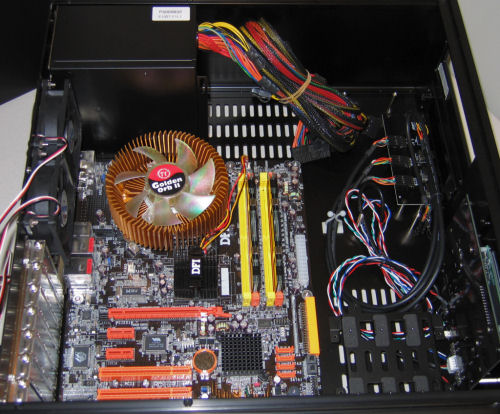
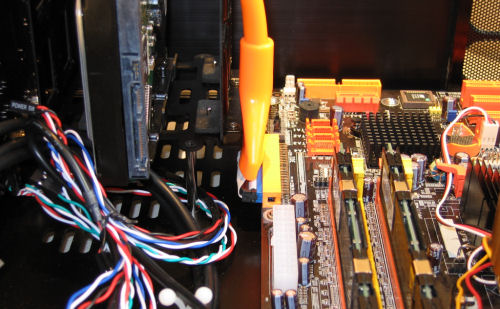
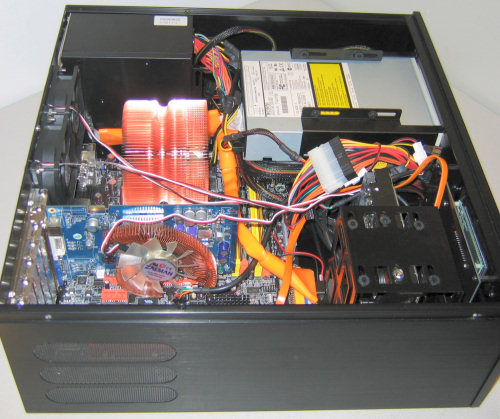
With the necessary cabling and most other components in place, the last cage can be screwed into place, and thankfully this unit, even with the optical drive already mounted, is fairly simple to install.
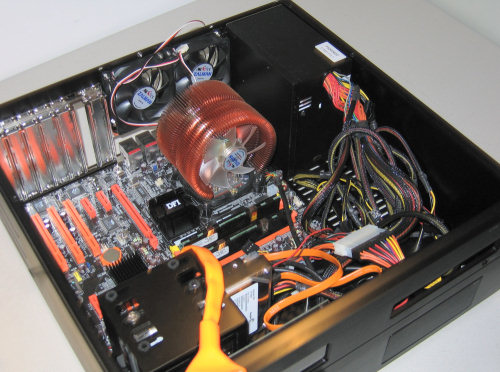
After this was done, we connected a few cables, including the ATX power cord and IDE cable to get a picture before any real cable management was performed.

Click to enlarge.
Thanks to the extra space on either side of the external drive cage, cable management is a breeze in the HD-160. We were able to route cables much better than in other cases with minimal effort.

Click to enlarge.
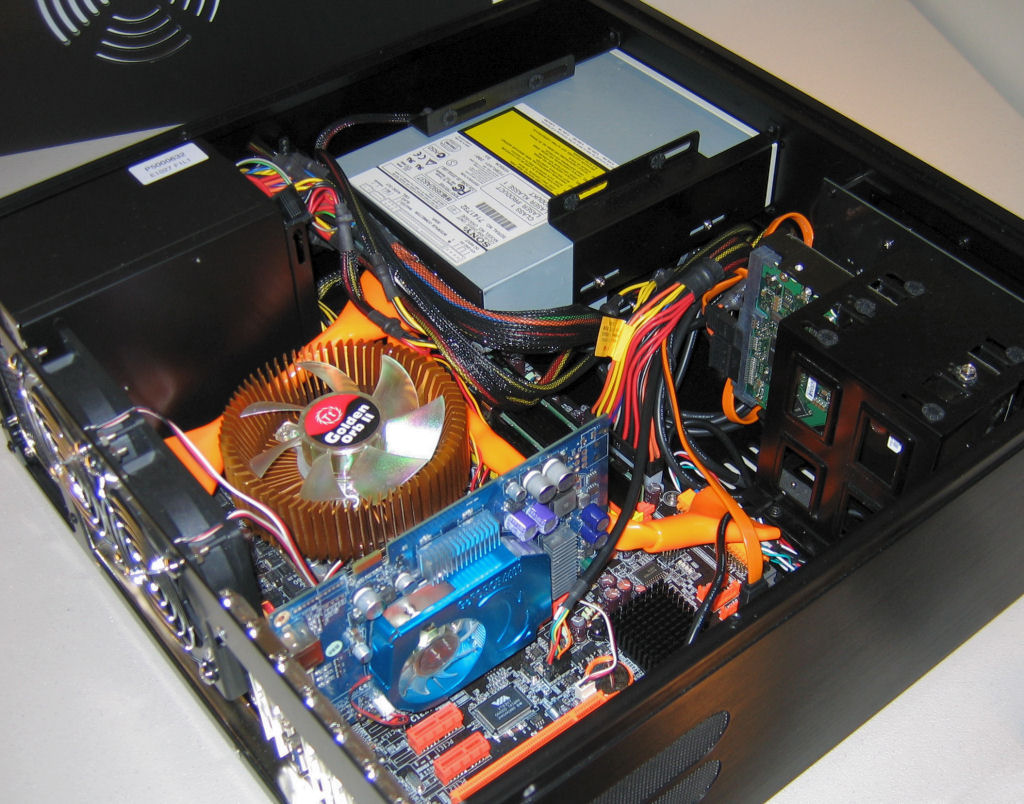
Finally, we installed our 6600GT video card, which was about as simple as it could be. Even longer video cards shouldn't have any problems inside the case, thanks to the smart layout.

Click to enlarge.
Included with the HD-160 is a VFD, which by default simply displays "Welcome to HTPC", but after installing drivers, it displays the current date and time, as shown below.
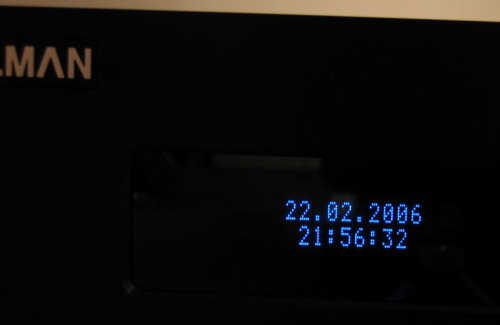
Click to enlarge.
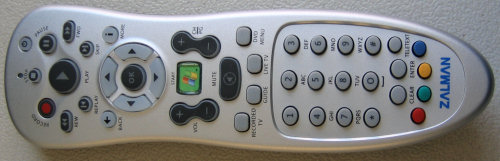
A nice Windows MCE remote is included as well, but the documentation and software for programming the remote are lacking. However, since most of what goes on with the remote and display are only tied directly to Media Center Edition, this perhaps isn't as big of a deal as it might seem. When working in the OS itself, the display has a much better idea what information to display and the controls on the remote integrate automatically with the base software of the OS - especially windows media player.
Click to enlarge.
CNPS-9500-LED
Initially, we were planning on saving our first look at the CNPS-9500 CPU cooler for a larger heat sink comparison article, but Zalman insisted that the cooler was a perfect fit for their new case and we were up to the task of boring out this claim.
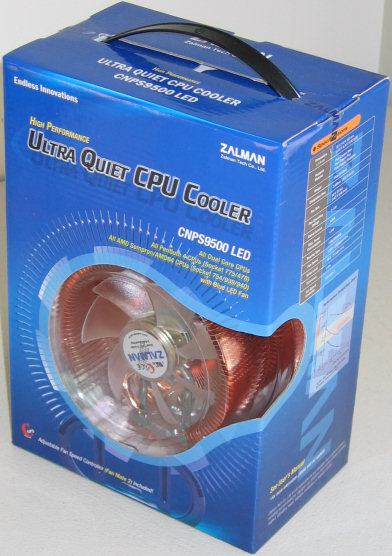
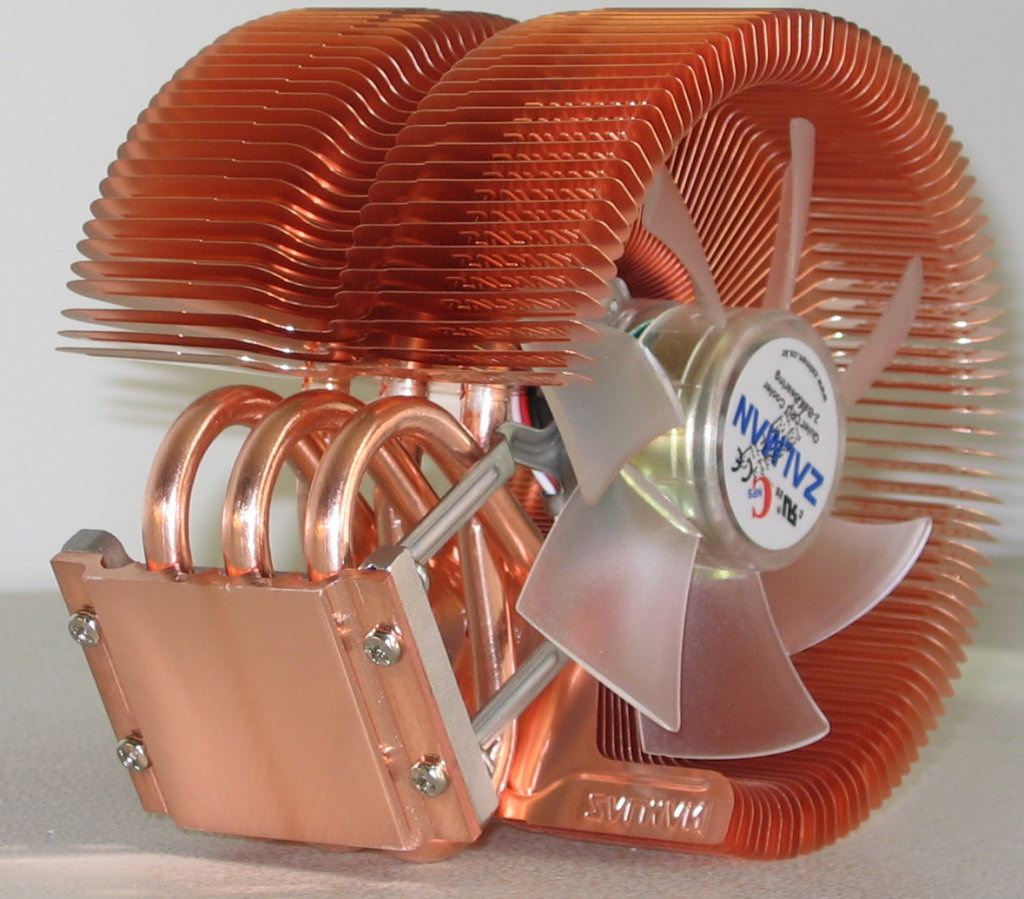
The CNPS-9500 has been out for a while now, and it's been quite popular among enthusiasts for several reasons. First and foremost, it's performance is exemplary.
Click to enlarge.
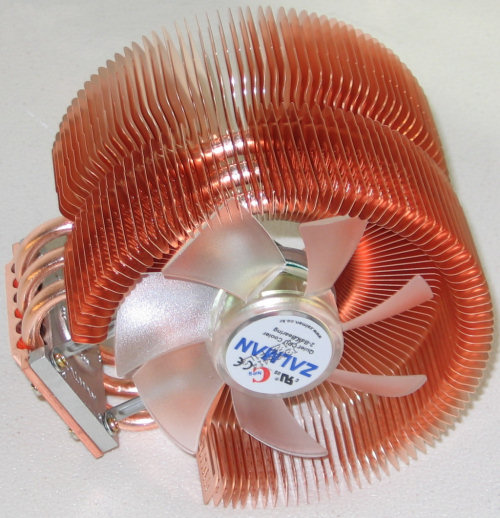
With three discrete copper heat pipes and a relatively small base, the cooler is designed to whisk heat away from the core immediately and carry it around the rest of the unit where the wide fins with even separations can dissipate it efficiently.
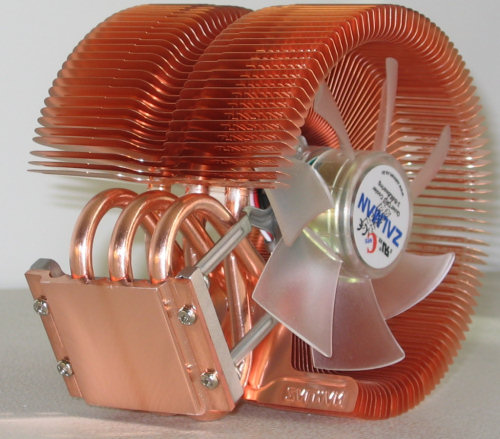
Click to enlarge.
A single 92mm fan forces air between the circularly-arranged fins for maximum effectiveness versus minimum air movement.
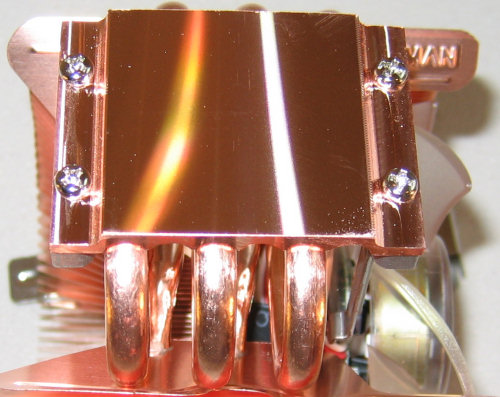
The base itself is certainly flat and polished well - trying to take a picture to show any imperfections in the near mirror-like finish proved rather fruitless.
Click to enlarge.
Mounting equipment is included to mount the heatsink on Intel 478, and LGA-775, and all AMD 64 sockets, and relatively clear intructions make the process easy even compared to some stock heat sink installations.
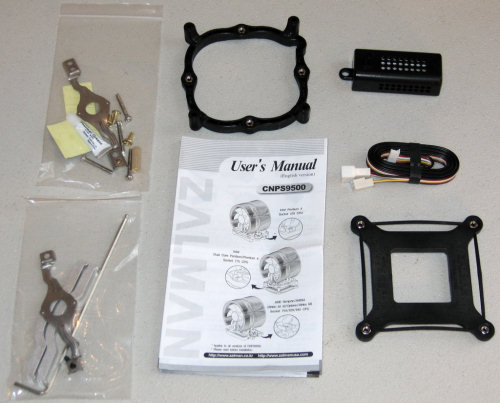
Click to enlarge.
The only step that some might consider annoying is the removing of the motherboard for the mounting of the backing plate, but this is to be expected with almost all performance CPU heat sinks, and the fact that the nuts are permanently attached to the plate makes this step much easier than many competing solutions.
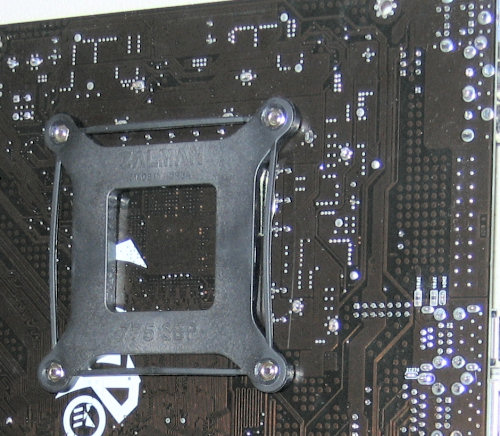
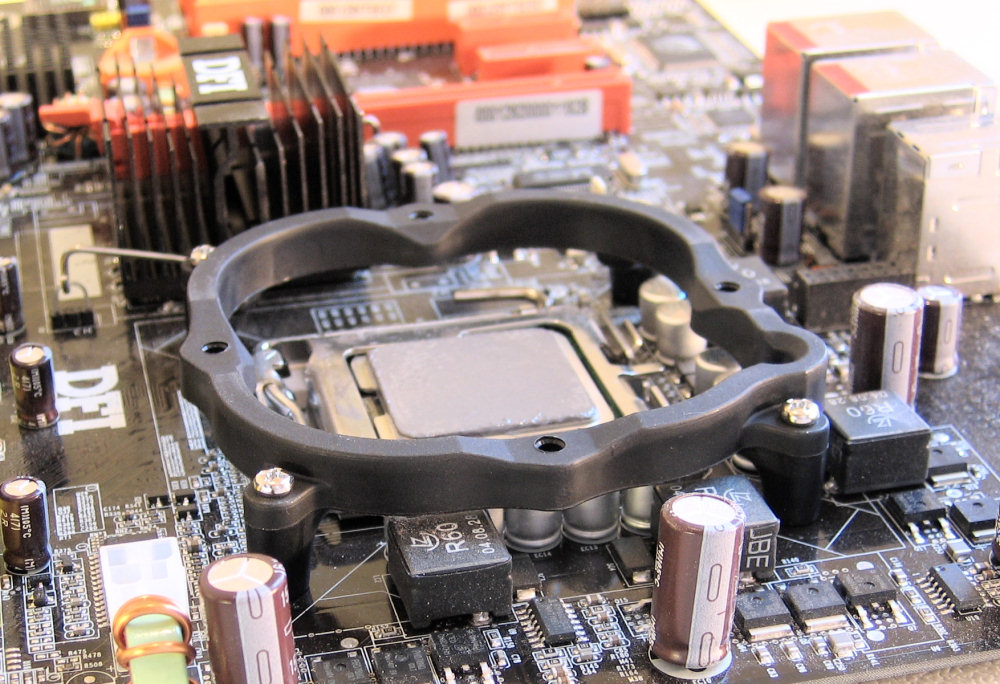
As the plate on the back is installed, the top "universal" plate is anchored simultaneously. It is this piece to which the CNPS-9500 actually mounts directly, and because of its 90-degree symmetry, it can be used to hold the cooler in one of four orientations to point the airflow in the most appropriate direction.

Click to enlarge.
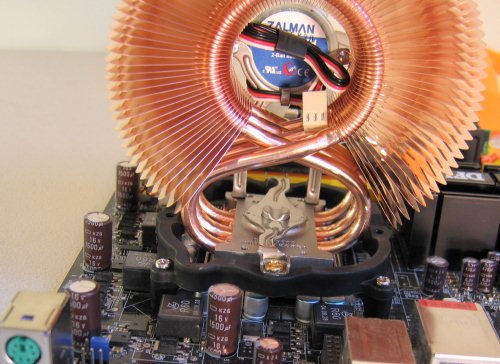
Once the plates are anchored securely and the thermal compound applied, the heat sink assembly is held in place with a single piece of steel, which anchors with only two points, ensuring an even application of pressure between the heat sink and CPU surface.
Click to enlarge.
VF700-Cu-LED
With so much Zalman equipment already in this setup, it seems almost silly
not to go all-out at this point, so that's exactly what we decided to do.

Click to enlarge.
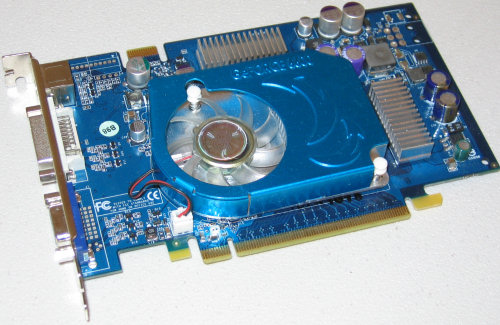
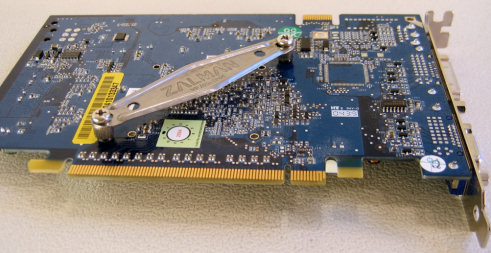
The stock cooler on our 6600GT has always been the subject of some concern of ours, due to the high temperatures reported by the driver software, and the rather audible noise of the fan.
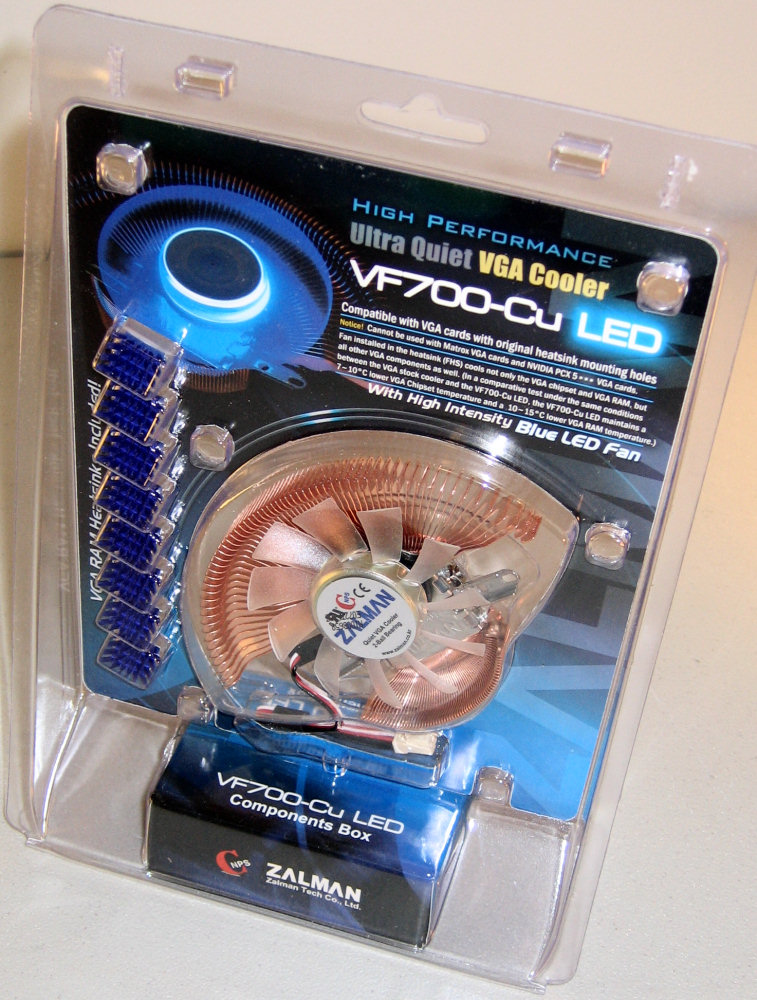
Although it's been on the market even longer than the CNPS-9500, we still think that it is worth looking at the also popular VF700-Cu GPU cooler, for as we'll see, it can dramatically improve temperatures and noise levels coming from the graphics card.
Click to enlarge.
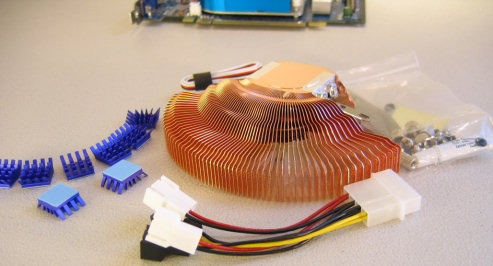
The package includes the heat sink assembly, eight individual ramsinks for the dedicated GPU memory, mounting hardware for both typical ATI and NVIDIA cards, and thermal compound for maximum heat transfer.
The hardest part about installing the VF700 for many cards is probably simply getting the stock cooler off the graphics card safely. Many stock coolers have a strong adhesive-style of thermal paste holding the cooler in place, which can make removing it potentially dangerous. One simply has to be careful to pull slowly and apply enough of a twisting force to prevent damaging the core of the processor.
Click to enlarge.
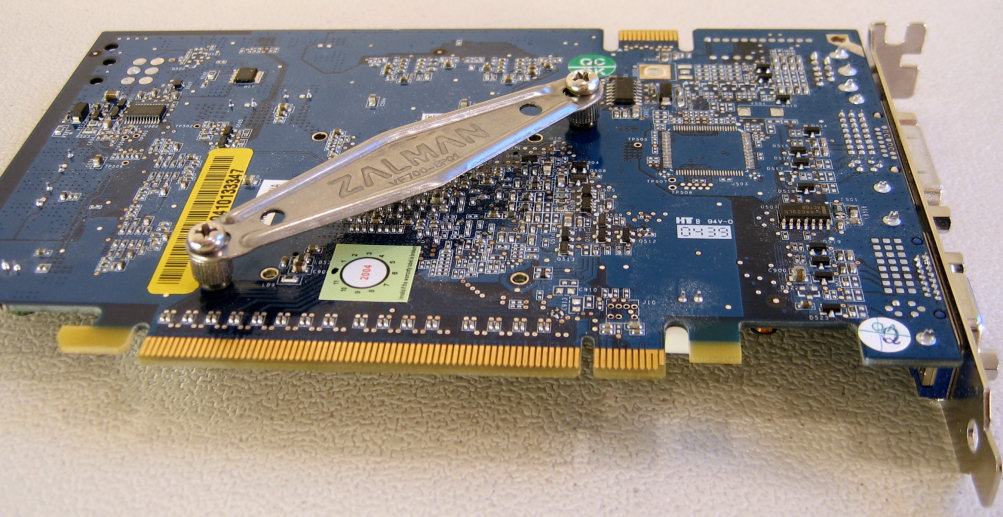
Once the stock cooler was removed and the GPU surface cleaned, we proceeded to install the Zalman mounting kit which uses another back plate design, which holds itself steady to the card first.
The back plate is held in place using special nuts, which are threaded on both sides. The one on the right in the following picture has already been screwed in place, while the one on the upper left corner only has one of the rubber washers installed so far.
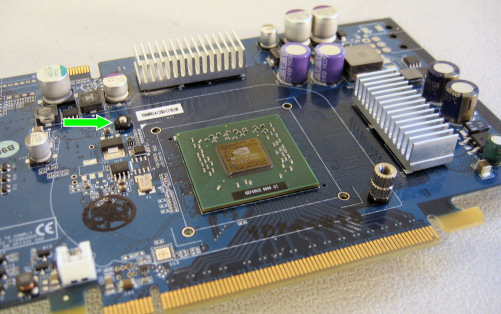
Click to enlarge.
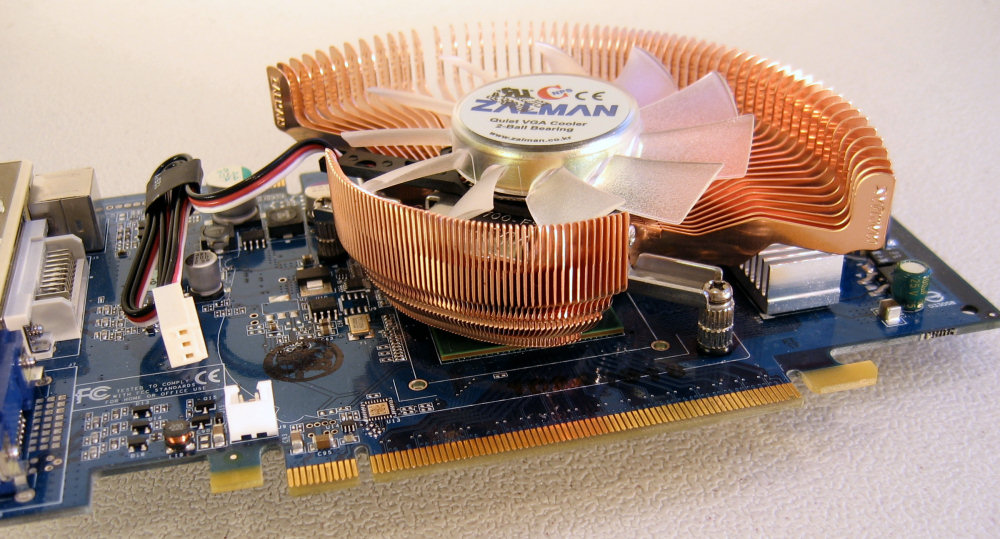
The heat sink/fan combination, which bears a strong resemblance to the popular 7000 series CPU coolers from Zalman, bolts down into these special fasteners, again using only two points to keep as even pressure between the two surfaces as possible.

Click to enlarge.
As this is the first time in a while since we've looked at cooling equipment, perhaps we should mention that there are always a few drawbacks to installing aftermarket heat sinks to any piece of hardware in your computer. Things to consider include voiding warranties and risking the possibility of damaging the hardware due to either physical damage during the installation or an improper installation, which leads to overheating of the equipment. However, simply taking care to follow all instructions and working slowly enough to do everything carefully is normally all it takes to make installing your own third-party cooling equipment enjoyable and rewarding.
Zalman Components Installed
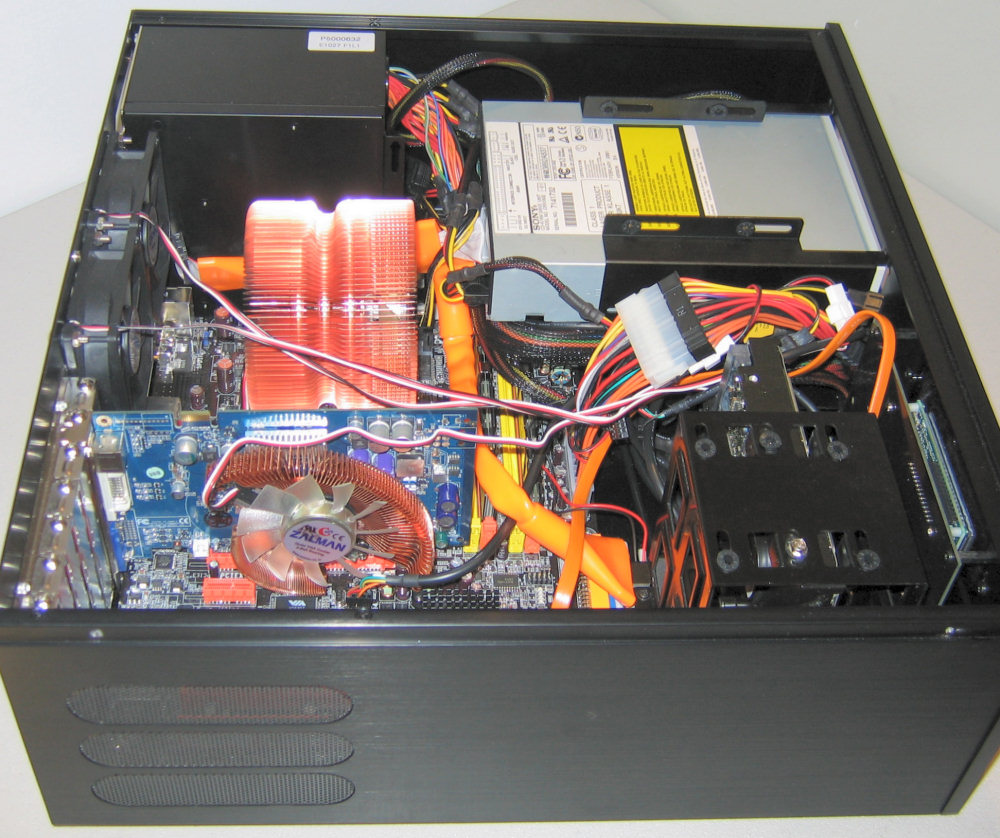
After getting the heat sinks on their respective parts, the next step is simply to put them back into the case again.
Click to enlarge.
It wasn't any easier or harder to put in our assembled motherboard tray, and the cable routing didn't really change either.
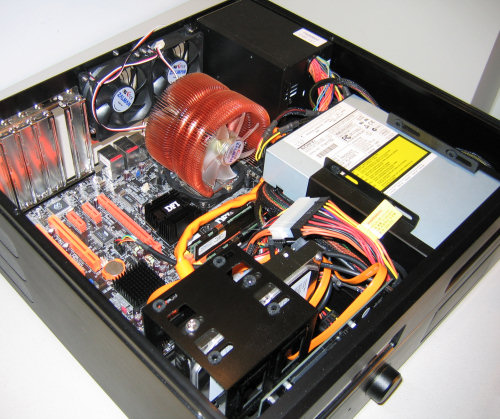
Click to enlarge.
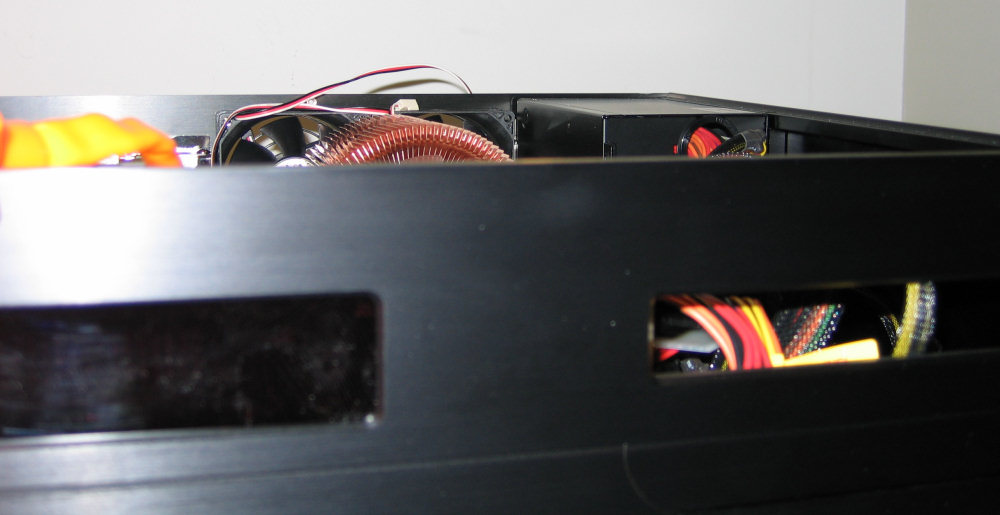
It's pretty apparent that Zalman had the CNPS-9500 in mind when sizing the HD-160 after looking at the next picture. The cooler just barely fits, maximizing the benefit of bringing heat from the CPU close to the already good heat dissipation of the aluminum case itself.

Click to enlarge.
The video card installed easily too, and with only a bit of bundling of cables left, the second install was pretty much complete.
Click to enlarge.
Both Zalman parts glow a pleasant blue color, which would normally only be visible with a window or with the top vent open quite a bit, but we wanted to include a shot of them in action as well, just to give them the spotlight that they deserve.
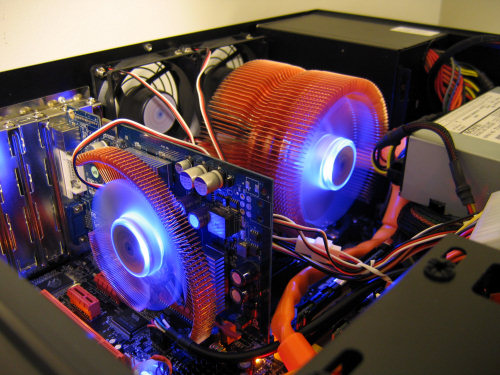
Click to enlarge.
Benchmark Comparisons
To test the new HTPC case and especially the performance change when switching to the Zalman CPU and GPU coolers, we installed our standard ATX test bed with the Zalman provided ZM460-APS power supply. Measurements were made at 22.5 degrees Celcius ambient, and averaged over the course of 5 minutes after running for over 30 in the respective mode. Two instances of Folding@Home , rthdribl, and a comprehensive hard-drive loader are run simultaneously for the "load" test.
| ATX Test Bed |
DFI LanParty UT 915P-T12
Pentium 4 530 Prescott 3.0ghz
OCZ 512MB DDR2 x 2
Thermaltake Golden Orb II
Seagate 120gb SATA Hard Drive
Chaintech GeForce 6600GT
MSI DVD-CD/R/RW Combo drive
Zalman ZM460-APS PSU |
 |
Our standard test bed has been a solid set of hardware for reviewing for several reviews now, but one of the first things that we noticed when using the ZM460-APS power supply was how much less heat it put out than the MadDog unit, which we had been using before. Before getting into detail about the other differences, here's a chart showing the performance of the case first with the Thermaltake Golden Orb and stock 6600GT cooler, then with Zalman equipment in its place. The 80mm case fans were both hooked up to 12v connections, the video card into a 5v line, the CPU fan for the Golden Orb II directly into the motherboard, and the CNPS-9500 into the included Zalman FanMate II
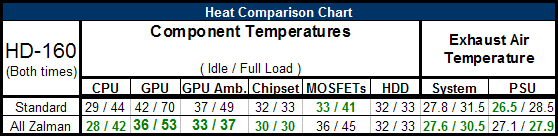
Without much of a surprise, the VF700-Cu comes out looking the most impressive here - we suspected the stock cooler wasn't the greatest and our guess couldn't have been any more accurate. The CNPS-9500 is a strong performer too, but only marginally better than our already stellar Golden Orb II. In its defense, the CNPS-9500 was also lighter, easier to install, and as we'll see shortly, even quieter too. Another conclusion to make about these results includes the fact that motherboard MOSFETs really do benefit the most from downward facing fans, even if cross-blowing fans like the one in the CNPS-9500 does a fantastic job of keeping the CPU cool. Also, probably because of an overall cooler internal temperature, the passively cooled chipset also sees a rather decent benefit from the Zalman products.
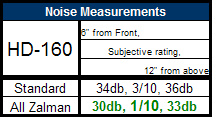
Even more impressive is the noise change It should be noted that our new sound meter doesn't even register below 28dBa, and the ambient noise floor of the lab is pretty much a steady 29 dBa on the money. Seeing 30 on the meter from 6" in front was pretty hard to believe, but subjectively, it was completely understandable. With the lid closed, turning on the system was barely perceivable from a normal distance (3-6ft) away. With noise being such a concern in an HTPC environment, it's hard not to love this case; even with the standard ATX test equipment, these are some record low scores. Only the video card fan was really keeping it from being even subjectively lower.
Final Words
Zalman's display of their quality of engineering, design, and manufacturing have all been top-notch for each and every product that we've looked at here. With a closer look at the ZM460-APS in the near future, we will surely only add to this concensus, as even with our short amount of work with the unit here, we've grown very fond of the product.
Without a doubt though, the HD-160 is a fine HTPC case. The layout is smart, simple, and elegant. The construction leaves nothing to be desired and should stand up to many years of home entertainment. Its thermal and noise performance were record-breaking, and they only became better when we used the CNPS-9500 and VF700-Cu. If only a perfect, stealthy optical drive system could've been implemented, and a VFD where the digits were more visible from actual living room distances, this could've been the perfect HTPC case that we were looking for when we started. However, the new Zalman case is closer than many by a long shot, and for one who doesn't want to settle for something that "just works", the HD-160 is a great choice, even for the relatively high
asking price of around $250. For those who really want to go all out, we'd readily recommend all three products that we looked at in detail; each stands out in its own right.